Users Management Guide
This document introduces how to add more users to your account and manage these users.
Users with the account administrator role can manage users under the account through the "User Management" feature in the management center, which you can navigate to from the page navigation.
Configure Account Administrator
Only users with the account administrator (Account_admin) role can create and maintain global users. The first user who creates a Singdata account is granted the account administrator role by default.
Users with the account administrator (Account_admin) role can configure other users to become account administrators. The account administrator role can be granted to one or more users, but at least one user must be granted this role. To avoid business operation disruptions due to login issues of account administrator users, it is recommended to configure at least two users as account administrators.
The steps to manage the account administrator role are:
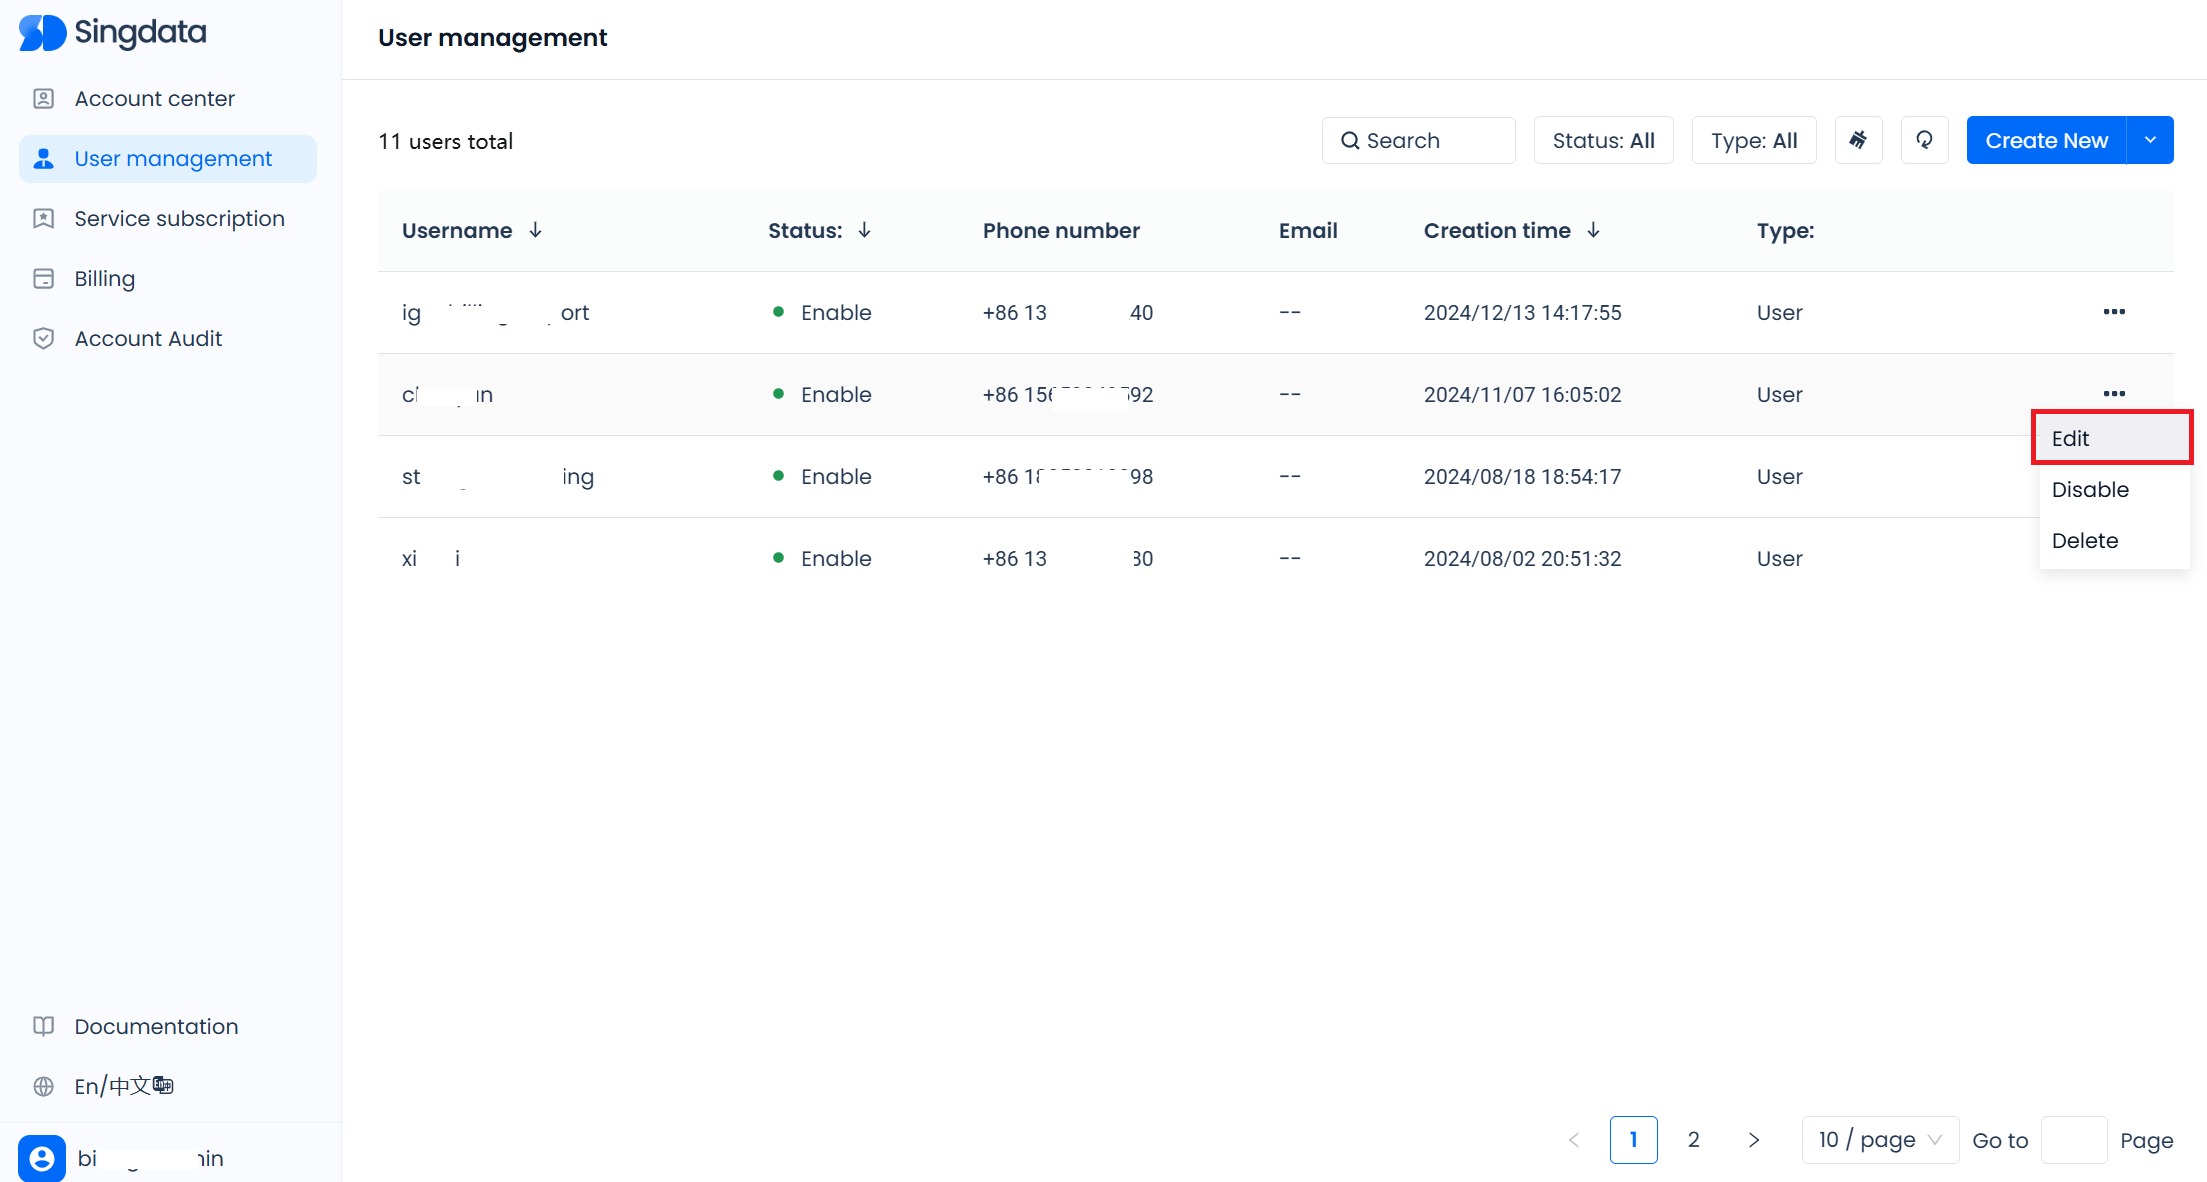
1. After logging in, go to .accounts.singdata.com/workbench, click "User Management", click the "..." button on the right side of the user you want to set as an account administrator to expand the operation buttons, and click "Edit";
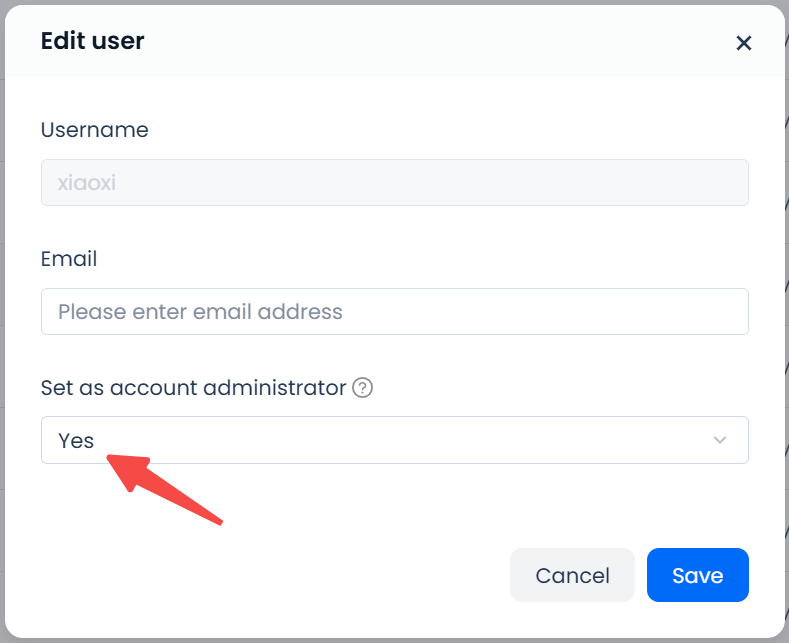
2. In the pop-up window, select "Yes" in the "Set as Account Administrator" section. Then click "Save".
3. Account administrators can remove the "Account Administrator" role from other users. Similar to granting the account administrator role, in the user's "Edit" pop-up window, select "No" in the "Set as Account Administrator" section to remove the role.
User Management
Create Global Users
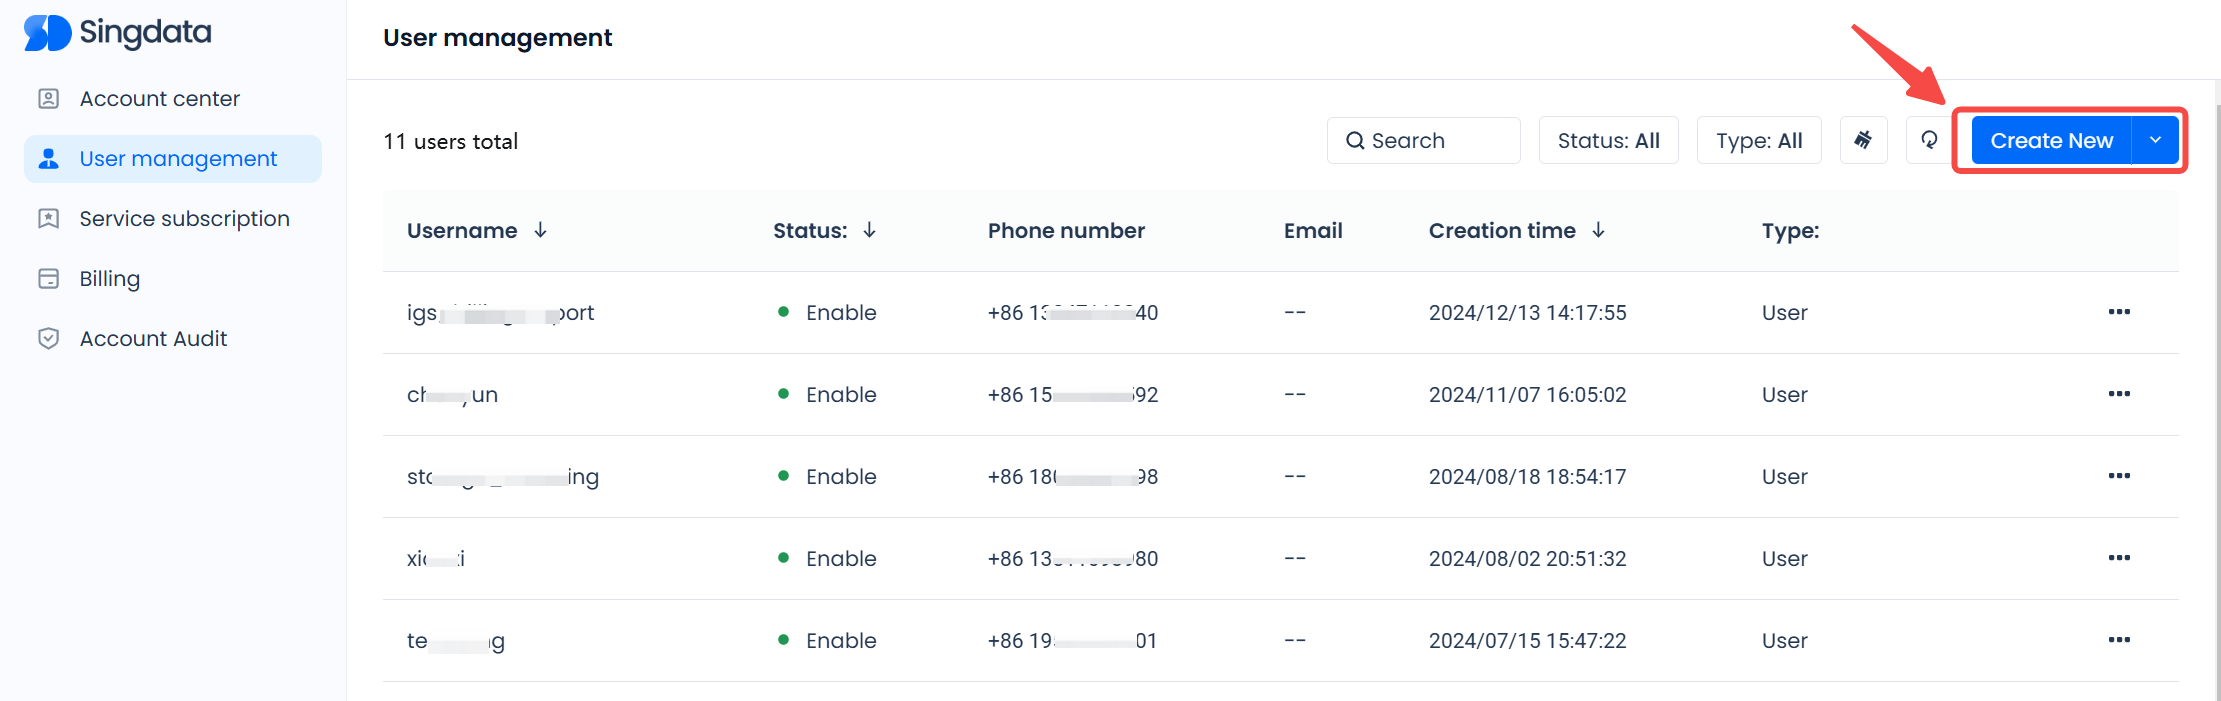
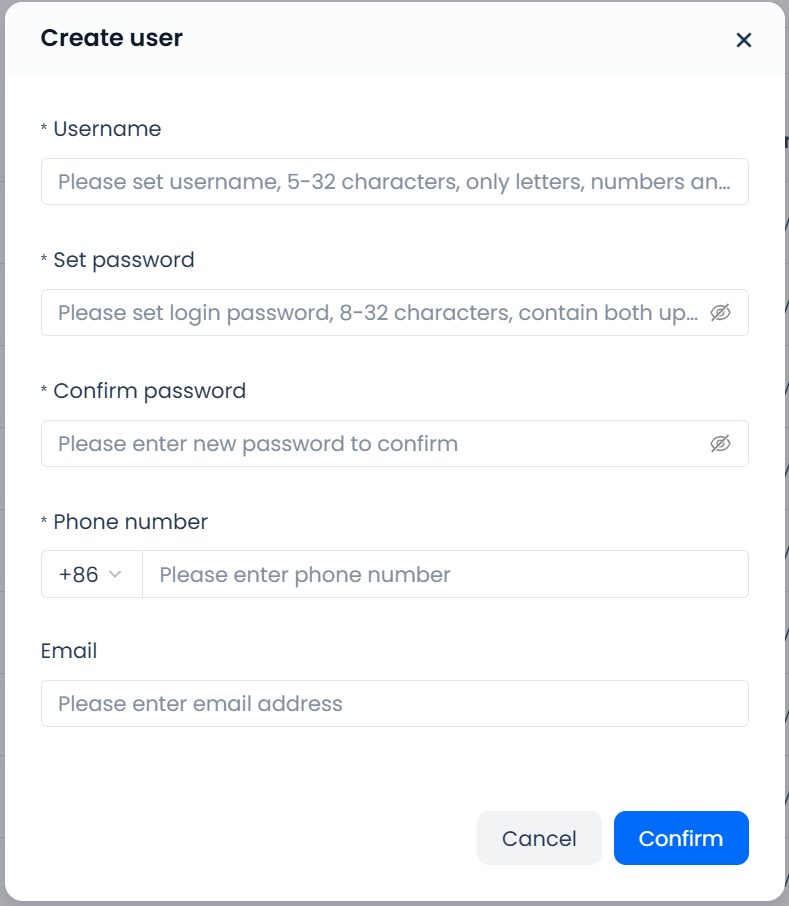
Users with the account administrator role can click the "Create New" button on the "User Management" page, fill in the username, password, and phone number of the new user to create a global user.
Edit Global User Information
On the "User Management" page, click the "..." on the right side of the user you want to edit, expand the operation bar, and click the "Edit" button to edit the user information. Only the user's email information and their designation as an "Account Administrator" can be modified. To ensure system security, even account administrators cannot modify other users' passwords and phone number information.
Disable Global Users
Disabling a global user will immediately change the current user's status and immediately prohibit all operations performed using that user identity. Disabling a global user is typically used to identify security risks and immediately halt all activities associated with the user identity to prevent further damage.
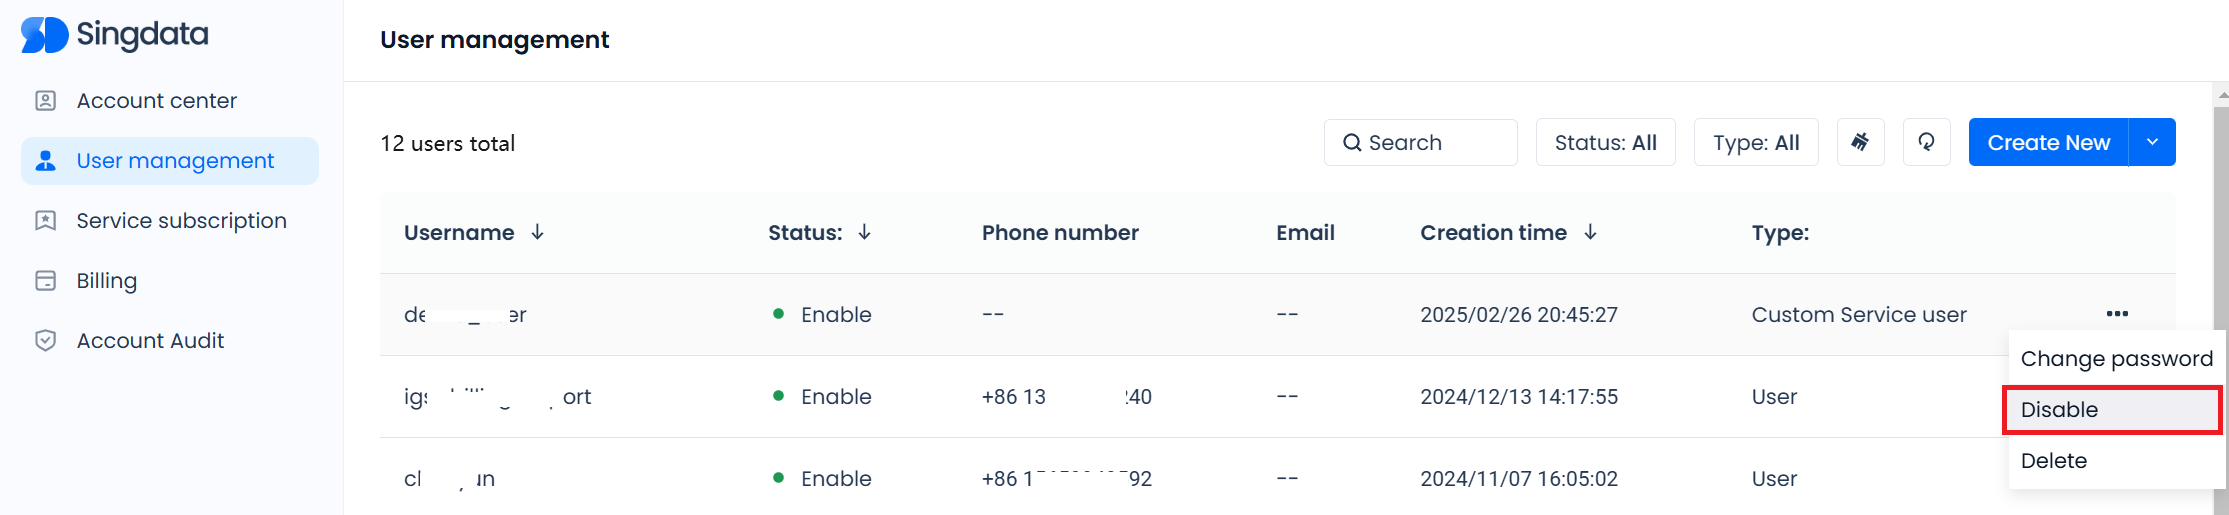
Only users with the account administrator role can disable global users. On the "User Management" page, click the "..." on the right side of the user you want to disable, expand the operation bar, and click the "Disable" button. After a second confirmation, the user can be disabled.
Enable Global Users
Only users in the "Disabled" status can be enabled. On the "User Management" page, click the "..." on the right side of the user you want to enable, expand the operation bar, and click the "Enable" button to enable the user.
Delete Global Users
On the "User Management" page, click the "..." on the right side of the user you want to delete, expand the operation bar, and click the "Delete" button. In the pop-up window, enter the username of the user to confirm the deletion. Deleting a user identity will not automatically invalidate the user's login or disconnect the JDBC connection established with this user identity. However, any operation performed by this user on the web or any request executed using the JDBC connection will return an invalid identity.
Change User Password
Account administrators cannot change other users' passwords; only the currently logged-in user can change their own password. While logged in, click the username in the lower left corner and click "Change Password". Complete the verification code verification in the pop-up window and enter the new password to complete the password change. The new password will take effect at the next login and will not affect the current login status.
Change User's Phone Number
Account administrators cannot change other users' phone numbers; only the currently logged-in user can change their own phone number. While logged in, click the username in the lower left corner and click the "User Information" button to open the user information pop-up window. Click the "edit" button on the right side of the phone number, verify the current phone number in the pop-up window, and enter the new phone number to complete the phone number change.
Service User Management
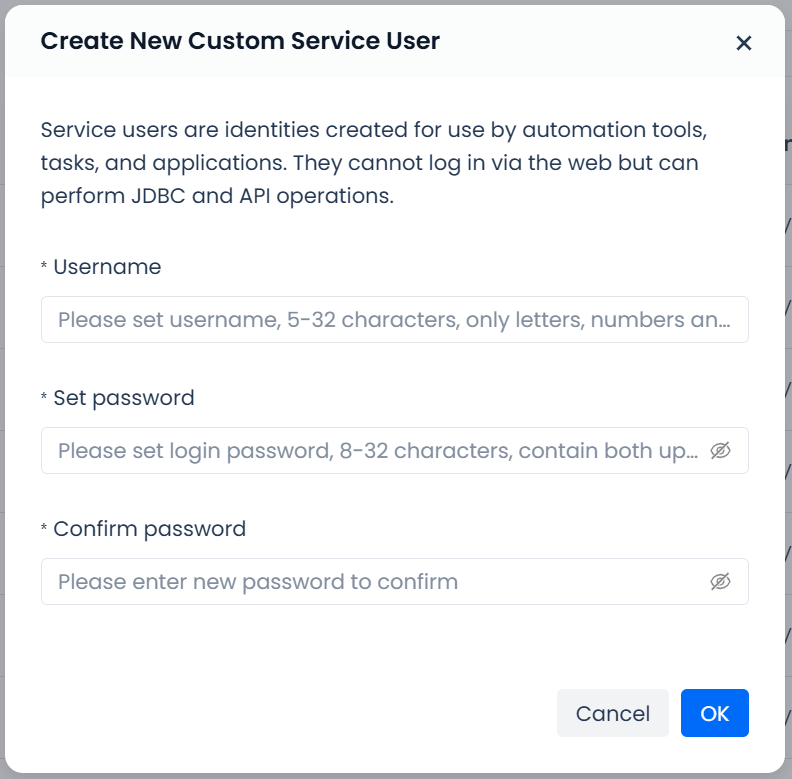
Create Custom Service Users
Users with the account administrator role can click the "New Custom Service User" button on the "User Management" page, fill in the service user's username and password to create a custom service user.
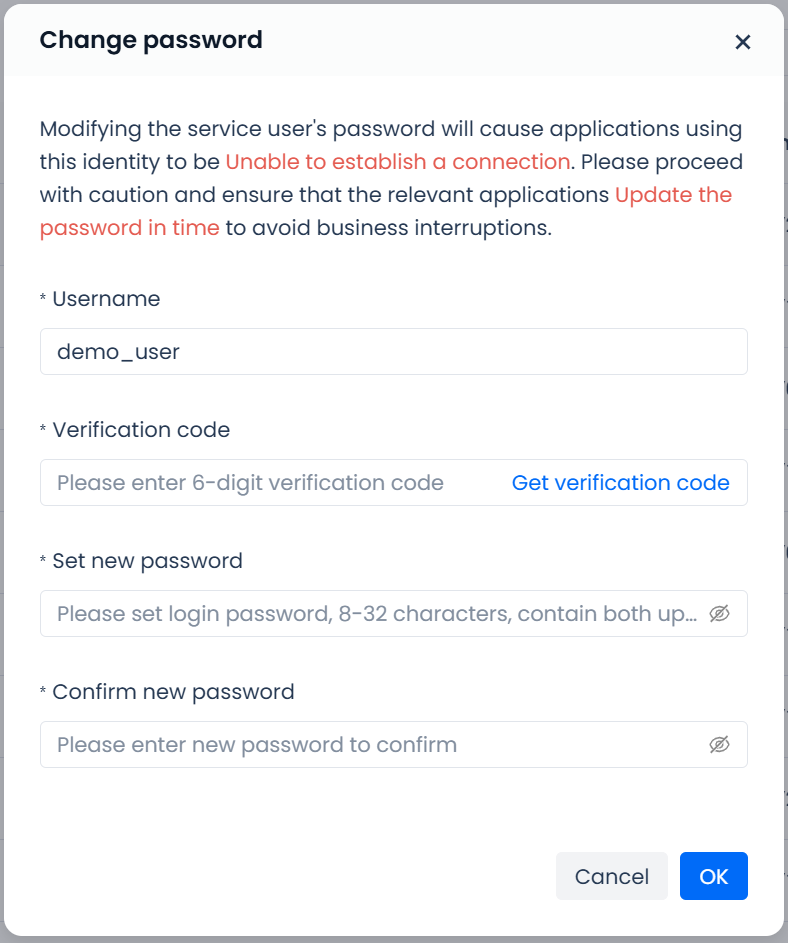
Change Service User Password
Users with the "Account Administrator" role can change the service user's password. Since changing the custom service user's password is a sensitive operation, it requires verification of the currently logged-in user's phone number. The password can only be changed after correctly entering the phone number verification code.
Disable Service Users
Disabling a service user will immediately change the current service user's status and immediately prohibit all operations performed using that service user identity. Only users with the Account Administrator role can disable service users.
On the User Management page, click the “...” button on the right side of the service user you want to disable to expand the action menu. Then, click the Disable button and confirm the action to complete the process.
Delete Service User
On the User Management page, click the “...” button on the right side of the service user you want to delete to expand the action menu, then click the Delete button. In the pop-up window, enter the service user's name to confirm the deletion.
Since service user identities are often associated with system scheduling tasks or other application tasks, deleting an active service user may disrupt production tasks and cause failures. Therefore, the deletion confirmation window includes a “Force Delete” checkbox for users to decide whether to proceed with a forced deletion.

If "Force Delete" is not selected, the service user identity will undergo soft deletion. This means all tasks utilizing this service identity will be interrupted. However, the service user will be retained for 24 hours, during which it can be restored by clicking the "Restore" button, reverting the service user status to "Enable". Once restored, tasks using this service identity can resume normal execution (unless they require manual restart due to no retries or exceeding retry limits). After 24 hours, the service user identity will be permanently deleted and cannot be recovered.
If "Force Delete" is selected, the service user identity will be deleted immediately without a retention period.