Lakehouse Service Instances Management Guide
What is a Lakehouse Service Instance?
A Lakehouse service instance is the core carrier of the Singdata Lakehouse product service. When activating the Lakehouse service, users need to specify the cloud service provider and region information. The system will create a service instance based on this information. Each user account can create one or more service instances (currently, only one service instance is allowed by default).
Within the service instance, unified metadata is used to manage data objects, computing resources, and job tasks. Under a unified permission system, tools such as data integration, development scheduling, operation and maintenance monitoring, and data catalog are used for application building and data management. Service instances have regional attributes, and their computing, data, and other service resources are all within the region of the cloud service provider. Different service instances are isolated from each other by default.
Create and Access Service Instances
Create a Service Instance
After completing account registration and logging in, you can create a Lakehouse service instance by following these steps:
- In the management center "Account center", click the "Activate" button on the Lakehouse product card.
- In the pop-up window, select the cloud service provider and region you need to activate.
- Click "Confirm Activation", and the system will create a Lakehouse service instance for you.
Please note that currently, Singdata Lakehouse only supports one account creating one Lakehouse service instance.
Default Roles and Permissions
The user who creates the service instance will be granted the instance administrator role by default. The instance administrator has the permission to create workspaces within the service instance and to grant or revoke other instance-level roles.
Access the Service Instance Homepage
The service instance homepage is your entry point to understand the core product capabilities of Singdata Lakehouse and quickly access workspaces. The steps are as follows:
1. Log in to the Singdata Lakehouse interface and directly enter the product homepage.
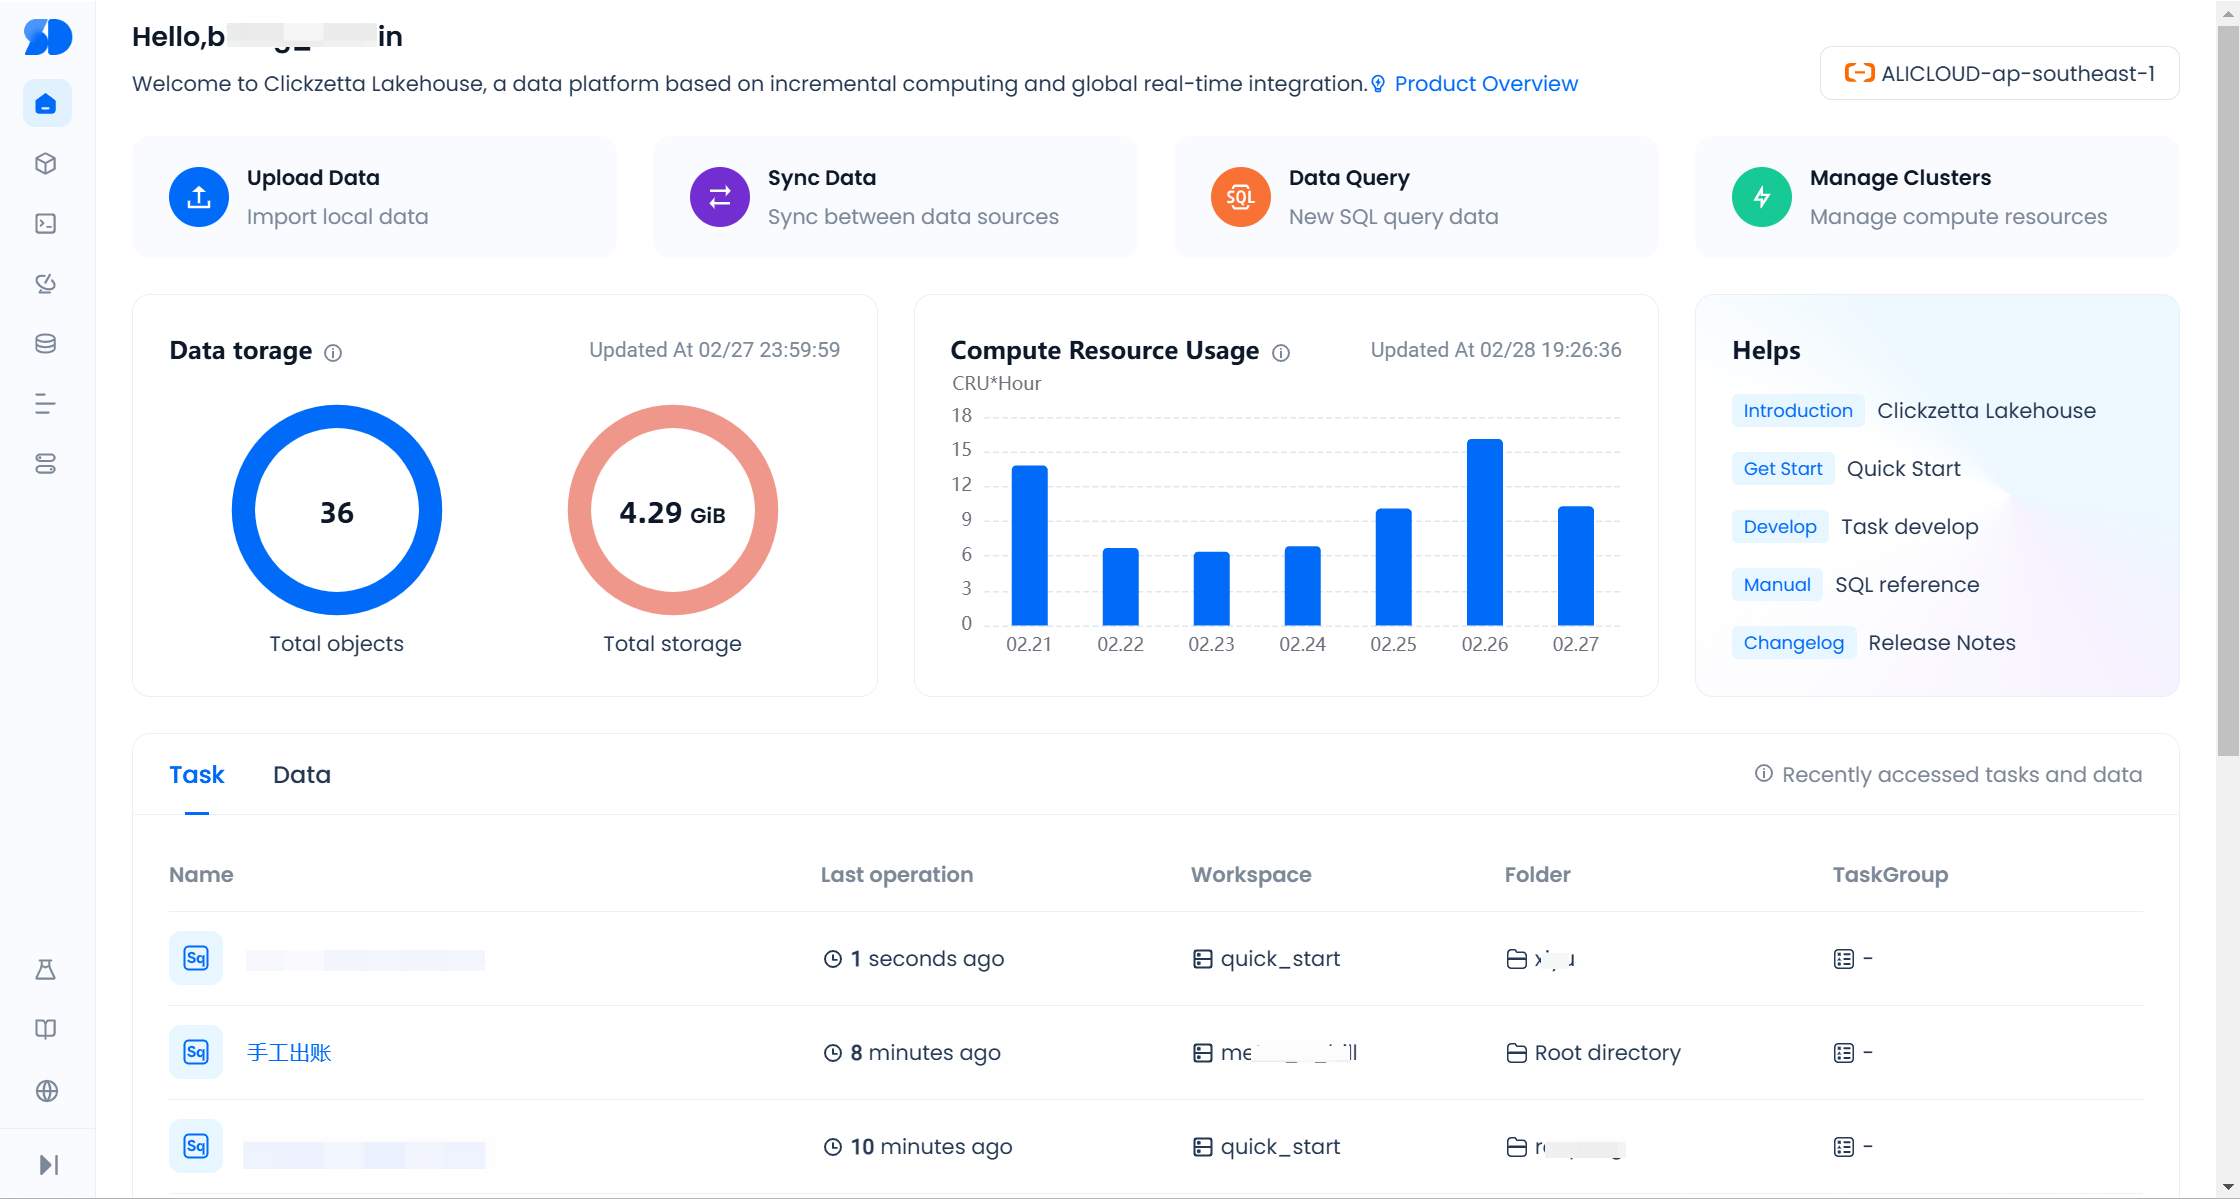
2. On the homepage, you can quickly understand the following information and functions:
- User Instance Information: Displays the user login name, instance name, cloud service provider, and region information.
- Help Documentation: Click to enter the product help documentation platform.
- Core Function Area: Provides quick access to functions such as data source management, development, workspace, task operation and maintenance, and monitoring and alerts.
- Data Asset Information: Displays the total number of objects stored and the total storage amount under the current instance.
- Computing Usage: View daily computing usage over the past 7 days.
- Workspace: Displays the most recently accessed tasks, as well as tables or views.
Usage Examples
Example 1: Create a Workspace
- Log in to the Lakehouse service instance.
- On the homepage, click the "View More" button in the "Workspace" area.
- Select "Create Workspace" and enter the workspace name and description.
- Click "Confirm" to complete the workspace creation.
Example 2: View Data Assets
- Log in to the Lakehouse service instance and enter the homepage.
- In the "Data Asset Information" area, view the total number of objects stored and the total storage amount under the current instance.
Example 3: Monitor Computing Usage
- Log in to the Lakehouse service instance and enter the homepage.
- In the "Computing Usage" area, view the daily computing usage over the past 7 days.
Example 4: Access a Workspace
- Log in to the Lakehouse service instance and enter the homepage.
- In the "Workspace" area, find the workspace you need to access.
- Click the workspace name to enter the development area or operation and maintenance center of the workspace.
Through the above examples, you can quickly get started and begin using the Singdata Lakehouse service. If you have any questions, please refer to the help documentation or contact our technical support team.