Creating an AWS VPC Endpoint Service
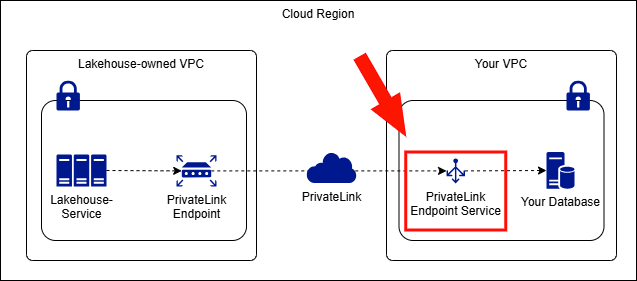
When Lakehouse needs to access services hosted inside your AWS VPC (such as a self-managed MySQL database or Hive Metastore), you must first create an AWS VPC Endpoint Service and configure the target service as a backend resource of that endpoint service.
Prerequisites
Before creating an endpoint service, ensure the following resources are ready:
- Create a Target Group
- Create a Network Load Balancer (NLB)
For more details on creating an endpoint service in AWS, refer to the AWS documentation: https://docs.aws.amazon.com/vpc/latest/privatelink/create-endpoint-service.html
1. Create an Endpoint Service in AWS
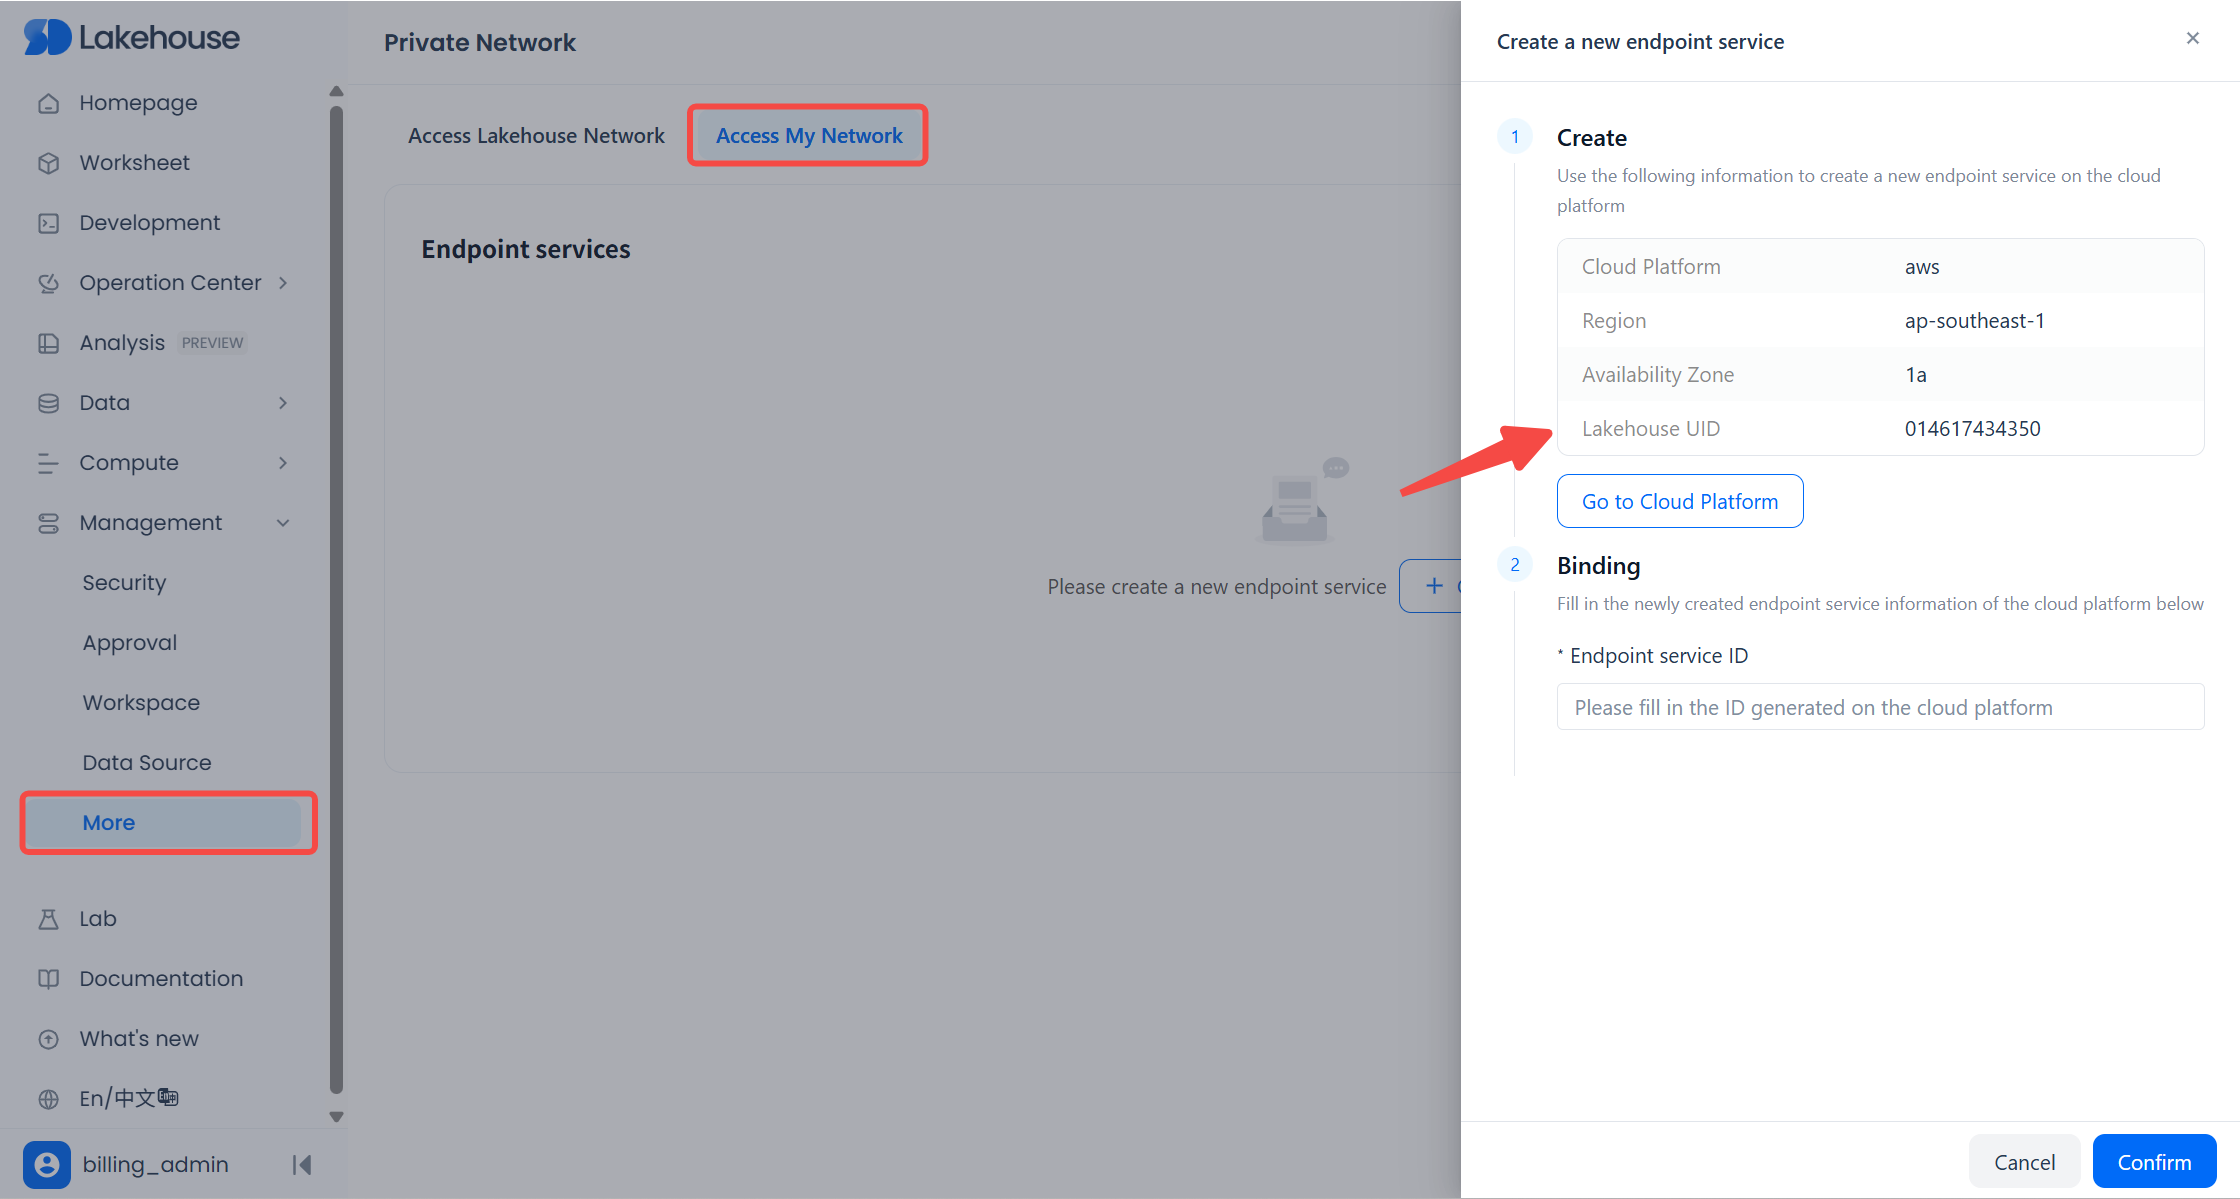
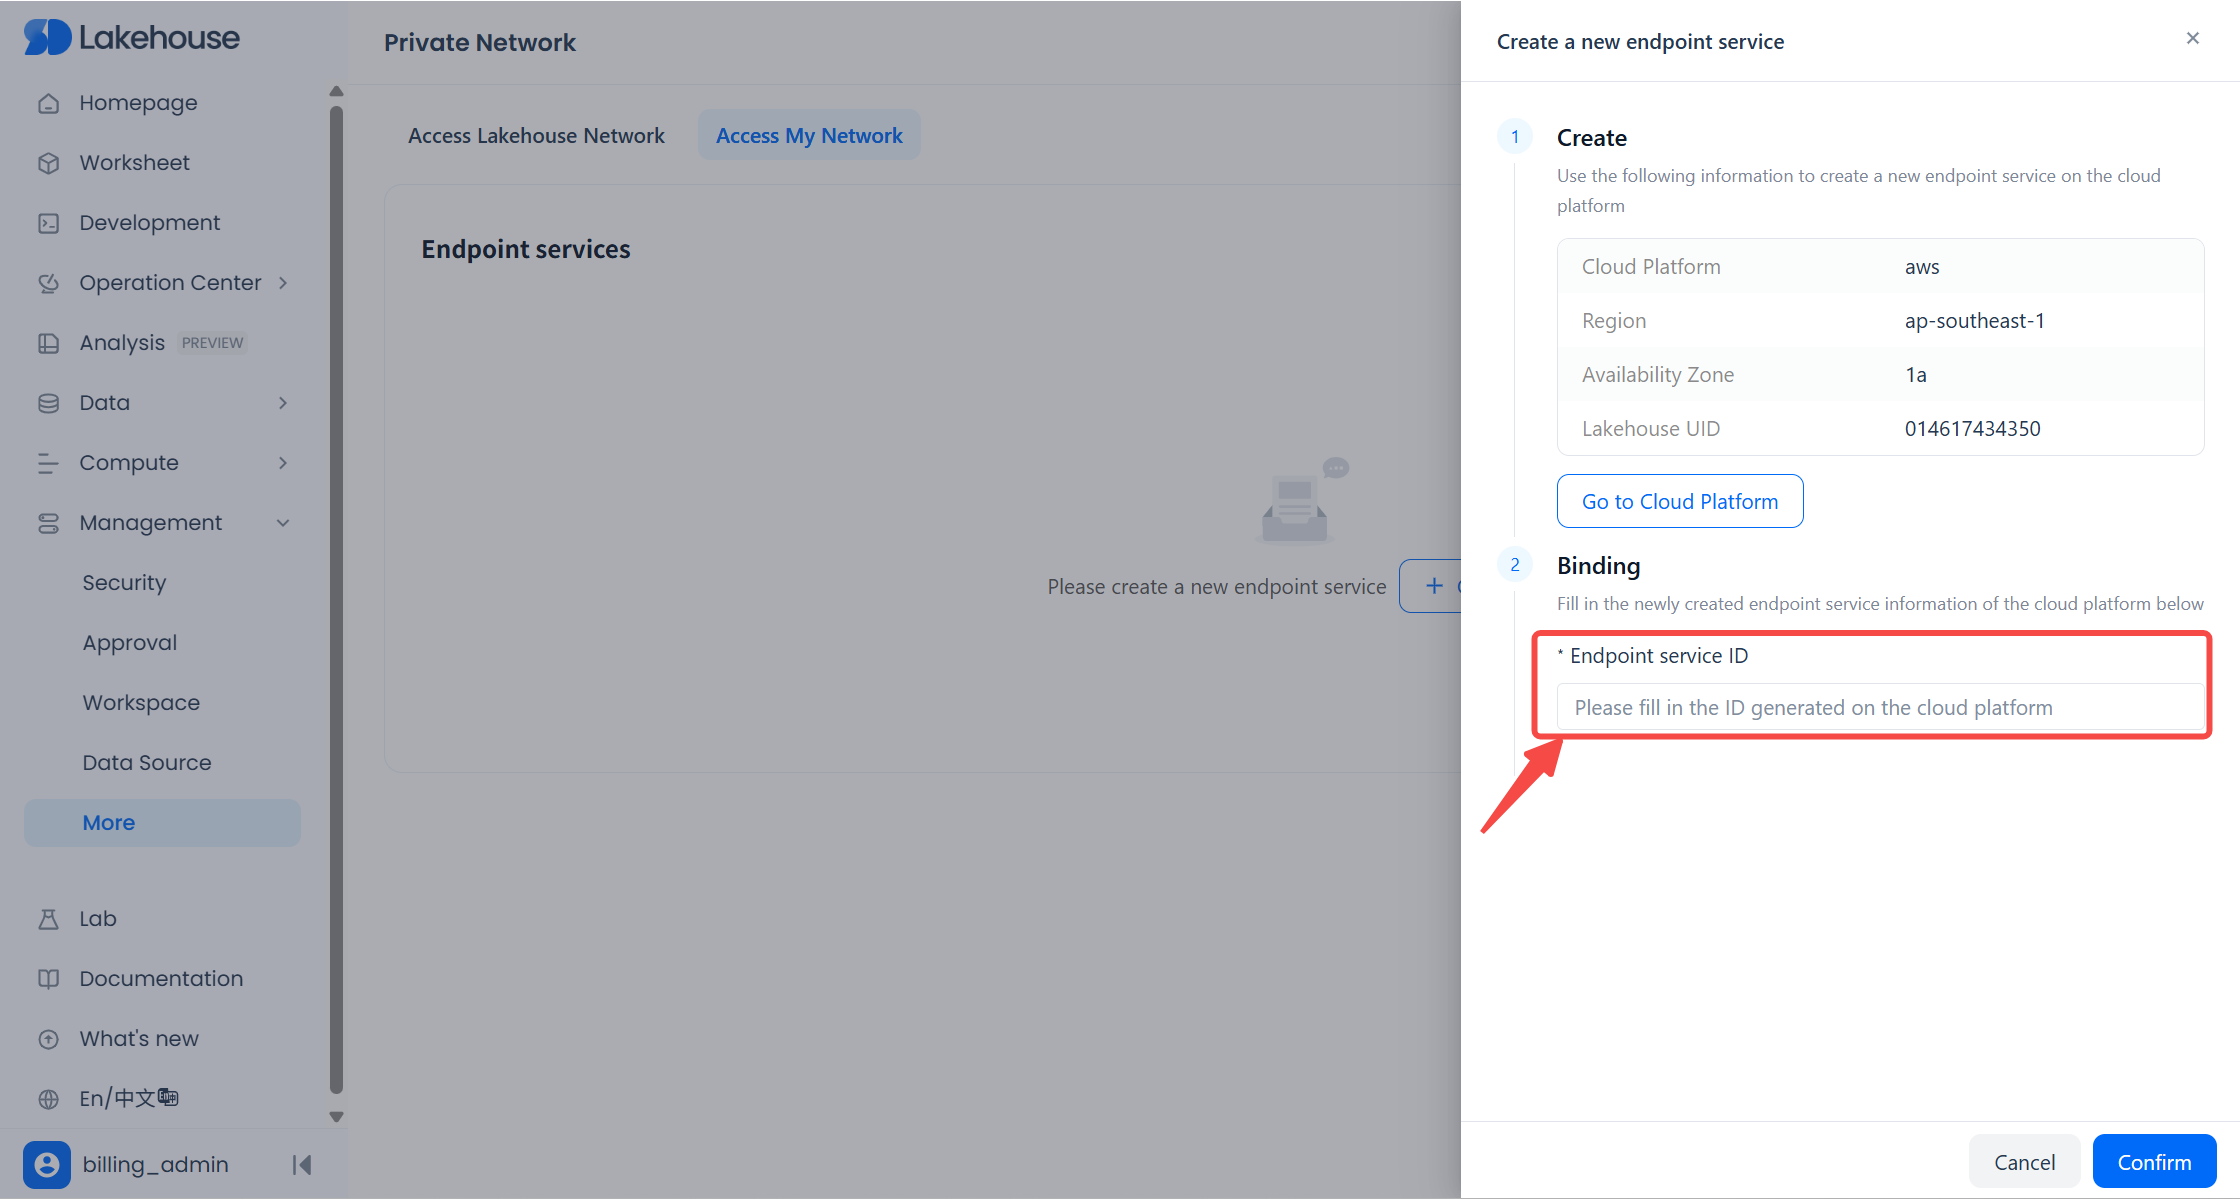
In Lakehouse, navigate to Management → More → Private Network → Access My Network, and click Create. At the top of the Lakehouse “Create Endpoint Service” dialog, locate the region and availability zone (AZ) of your current Lakehouse service instance.
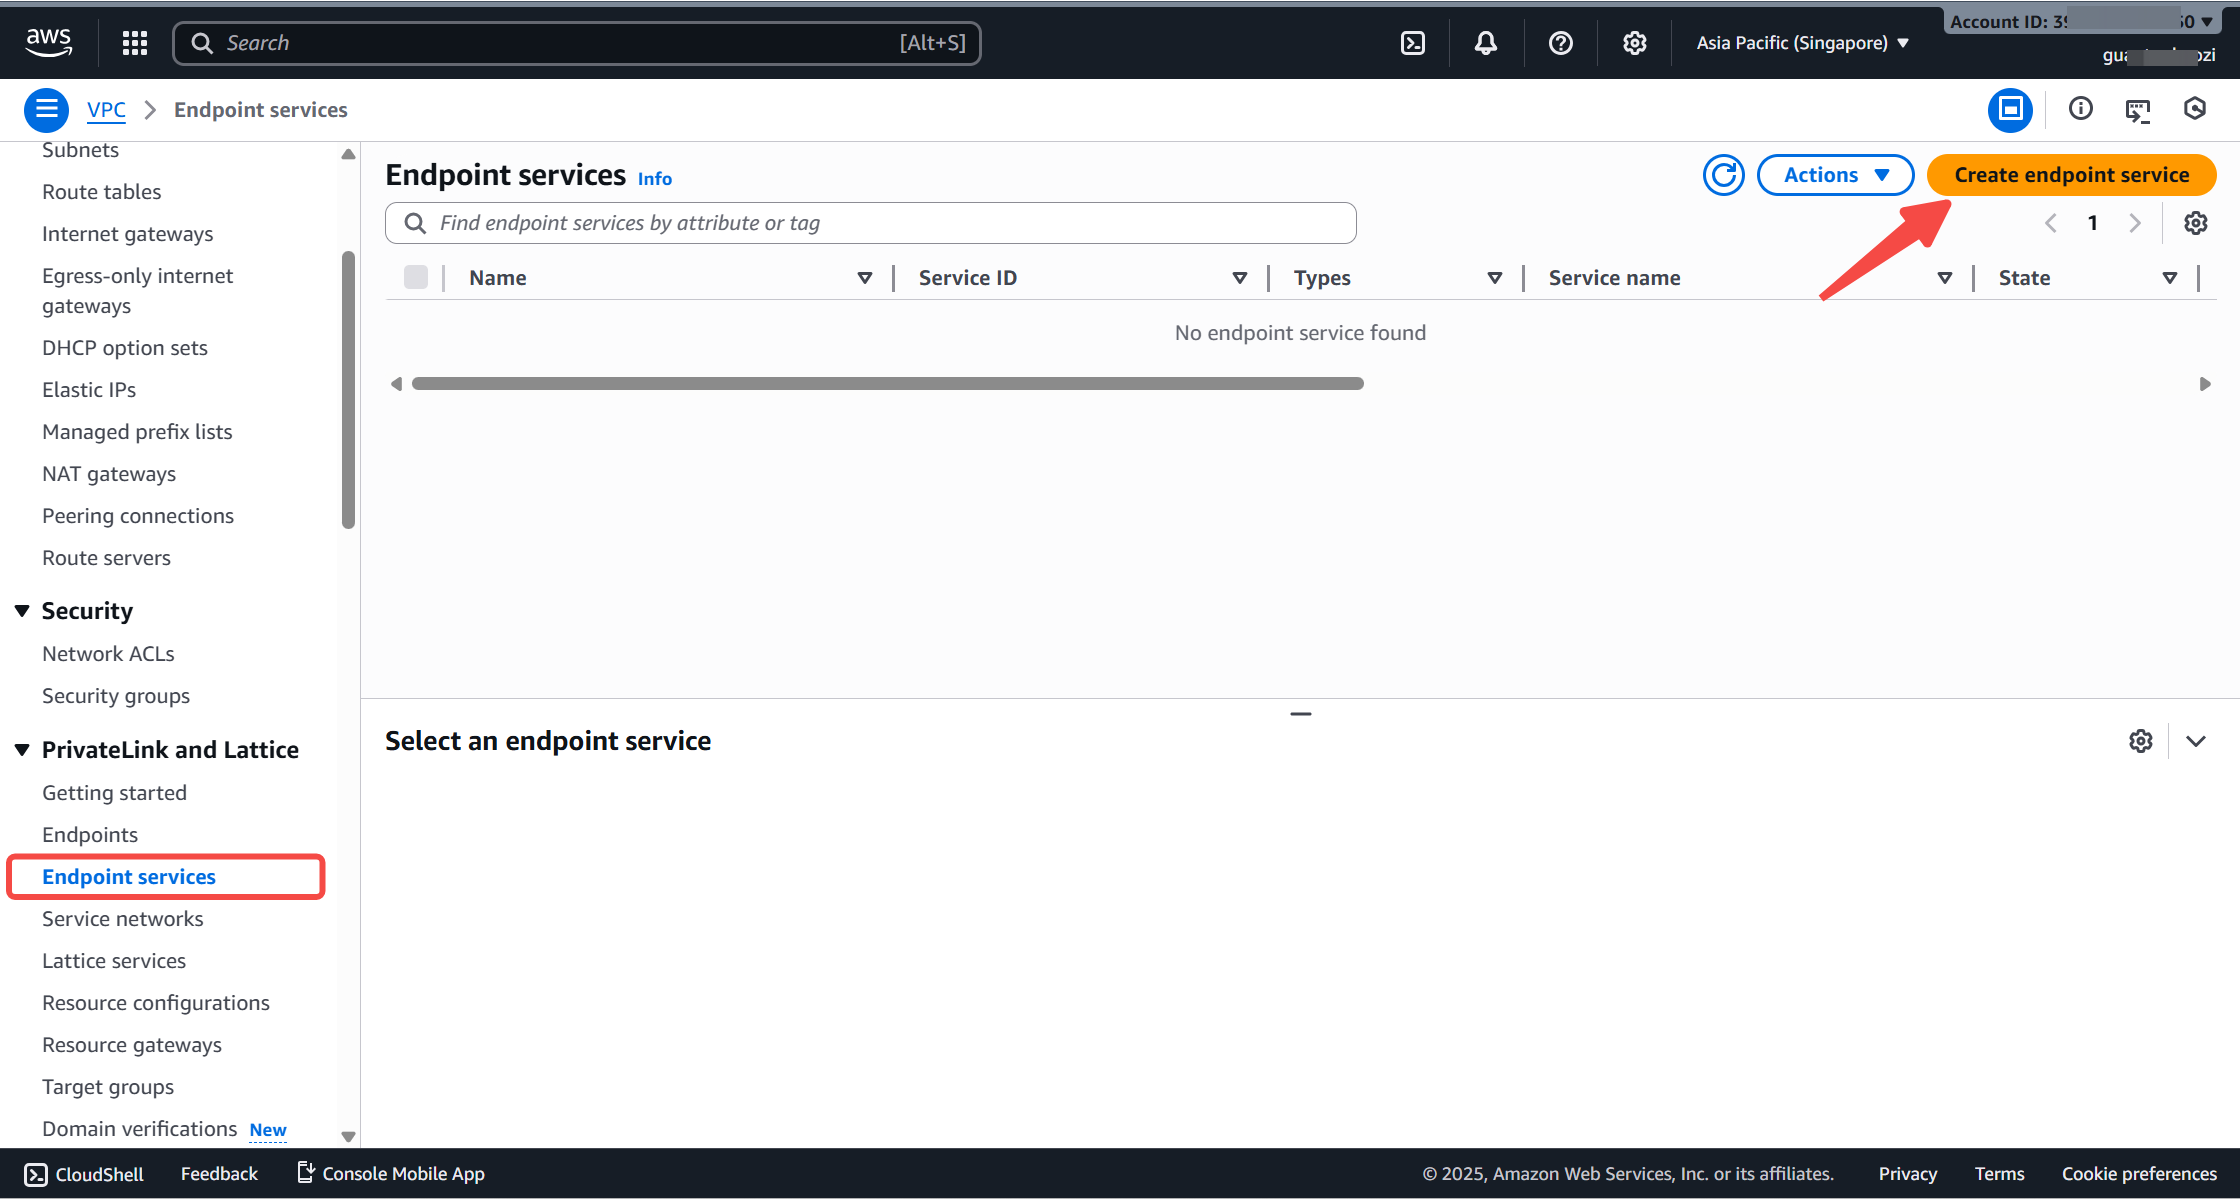
Then, log in to the AWS Console. Go to VPC → Endpoint services, and switch to the same region as the Lakehouse instance.
Click Create endpoint service.
2. Configure the Endpoint Service
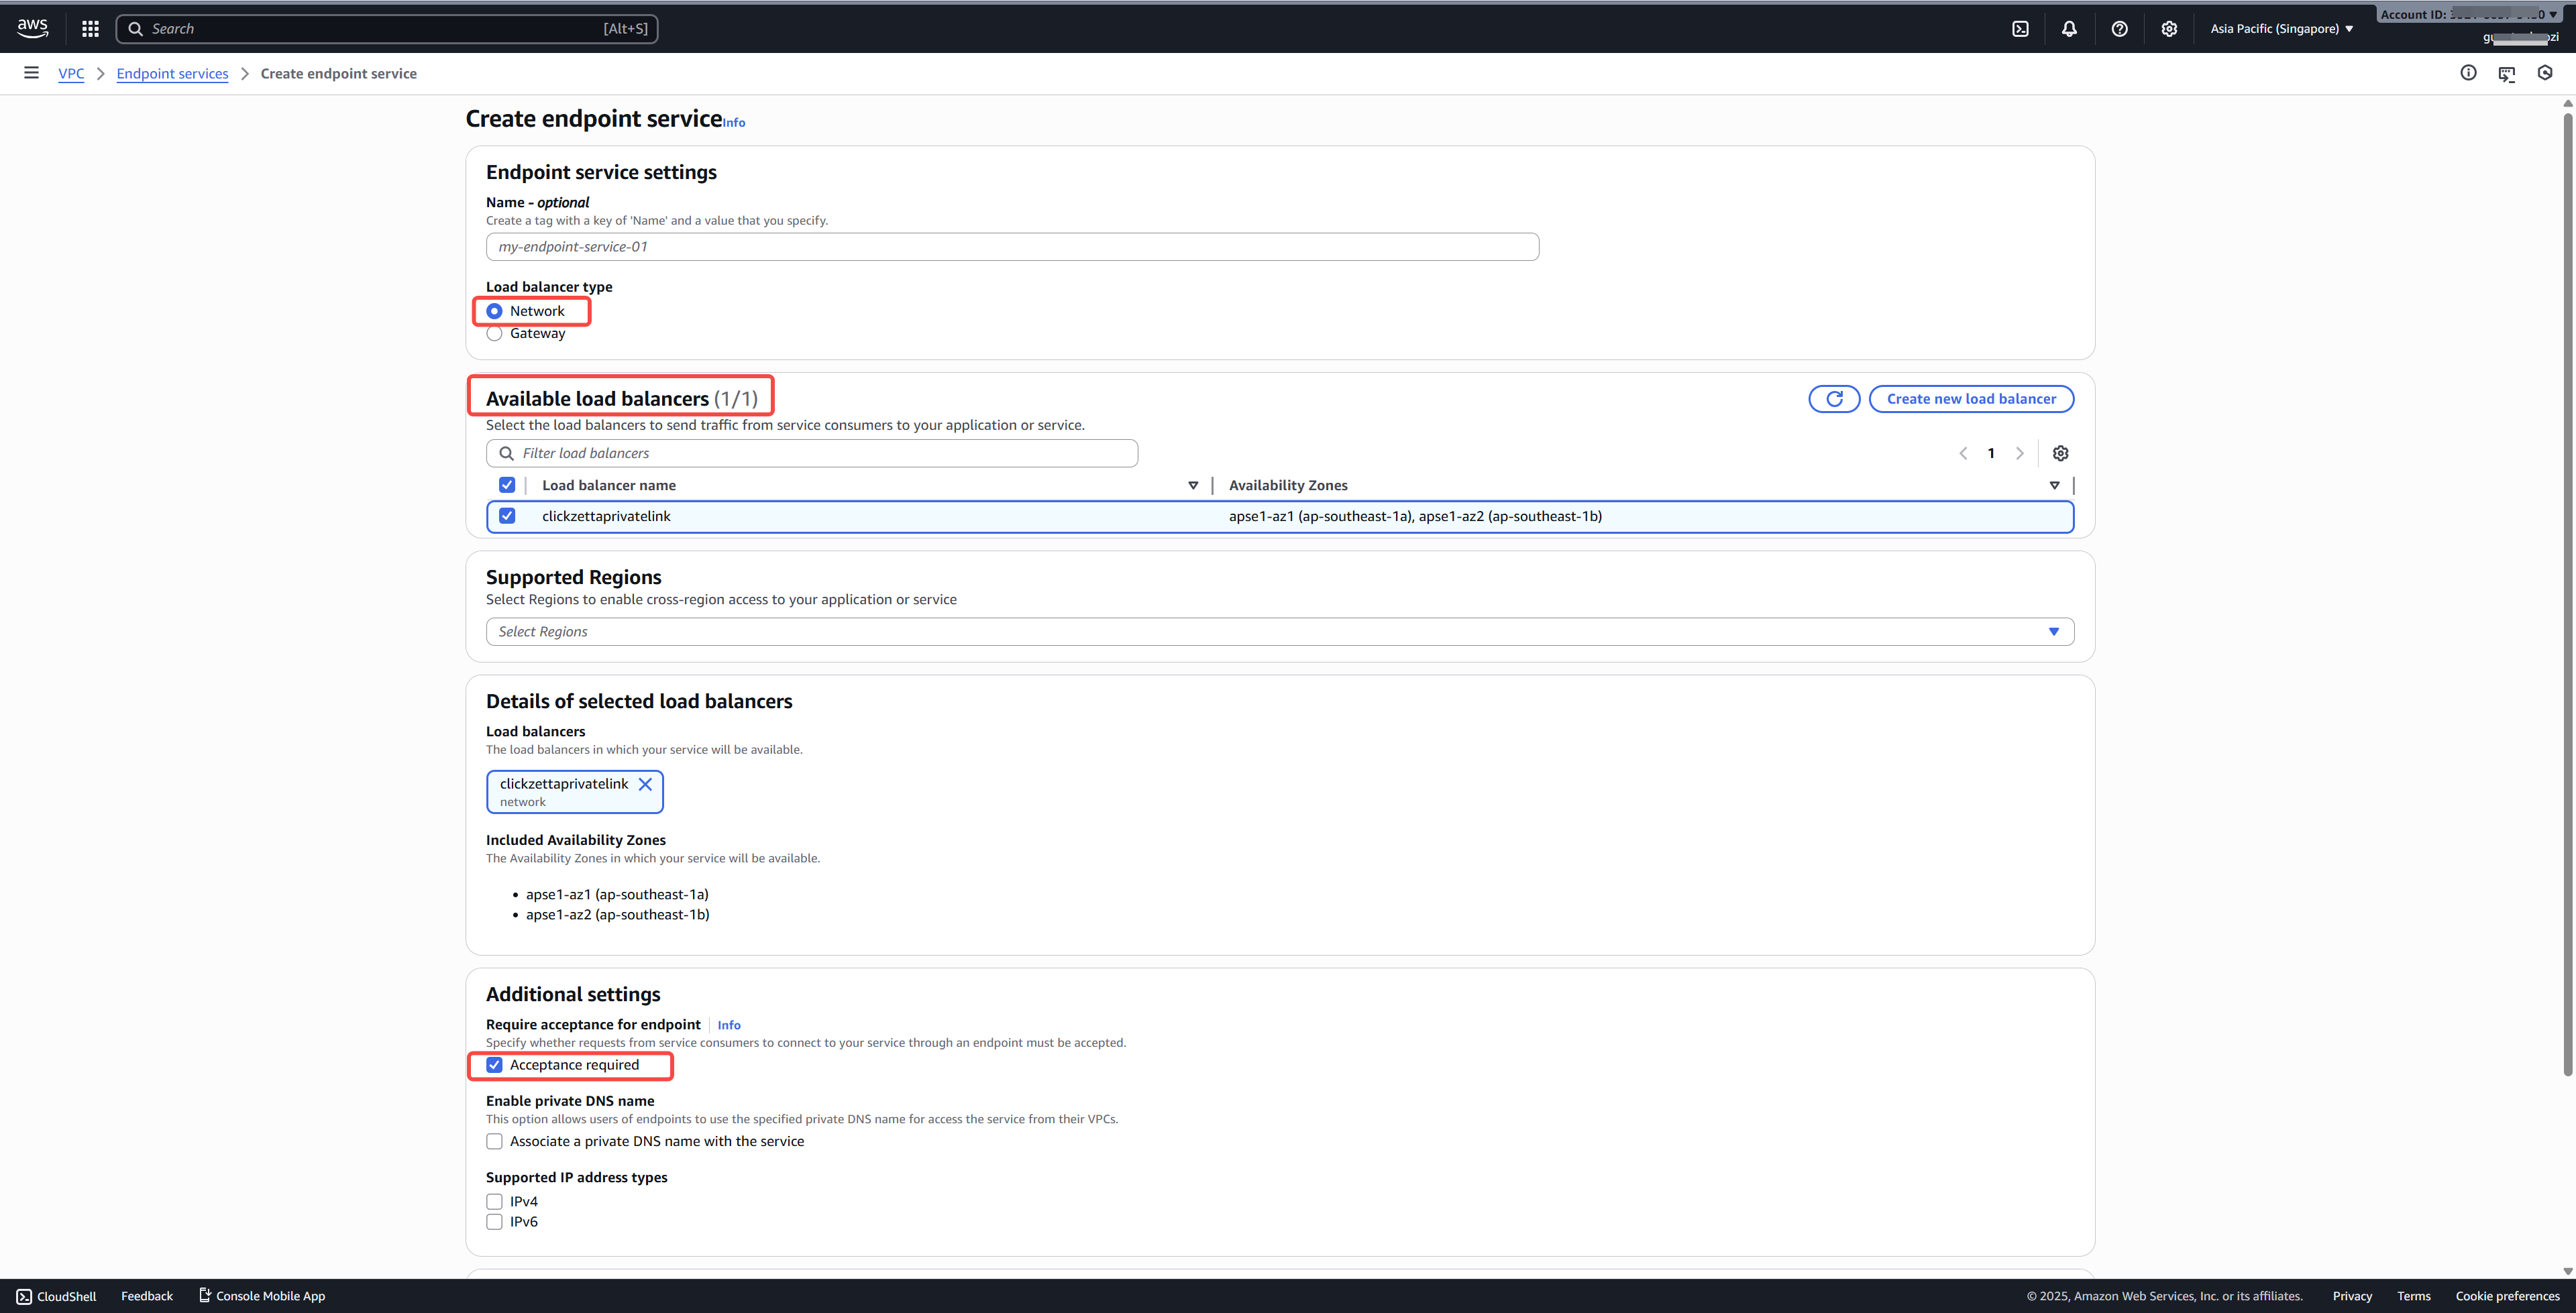
On the configuration page, provide the following parameters:
| Parameter | Description |
|---|---|
| Name | Optional. Use a descriptive name for easier management. |
| Load balancer type | Required. Select Network. |
| Available load balancer | Required. Select the NLB created in the prerequisite step. If none is available, create an NLB first. |
| Acceptance required | Recommended. When enabled, endpoint connection requests must be manually accepted, providing better security control. |
| Enable private DNS name for the endpoint | Optional. Enable according to your usage requirements. |
Click Create to complete the endpoint service creation.
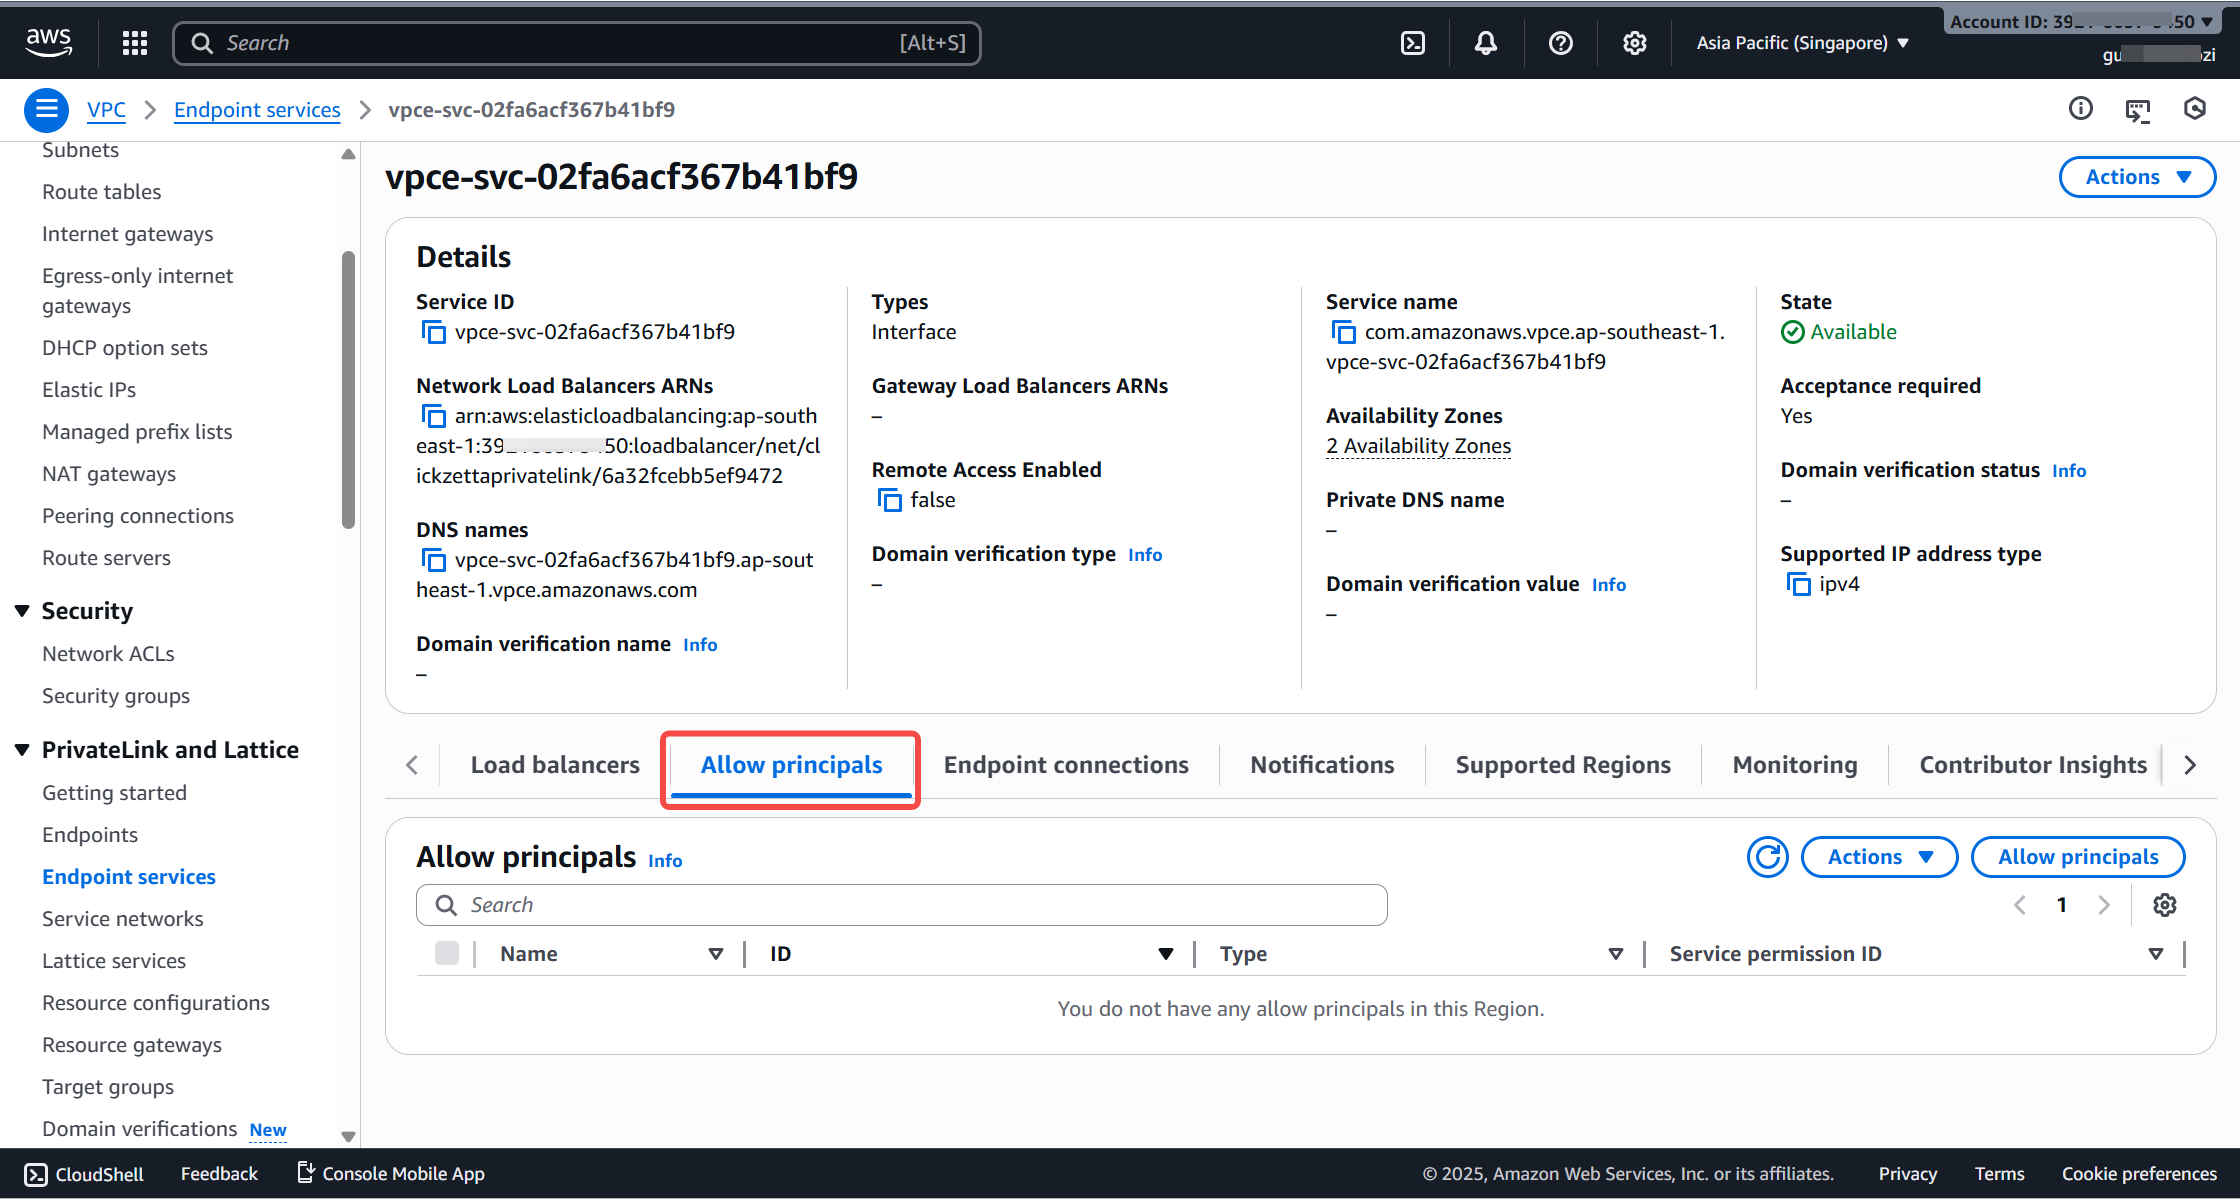
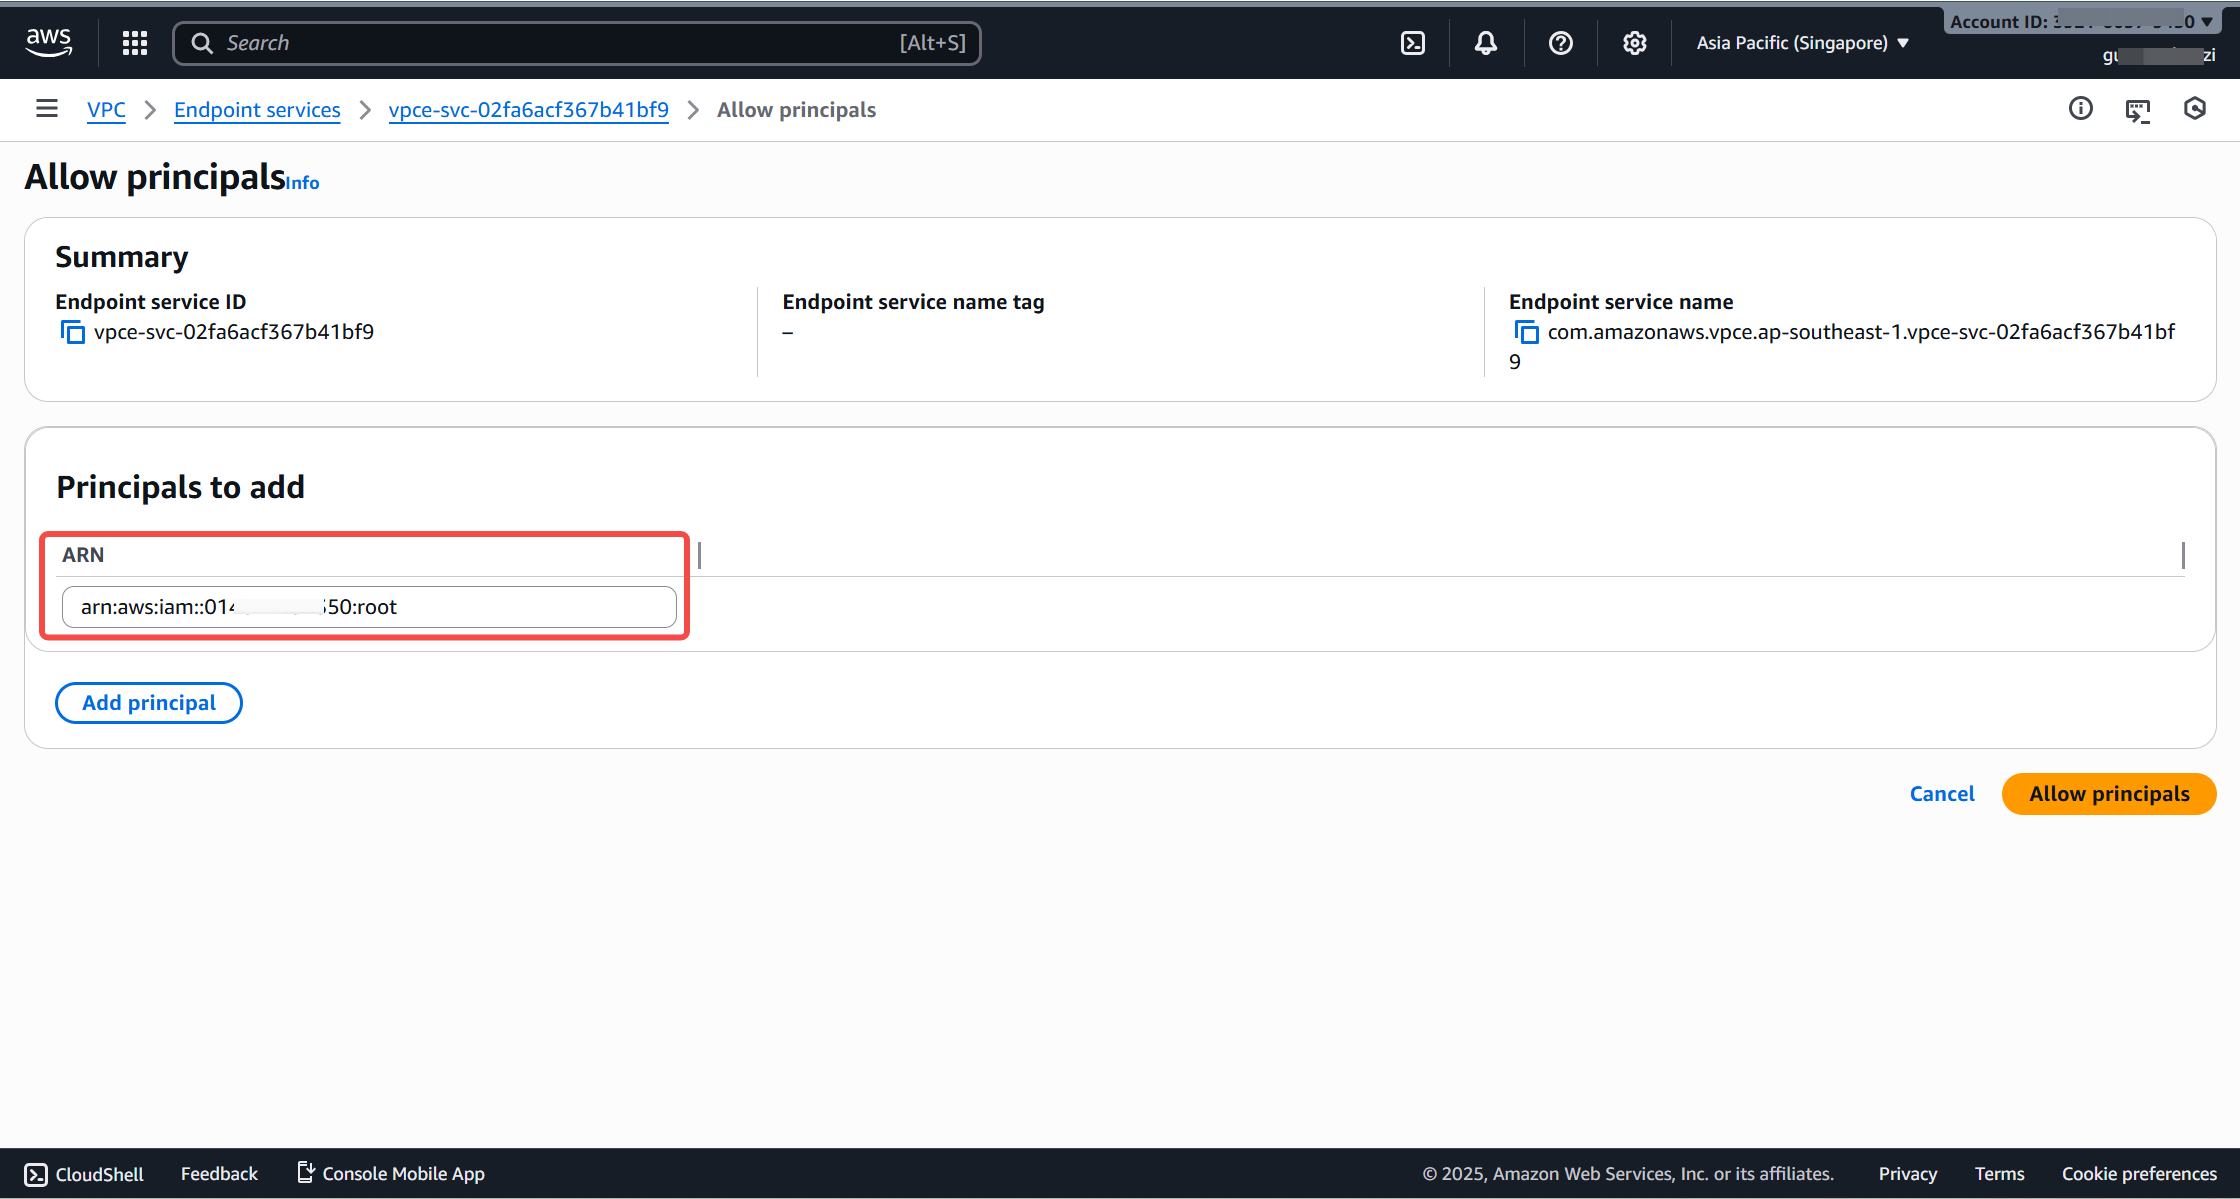
3. Add Allowed Principals
After the endpoint service is created, go to the Allowed principals tab and add the Lakehouse ARN.
Enter the ARN provided by Lakehouse in the ARN field, then click Allow principal.
The ARN is formatted as: ``
4. Register the Endpoint Service in Lakehouse
Return to the Lakehouse interface.
From the AWS endpoint service details page, copy the Service ID.
Paste the values into the corresponding fields in the Lakehouse “Create Endpoint Service” dialog, and click Confirm.
5. Accept Endpoint Connection Requests
Lakehouse will automatically initiate an endpoint connection request to your endpoint service.
In the AWS Console, open the endpoint service details page and switch to the Endpoint connections tab.
Select the pending connection request, then click Actions → Accept endpoint connection request.
In the confirmation dialog, type accept, and click Accept.
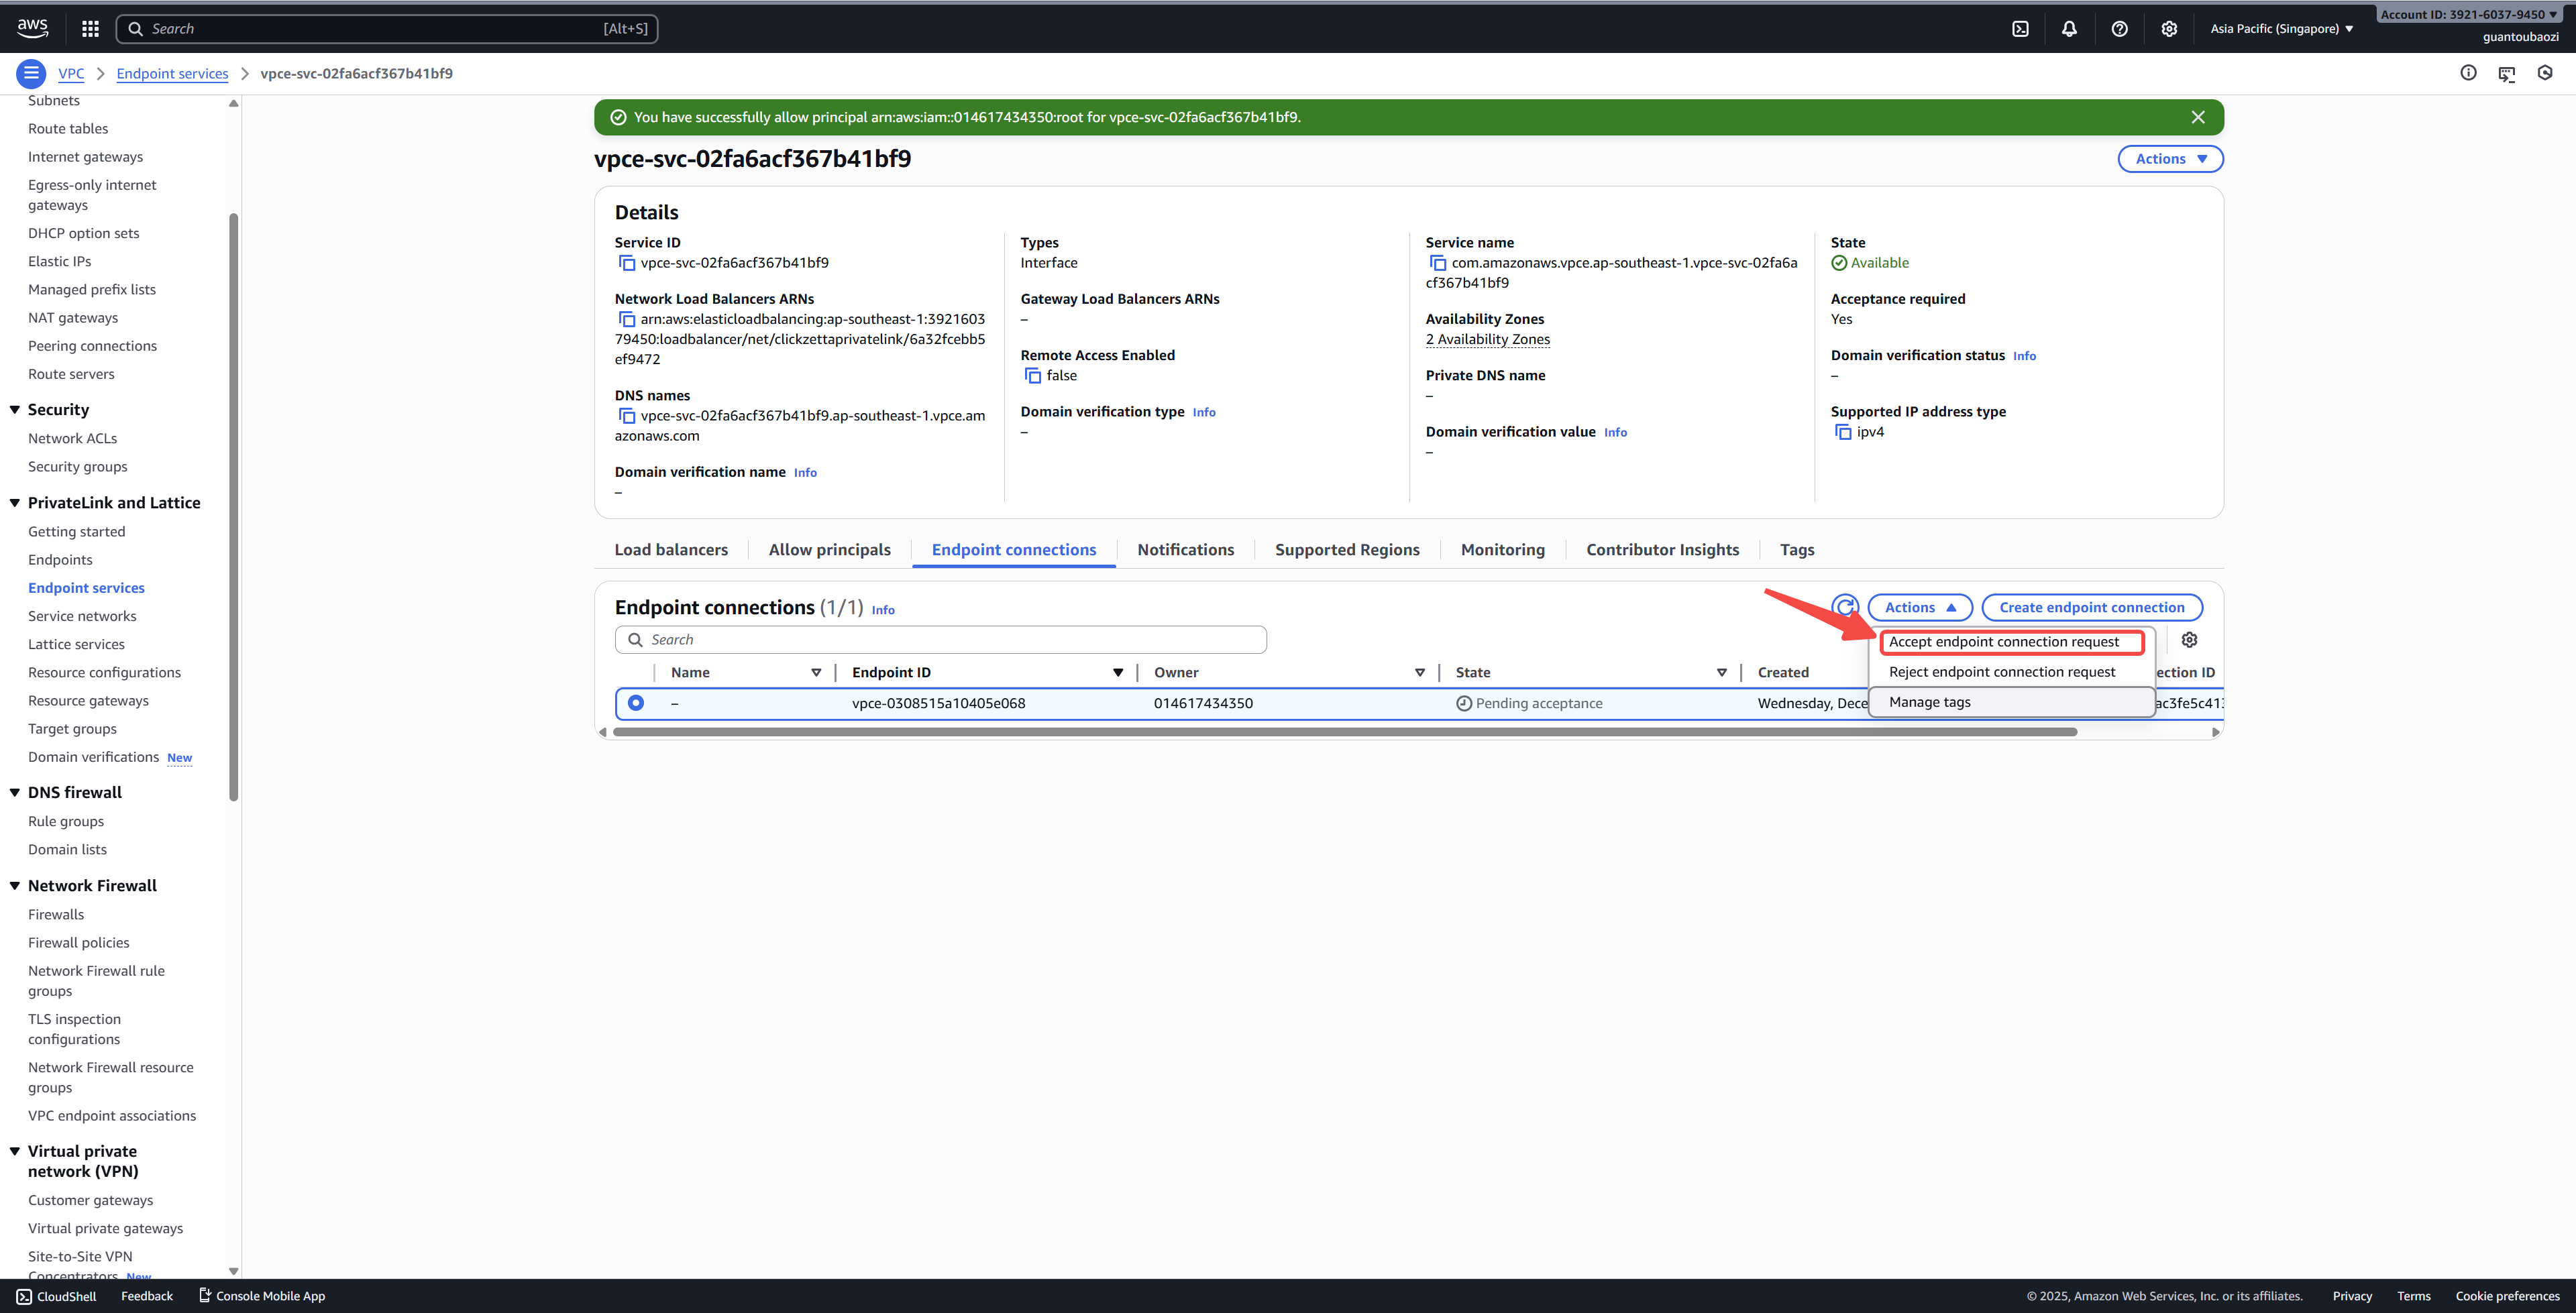
6. Verify the Connection Status
Refresh the page and wait for the endpoint status to change from Pending acceptance to Available, indicating that the connection is successfully established.
The Lakehouse console will also display the connection status as Connected.