Obtaining AWS Cloud ARN and ExternalID
To enable Lakehouse to read the status of VPC Endpoint and related networking information in your AWS account via PrivateLink, you must create a dedicated IAM Role with read-only permissions and configure a secure External ID.
After completing this setup, you will need to provide Role ARN and External ID to Lakehouse.
1. Prerequisites
Before starting, prepare the following information:
- Lakehouse UID(Lakehouse AWS Account ID) Used in the trust policy (STS AssumeRole).
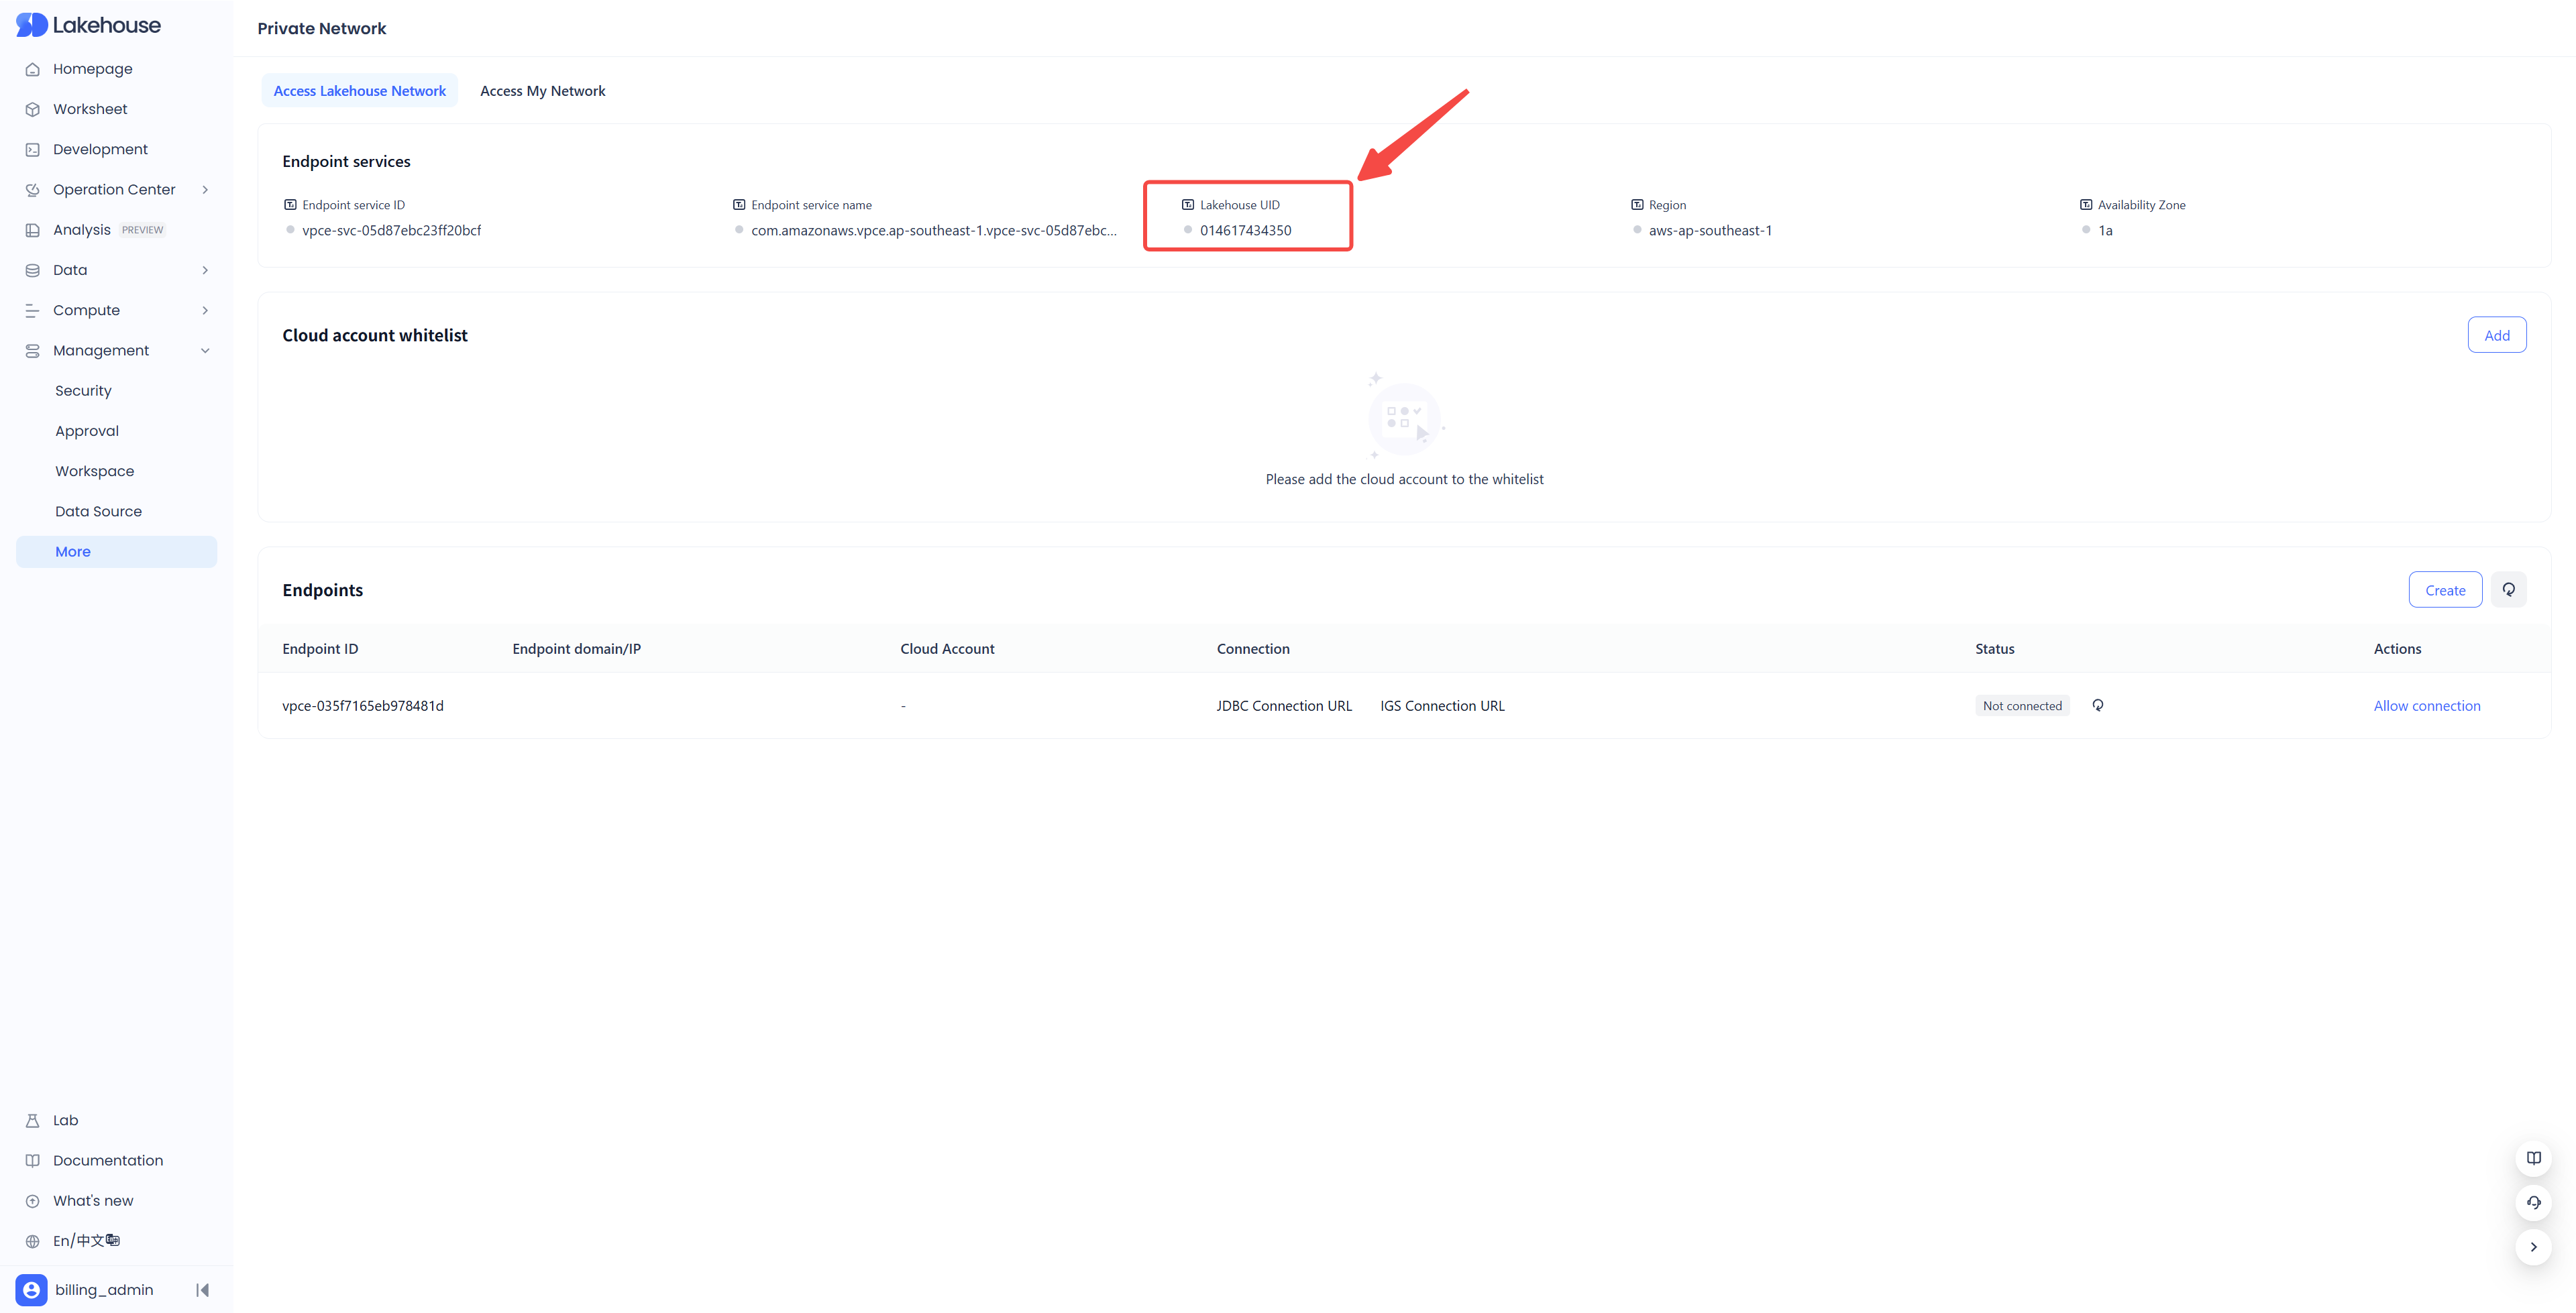
-
Your custom External ID
- Use a random and hard-to-guess string (UUID recommended).
- This value must be included in the trust policy and later provided to Lakehouse.
2. Create an IAM Role for Lakehouse PrivateLink Access
- Sign in to the AWS Management Console and open the IAM service.
- In the left navigation pane, click Roles → Create role.
Step 1: Select trusted entity type
-
Trusted entity type: AWS account
-
Select Another AWS account
-
Enter the Lakehouse AWS Account ID
-
Check Require external ID
-
Enter the External ID you prepared
-
Make sure Require MFA is unchecked
Click Next to continue.

Step 2: Add Permissions (Skip This Step)
This role will be configured with permission policies later. On the Add permissions page, click Next directly without selecting any policies.
Step 2: Require External ID
Step 3: Name the Role and Configure Trust Policy
-
On the Name, review, and create page:
- Enter a role name such as: LakehousePrivateLinkAccessRole
- (Optional) Add a description: “Role for Lakehouse to read AWS PrivateLink and VPC network status.”
-
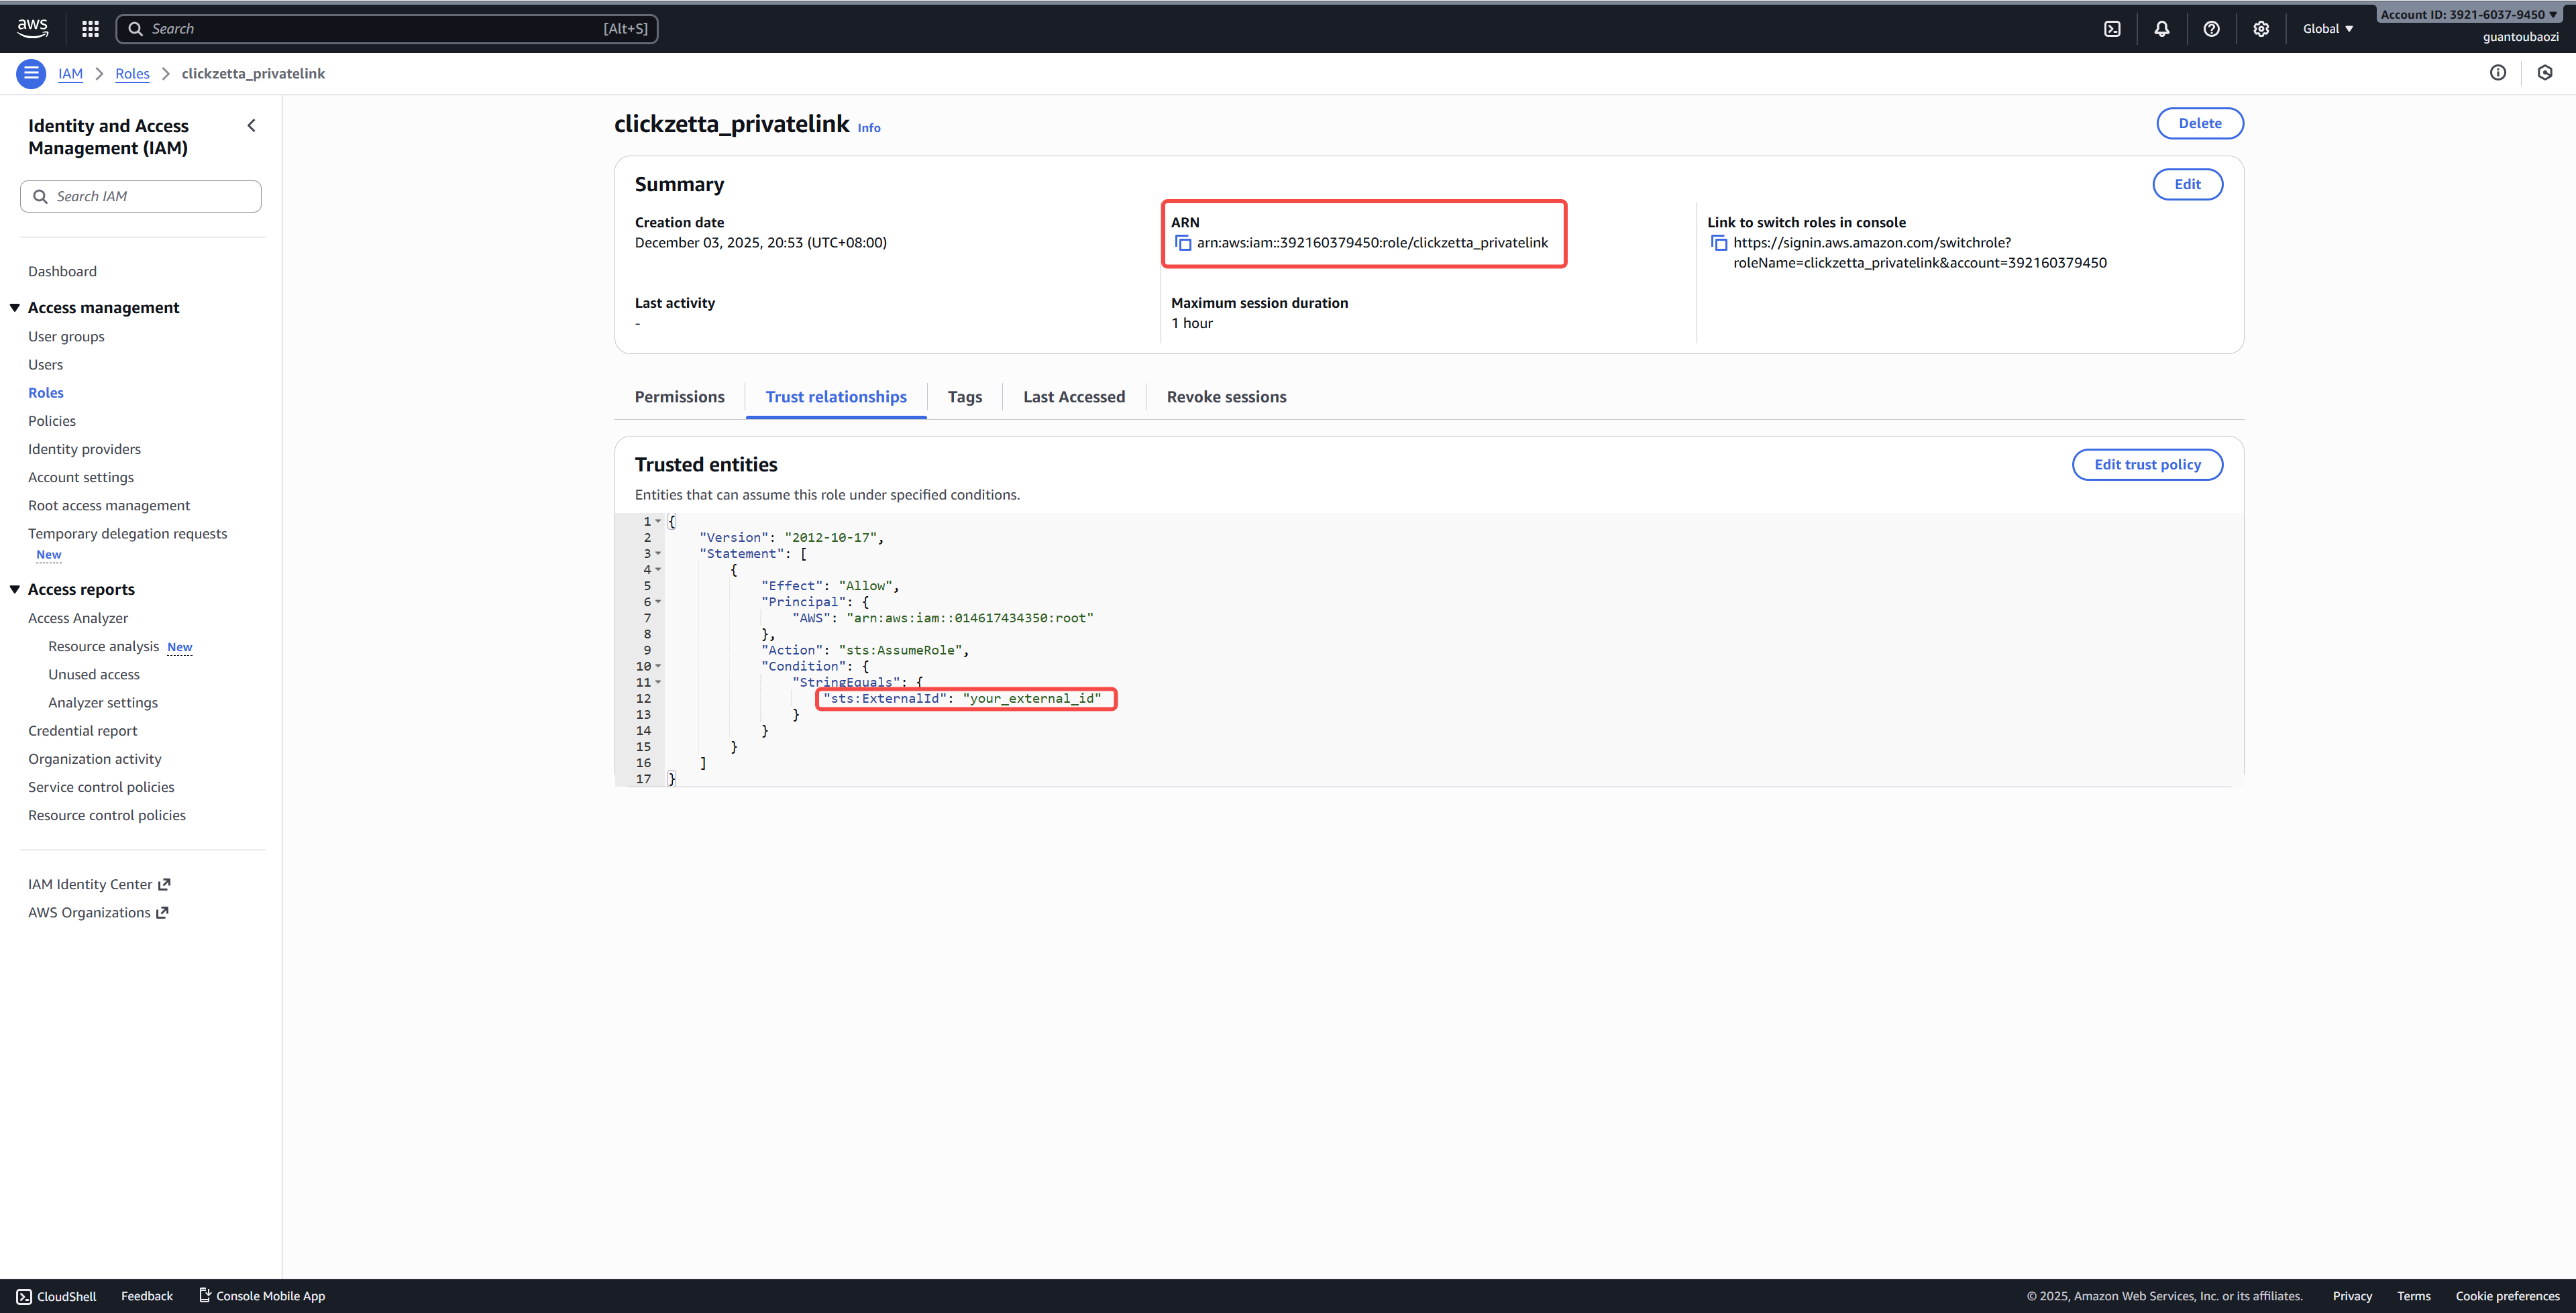
Before creating the role, scroll to the Trusted entities section and verify whether the Lakehouse AWS Account ID and External ID have been correctly configured. If not, click Edit to update the trust policy. Make sure to update both fields with your real values:
-
Make sure to update both fields with your real values:
"Lakehouse UID"→ replace with the AWS Account ID provided by Lakehouse"your-external-id"→ replace with the External ID that you prepared earlier
- Finally, click Create role to complete the role creation.
3. Attach Read-Only Policies for PrivateLink
You will now create a custom policy that grants Lakehouse the required read-only permissions.

On the Add Permissions page, click Create inline policy (opens in a new tab)
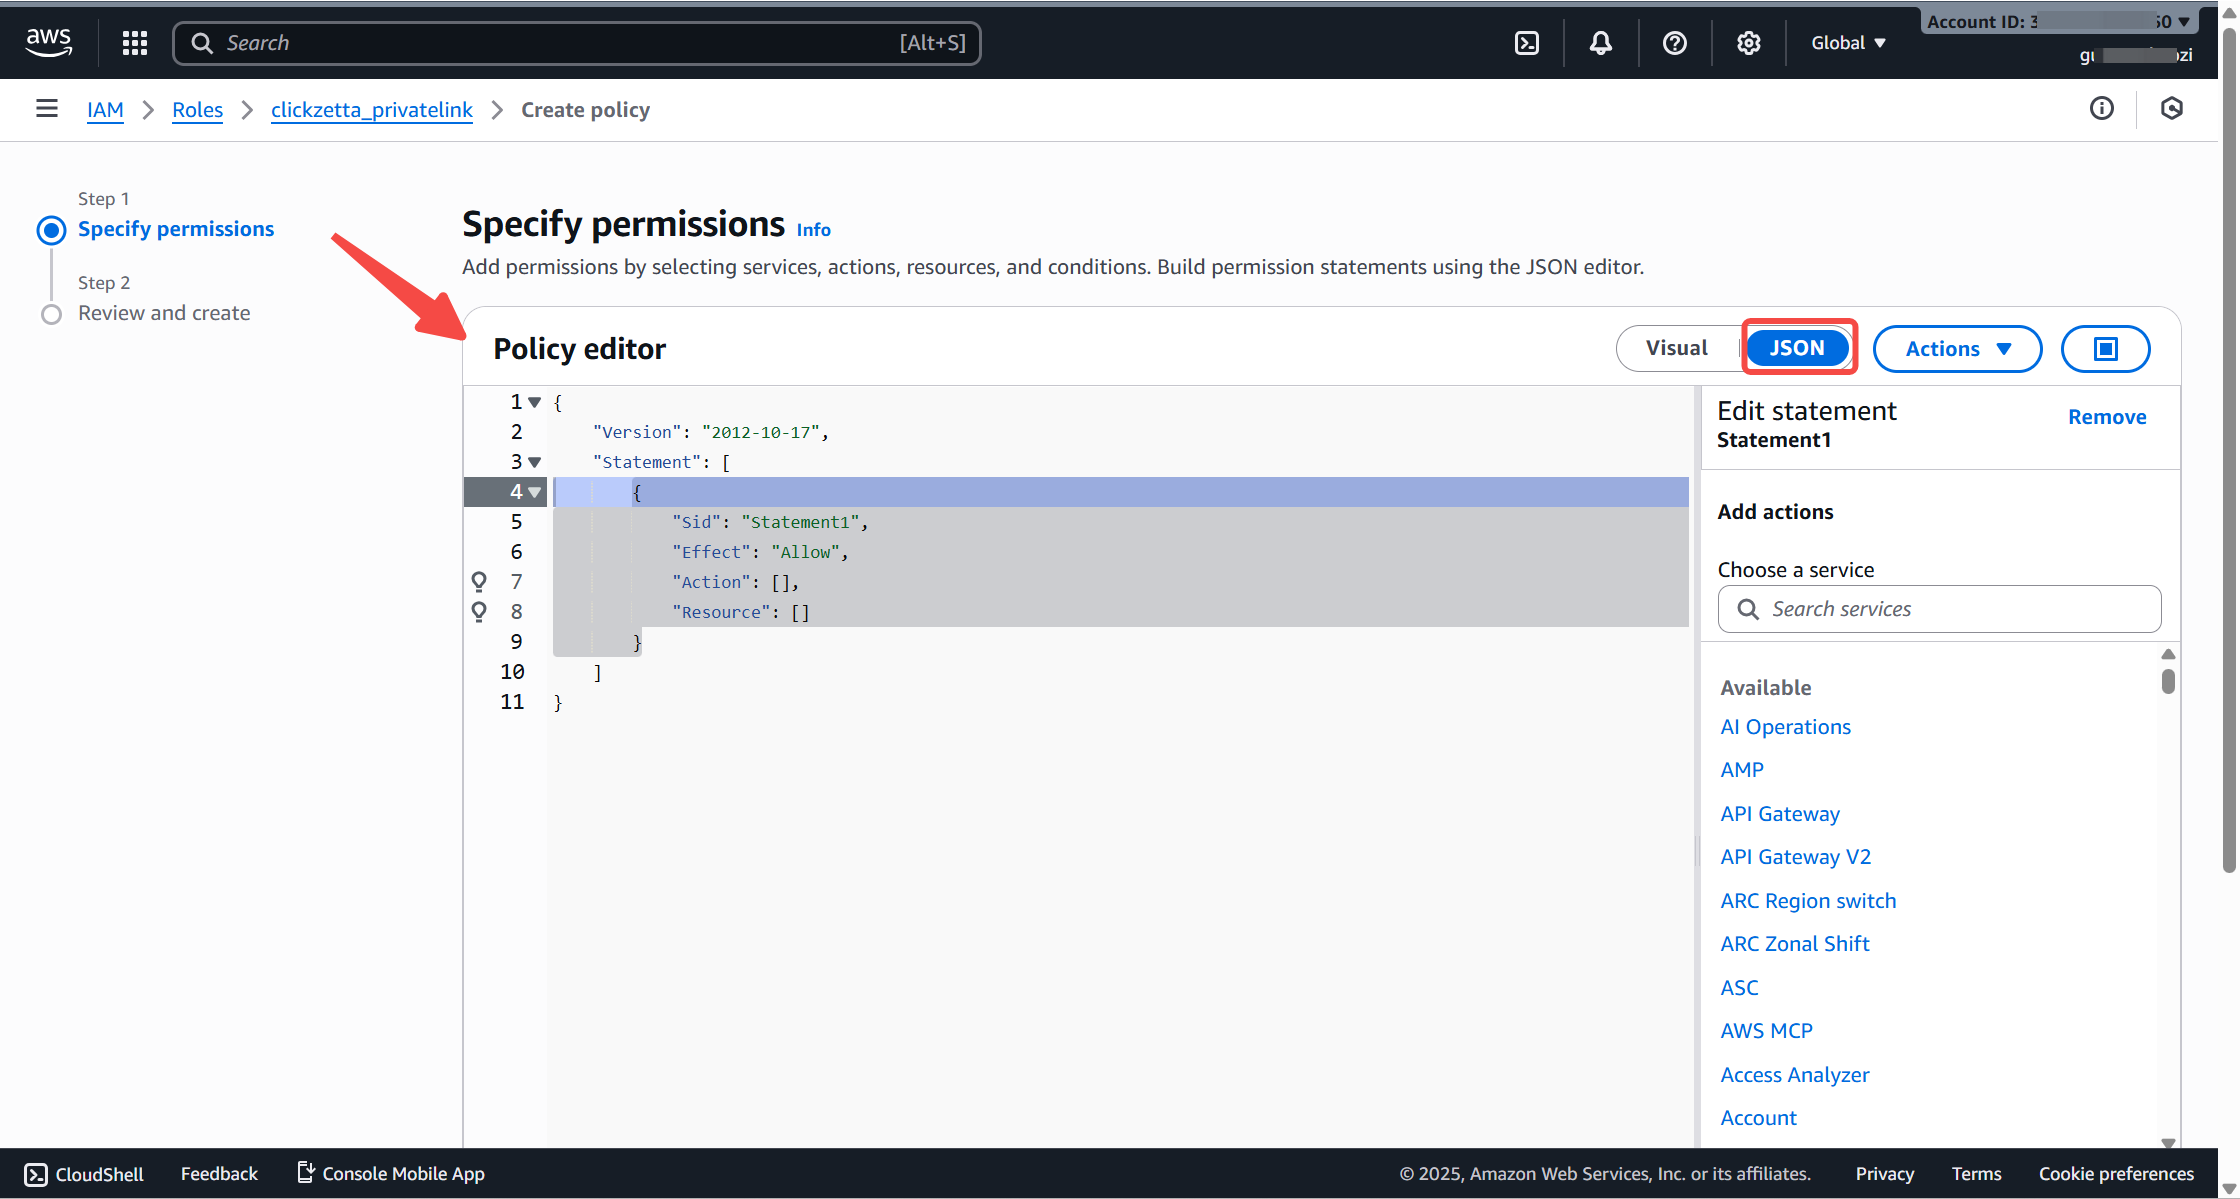
Select the JSON editor Paste the following policy content:
Click Next Name the policy, for example: LakehousePrivateLinkReadOnly Click Create policy.
5. Retrieve Role ARN and External ID
After the role is created:
Role ARN
- Displayed at the top of the Role detail page
Example:
arn:aws:iam::123456789012:role/LakehousePrivateLinkAccessRole
External ID
- The exact string you configured in Step 2 and Step 5.
6. Provide the Following Information to Lakehouse
You must provide:
- Role ARN
- External ID
Lakehouse uses these to securely assume your IAM Role and perform read-only PrivateLink validation, including:
- VPC Endpoint status
- VPC, subnets, route tables
- Security groups
- Load balancer and target group associations
This ensures that the PrivateLink connection between your VPC and Lakehouse services can be verified and monitored.