Create Alibaba Cloud Storage Connection
The goal of this step is to allow the Lakehouse cluster to access object storage OSS on Alibaba Cloud. To achieve this goal, you can use two authentication methods provided by Alibaba Cloud: Access Key and Role Authorization.
Method 1: Access Key (AK Information):
You only need to provide the AccessKey ID and AccessKey Secret information of an account with access to OSS permissions. Use this information to create a Storage Connection object, as shown in the example below:
Method 2: Role Authorization (RoleARN):
You need to create a role and a permission policy: the permission policy represents the access policy for the OSS service, and this policy is authorized to the created role.
The following mainly describes the specific steps for the role authorization method (RoleARN):
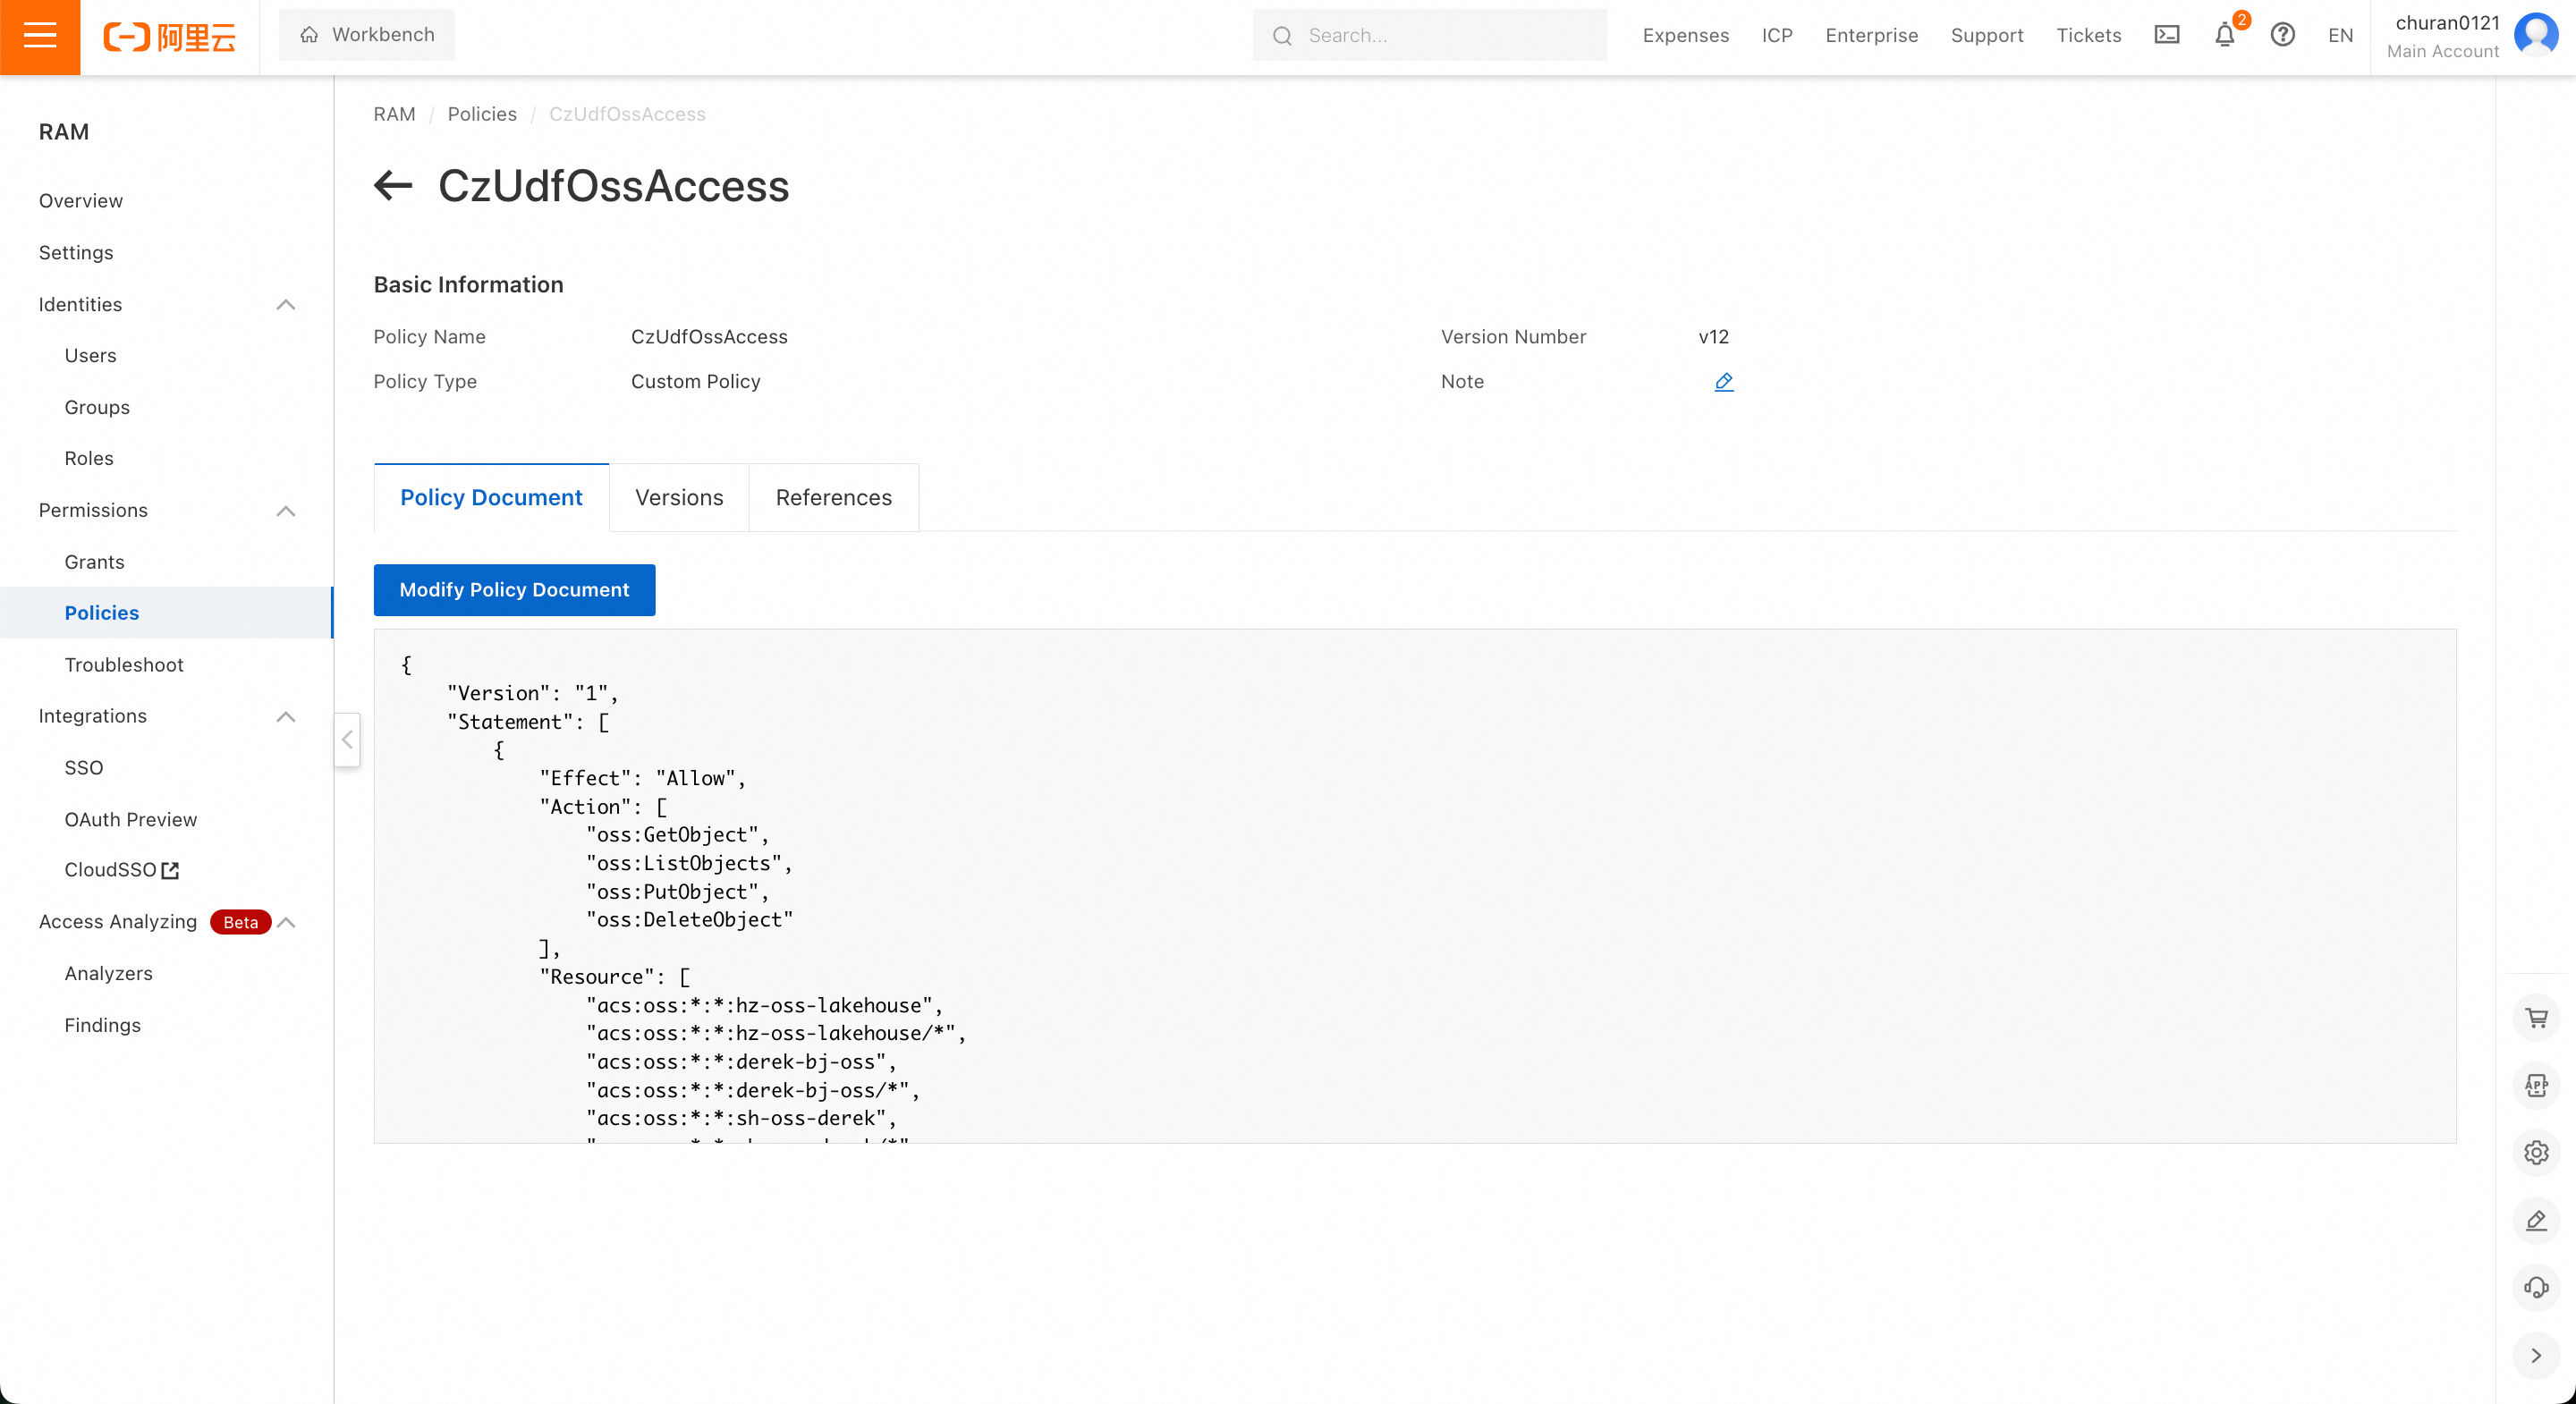
1. Operations on the Alibaba Cloud side: Create a permission policy (CzUdfOssAccess) in the Alibaba Cloud RAM console:
- Access the Alibaba Cloud Resource Access Management (RAM) product console
- In the left navigation bar, go to Permission Management -> Permission Policies, and select Create Permission Policy in the permission control interface
- On the Create Permission Policy page, select the Script Editor tab, and replace
[bucket_name_1|2|3]below with the actual OSS bucket names. Note: According to Alibaba Cloud OSS conventions, the same bucket needs to have two Resource entries:"acs:oss:*:*:bucket_name_1"and"acs:oss:*:*:bucket_name_1/*"to achieve the authorization effect:
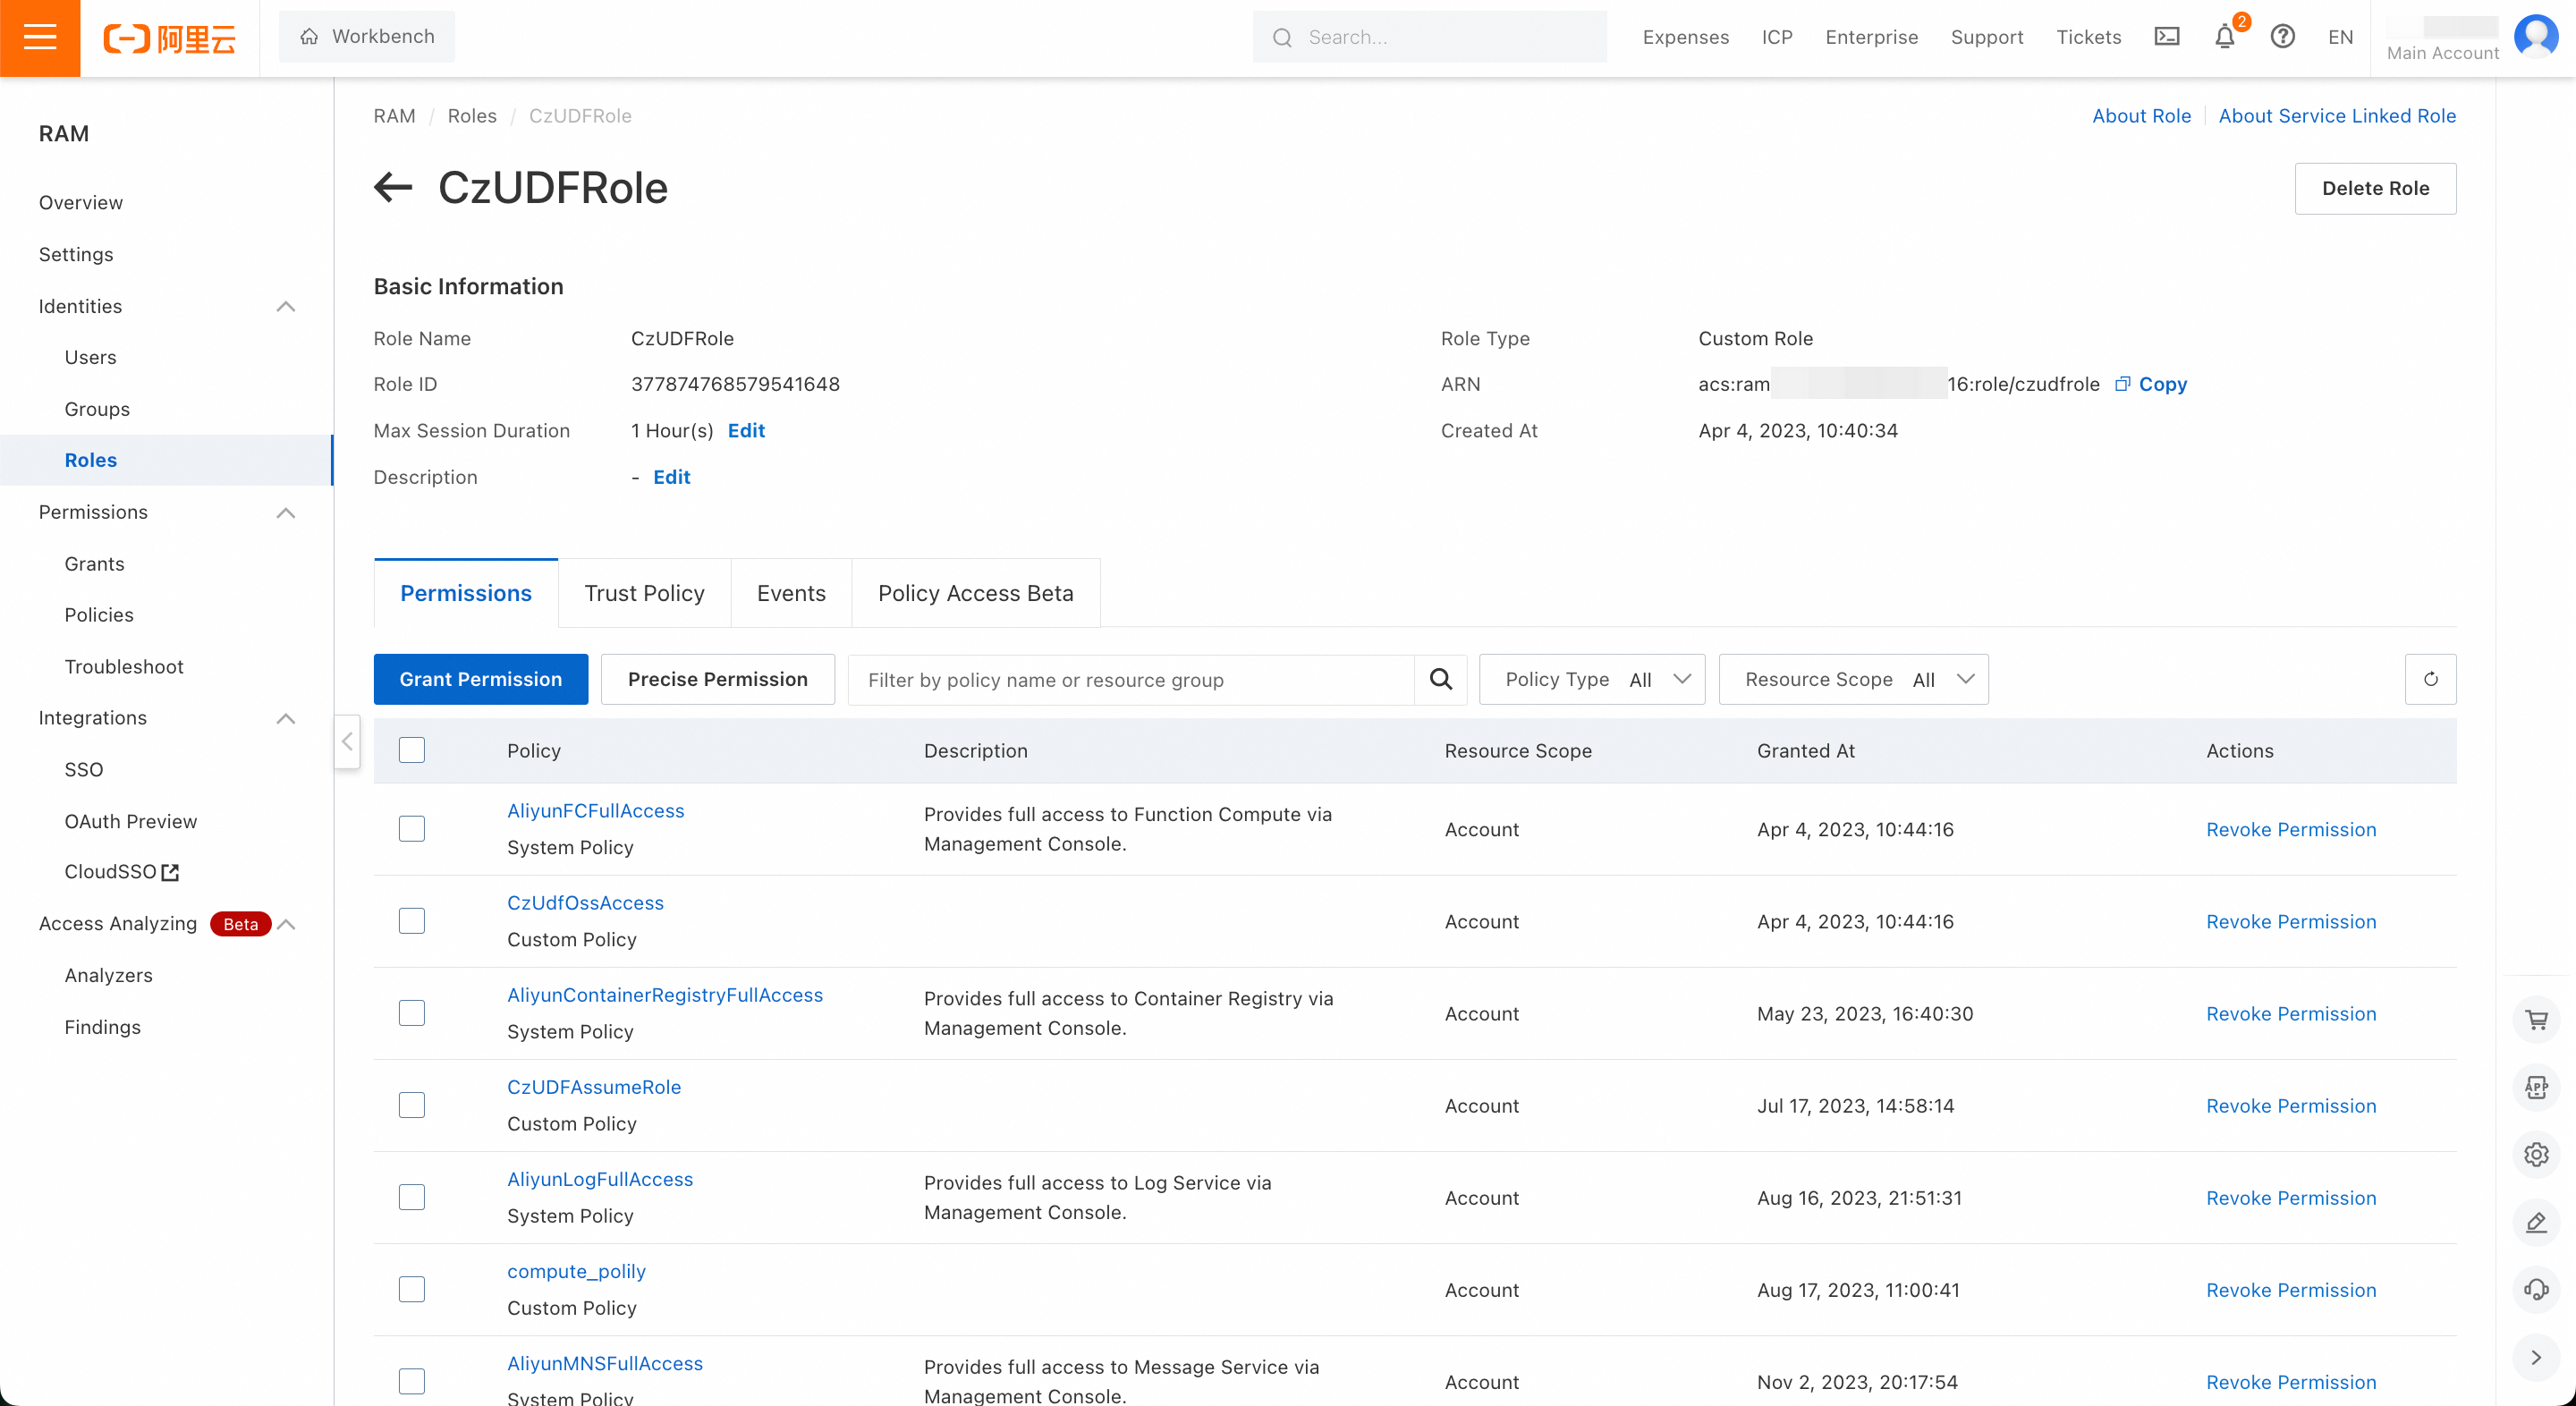
2. Alibaba Cloud Side: Create a Role CzUDFRole in Alibaba Cloud RAM:
- In the Alibaba Cloud Access Control (RAM) console, navigate to Identity Management -> Roles on the left sidebar, and create a role.
- On the Create Role page, select the type as Alibaba Cloud Account, fill in the custom role name (e.g., CzUDFRole) in Configure Role, select Other Cloud Account in Select Trusted Cloud Account, and enter: 1384322691904283, then click Finish.
- After creation, click Authorize for Role: In Custom Policy, authorize the newly created policy (CzUdfOssAccess) to the role. On the CzUDFRole role details page, obtain the RoleARN information for that role:
'acs:ram::1222808864xxxxxxx:role/czudfrole'
3. Lakehouse Side: Create Connection
- Execute the following command in Studio or Lakehouse JDBC client:
- Execute
desc connectionto get the external ID information: In this instance, the external ID is:O0lQUogDJajHqnAQ
4. Client Side: In Alibaba Cloud RAM -> Roles -> Trust Policy, modify the trust policy of CzUDFRole:
After creation, you can use this storage connection object in the statements of common external volumes to mount the object storage path.