Processing Image Data Using Hugging Face Image Recognition Models
1. Applicable Scenarios:
This article creates a Remote Function based on Alibaba Cloud Container Registry images. This scenario is applicable when:
- If the Python dependency packages for the image recognition program exceed 500MB, you need to use the method described in this article, i.e., creating based on the Container Registry image service (if the function program package is less than 500MB, it can be directly uploaded to object storage for automated creation).
- Regardless of program file size, if you need to use GPU resources of the cloud Function Compute service, you need to create based on the Container Registry image service.
2. Demonstration Process:
2.1 Preparation
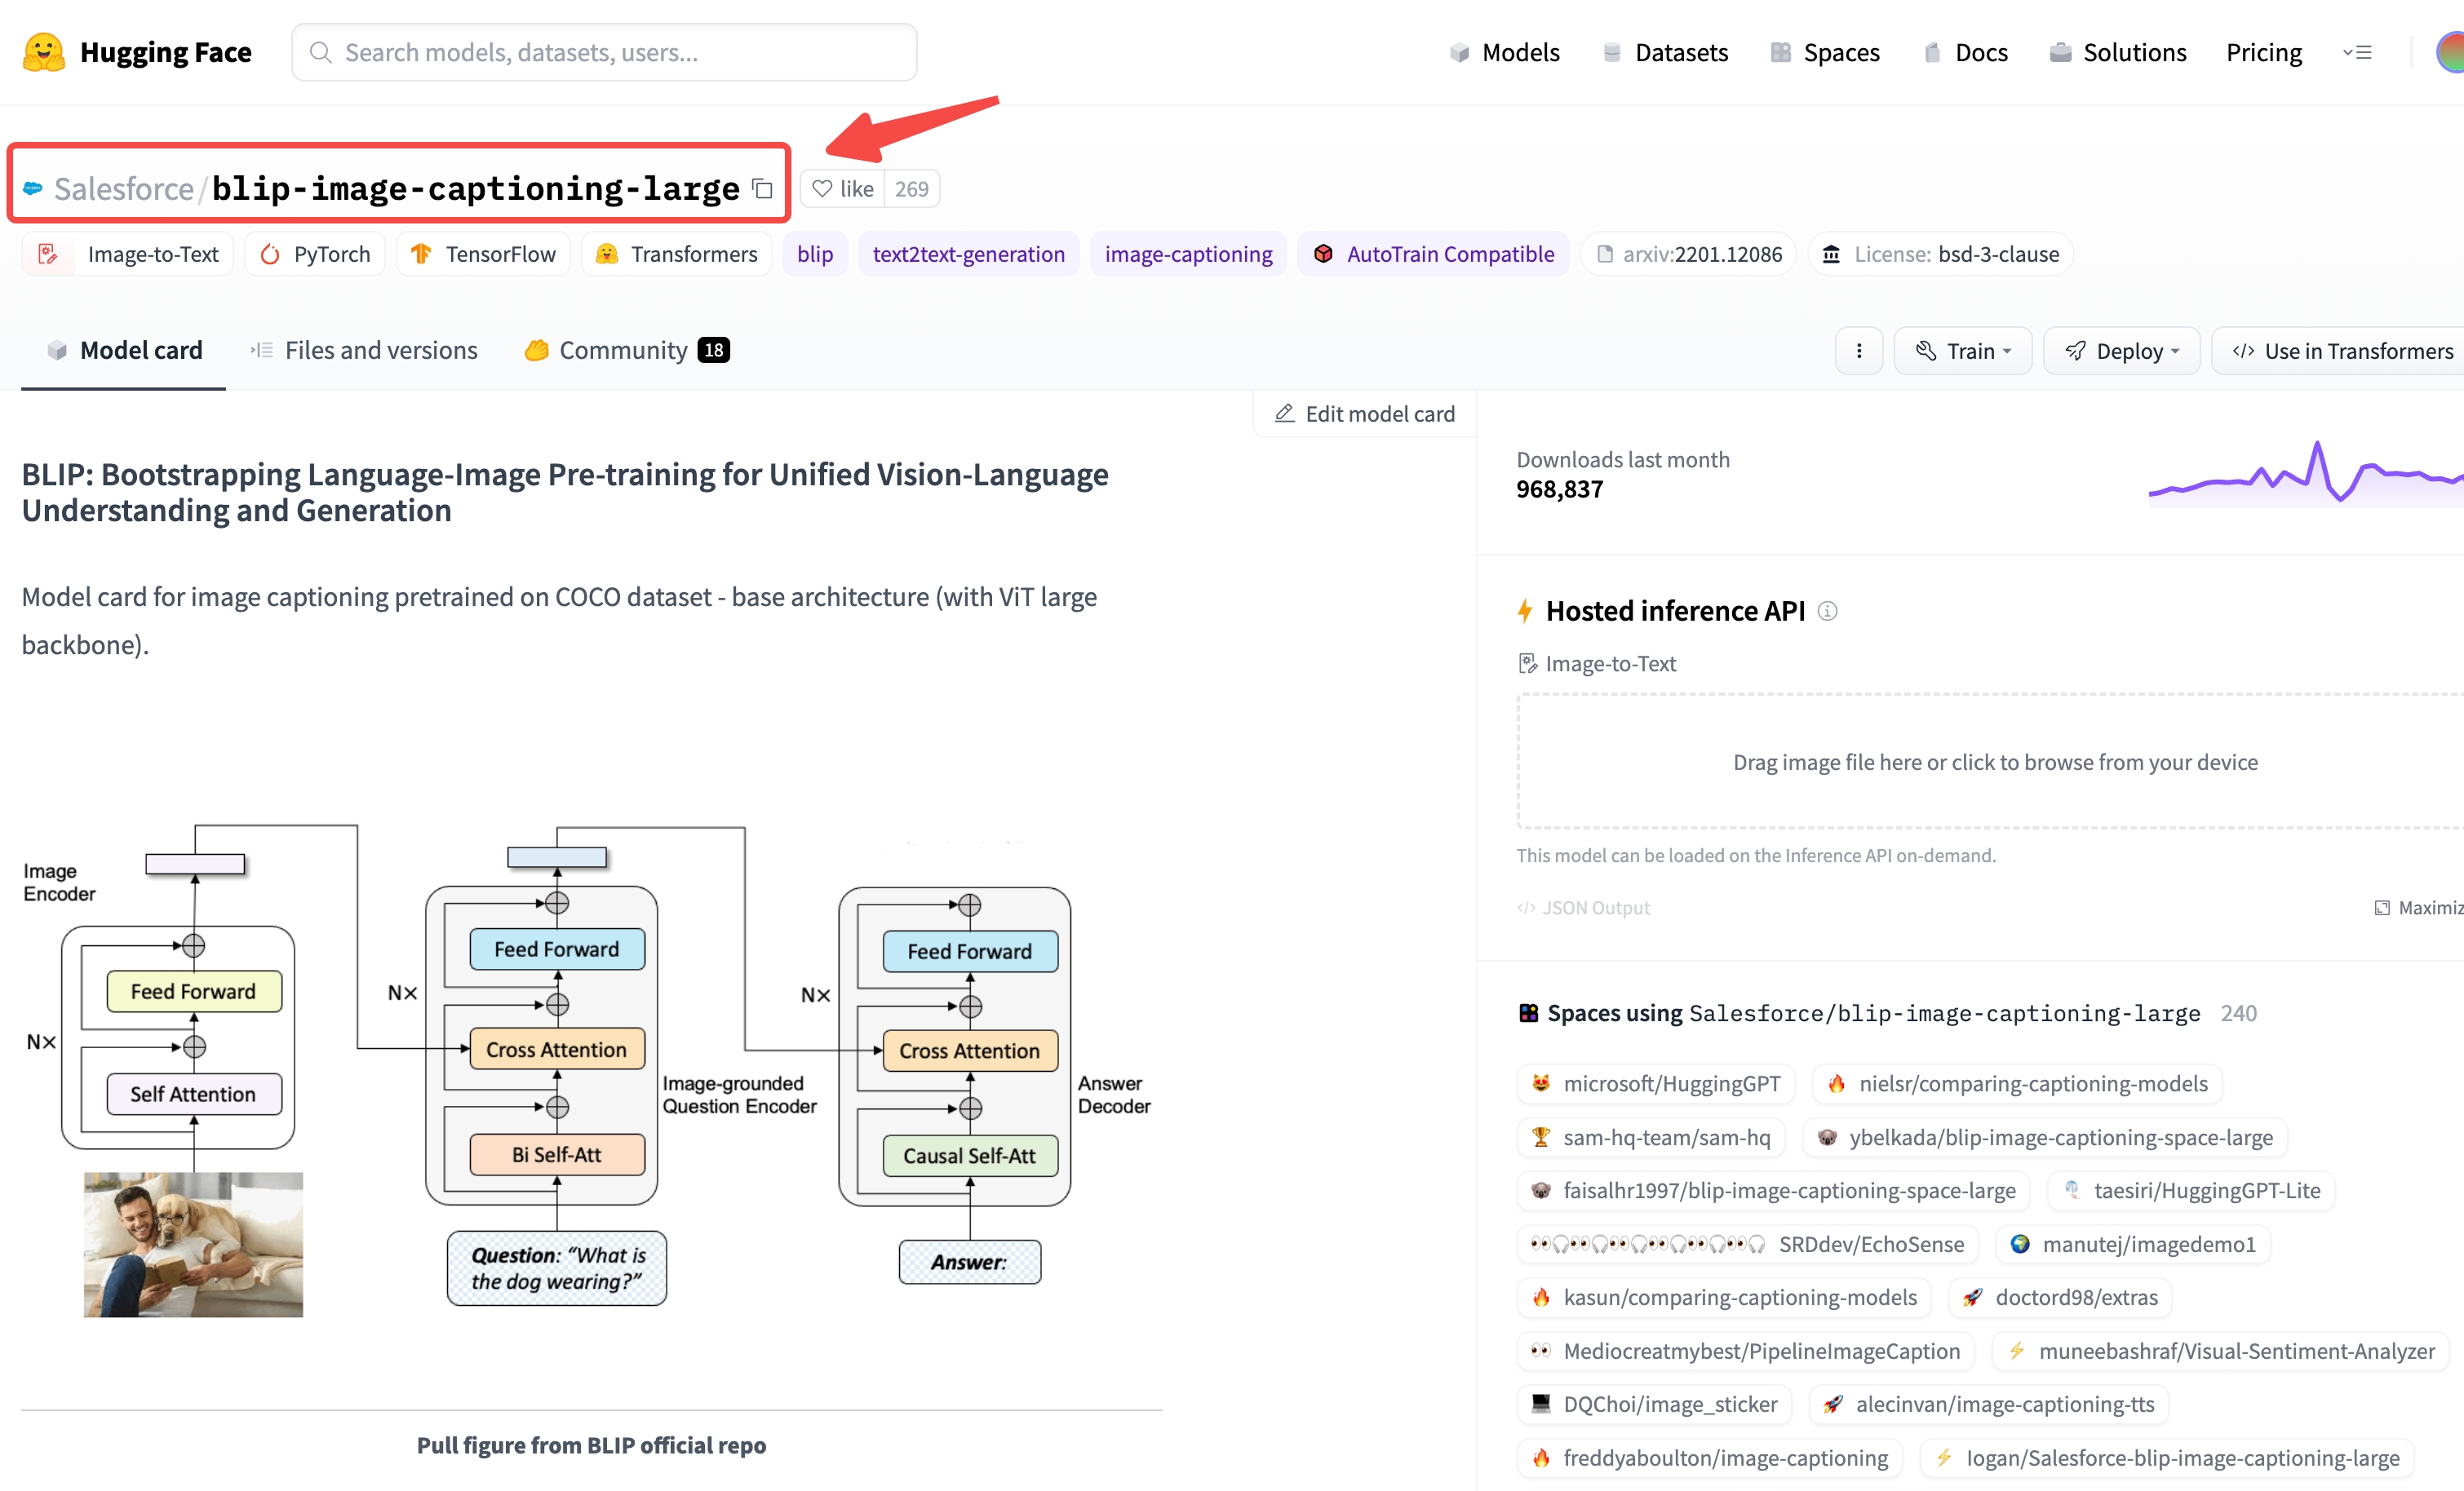
- Scenario: Use Hugging Face's image-to-text offline model to parse image content
- Model: Hugging Face image recognition model, see link
- Code: (see appendix)
2.2 Download Model and Dependencies:
(Recommended to run in an x86_64 Linux host environment)
2.2.1 Download the Model
- Install the huggingface_hub model download tool:
-
Download model files to the model directory; execute the following script using Python/ipython
- repo_id is the model name: Refer to the model website:
- local_dir: Local folder, the download destination for the model
- local_dir_use_symlinks: Whether the local folder is a mount point
2.2.2 Download Dependencies:
Download dependencies to the lib_ directory (requires a specific Python version; using Docker is recommended)
Create a lib_ folder locally, mount it to Docker's /root/lib_ , and download the dependencies into lib_.
Execute in the Docker environment:
2.3 Write Code:
Create a code file in the same directory level as model, lib_, such as hgf_image2text.py. See the appendix for the code.
2.4 Test Code:
Test in the Docker environment quay.io/pypa/manylinux2014_x86_64:2022-10-25-fbea779
Execute in the Docker environment:
After successful testing, package the image and upload it to the Alibaba Cloud ACR service.
2.5 Package and Upload Image:
2.5.1 Prepare Image:
Create a Dockerfile in the same directory level as model, lib_, and hgf_image2text.py, with the following content:
Add the Singdata Lakehouse bootstrap program (contact Singdata support for access) and extract it to the current directory. At this point, the current directory should contain:
model, lib_, hgf_image2text.py, Dockerfile folders and files, as well as bootstrap, lib, cz extracted from the Singdata bootstrap program.
2.5.2 Prepare Cloud Image Registry (requires logging into the Alibaba Cloud console):
- Go to Container Registry -> Instance List, and enter your personal instance 2. On the personal instance page, go to the left sidebar: Repository Management -> Namespace -> click Create Namespace: enter a namespace name, then click Create 3. On the left sidebar: Repository Management -> Image Repository -> click Create Image Repository: select a namespace, enter a repository name, set the repository type to "Private" -> Next, choose Local Repository for the code source, then click Create Image Repository 4. In the image repository list, enter the repository details page. The operation guide contains steps for uploading images; the image version tag is custom, for example for login:
2.5.3 Upload Image (run locally):
Build the image:
Push the image:
2.5.4 Test the Image (run locally):
2.6 Create Function (requires logging into the Alibaba Cloud console):
- Go to Function Compute FC 2.0 -> Services and Functions, select the desired region at the top of the page; a popup will appear on the right to enter the service name, leave other settings as default; click Show Advanced Options at the bottom, select AliyunFCDefaultRole under Service Role, leave others as default (public network and VPC access policies can be chosen as desired)
- In the Service List, enter the newly created service, click Create Function
- On the Create Function page, choose Create Using Container Image; under Basic Settings: enter a Function Name, e.g., hgf_image2txt, Web Server Mode: Yes, Request Handler Type: Process HTTP Requests
- Under Image Configuration, select Use Image in ACR, choose the image in ACR, Startup Command:
/src/bootstrap, Listening Port: 9000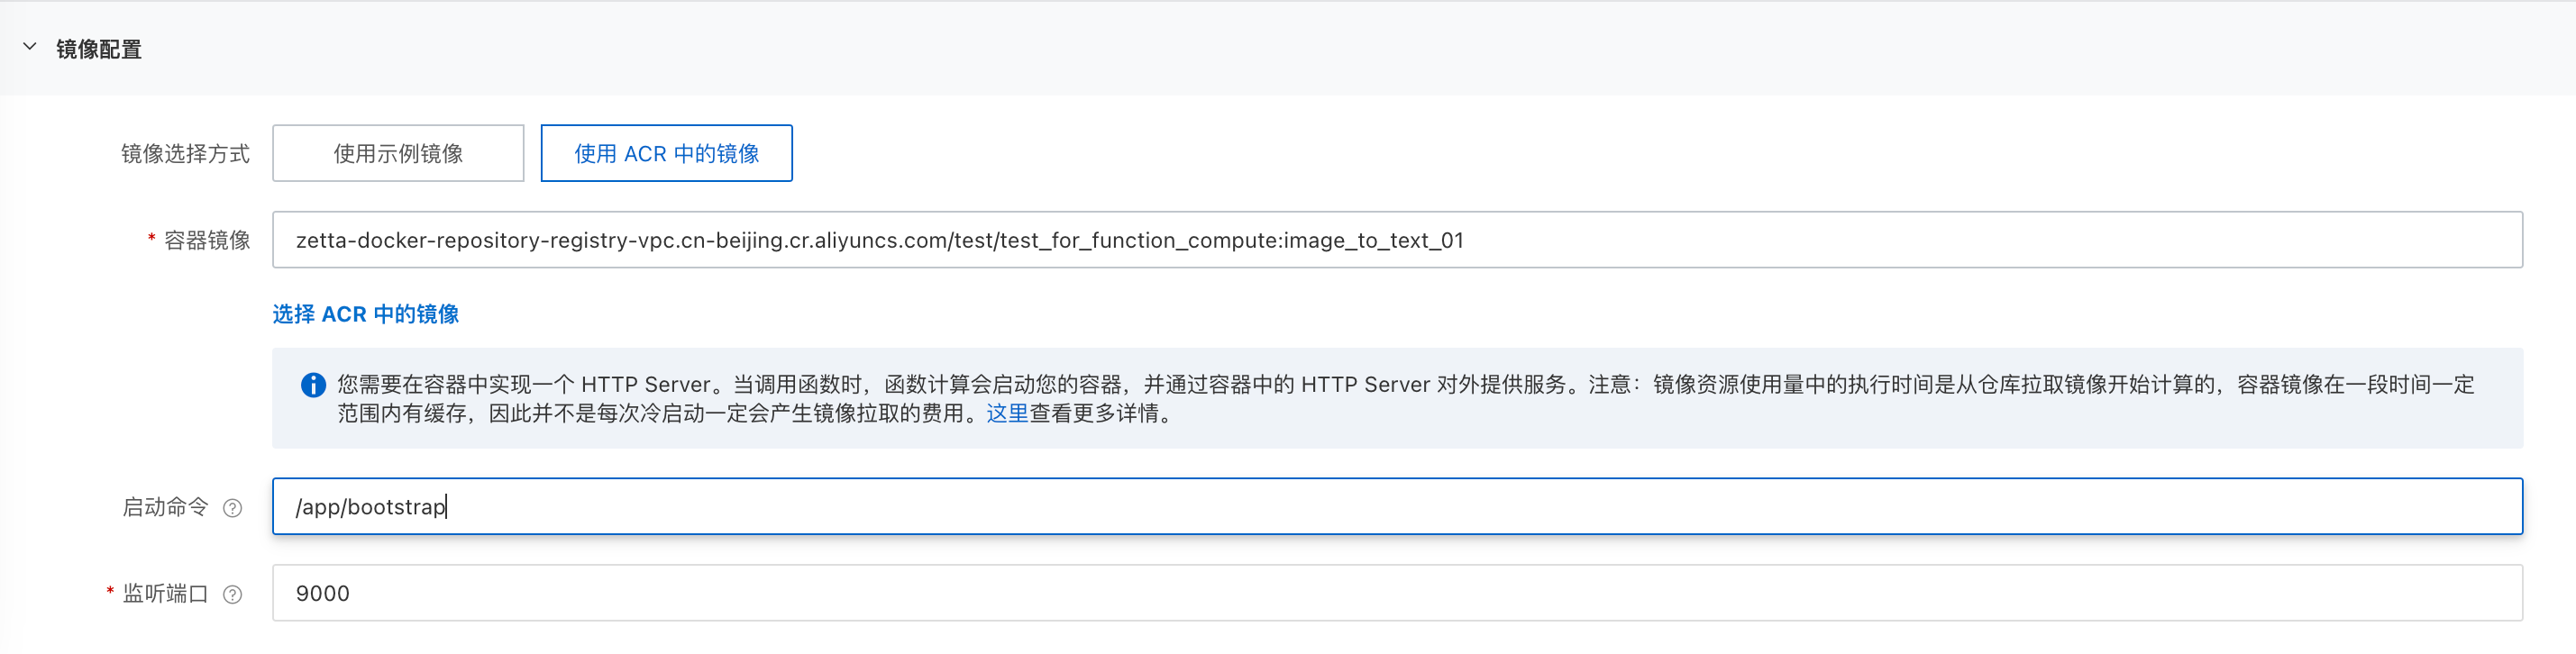
- Under Advanced Configuration, it is recommended to set vCPU and memory to 8 cores, 16GB
- Leave other settings as default, click Create
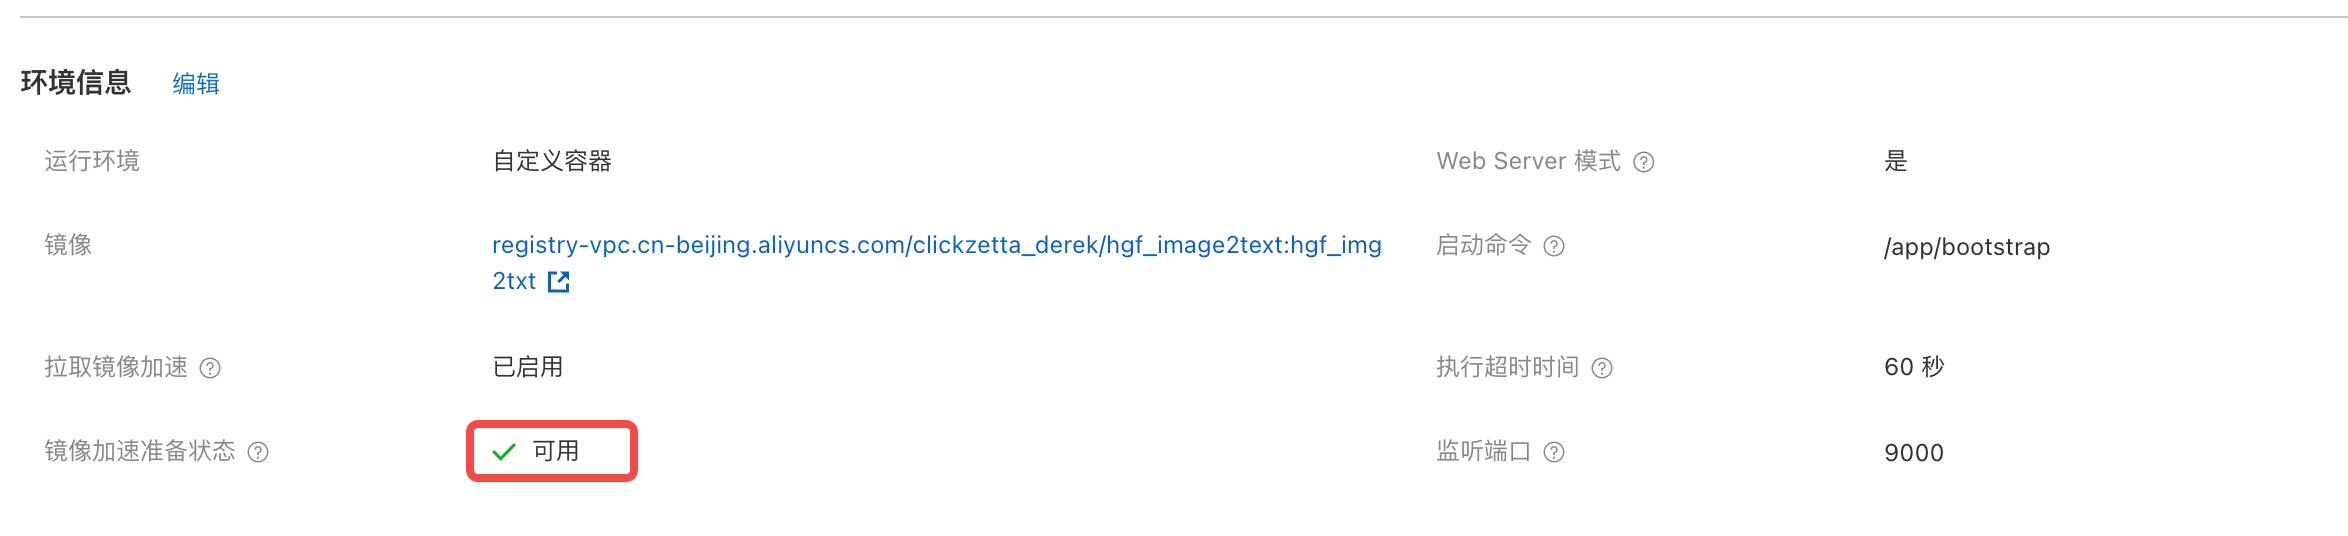
- In the Function List, enter the created function -> Function Configuration, check the image acceleration preparation status, wait until "Available"
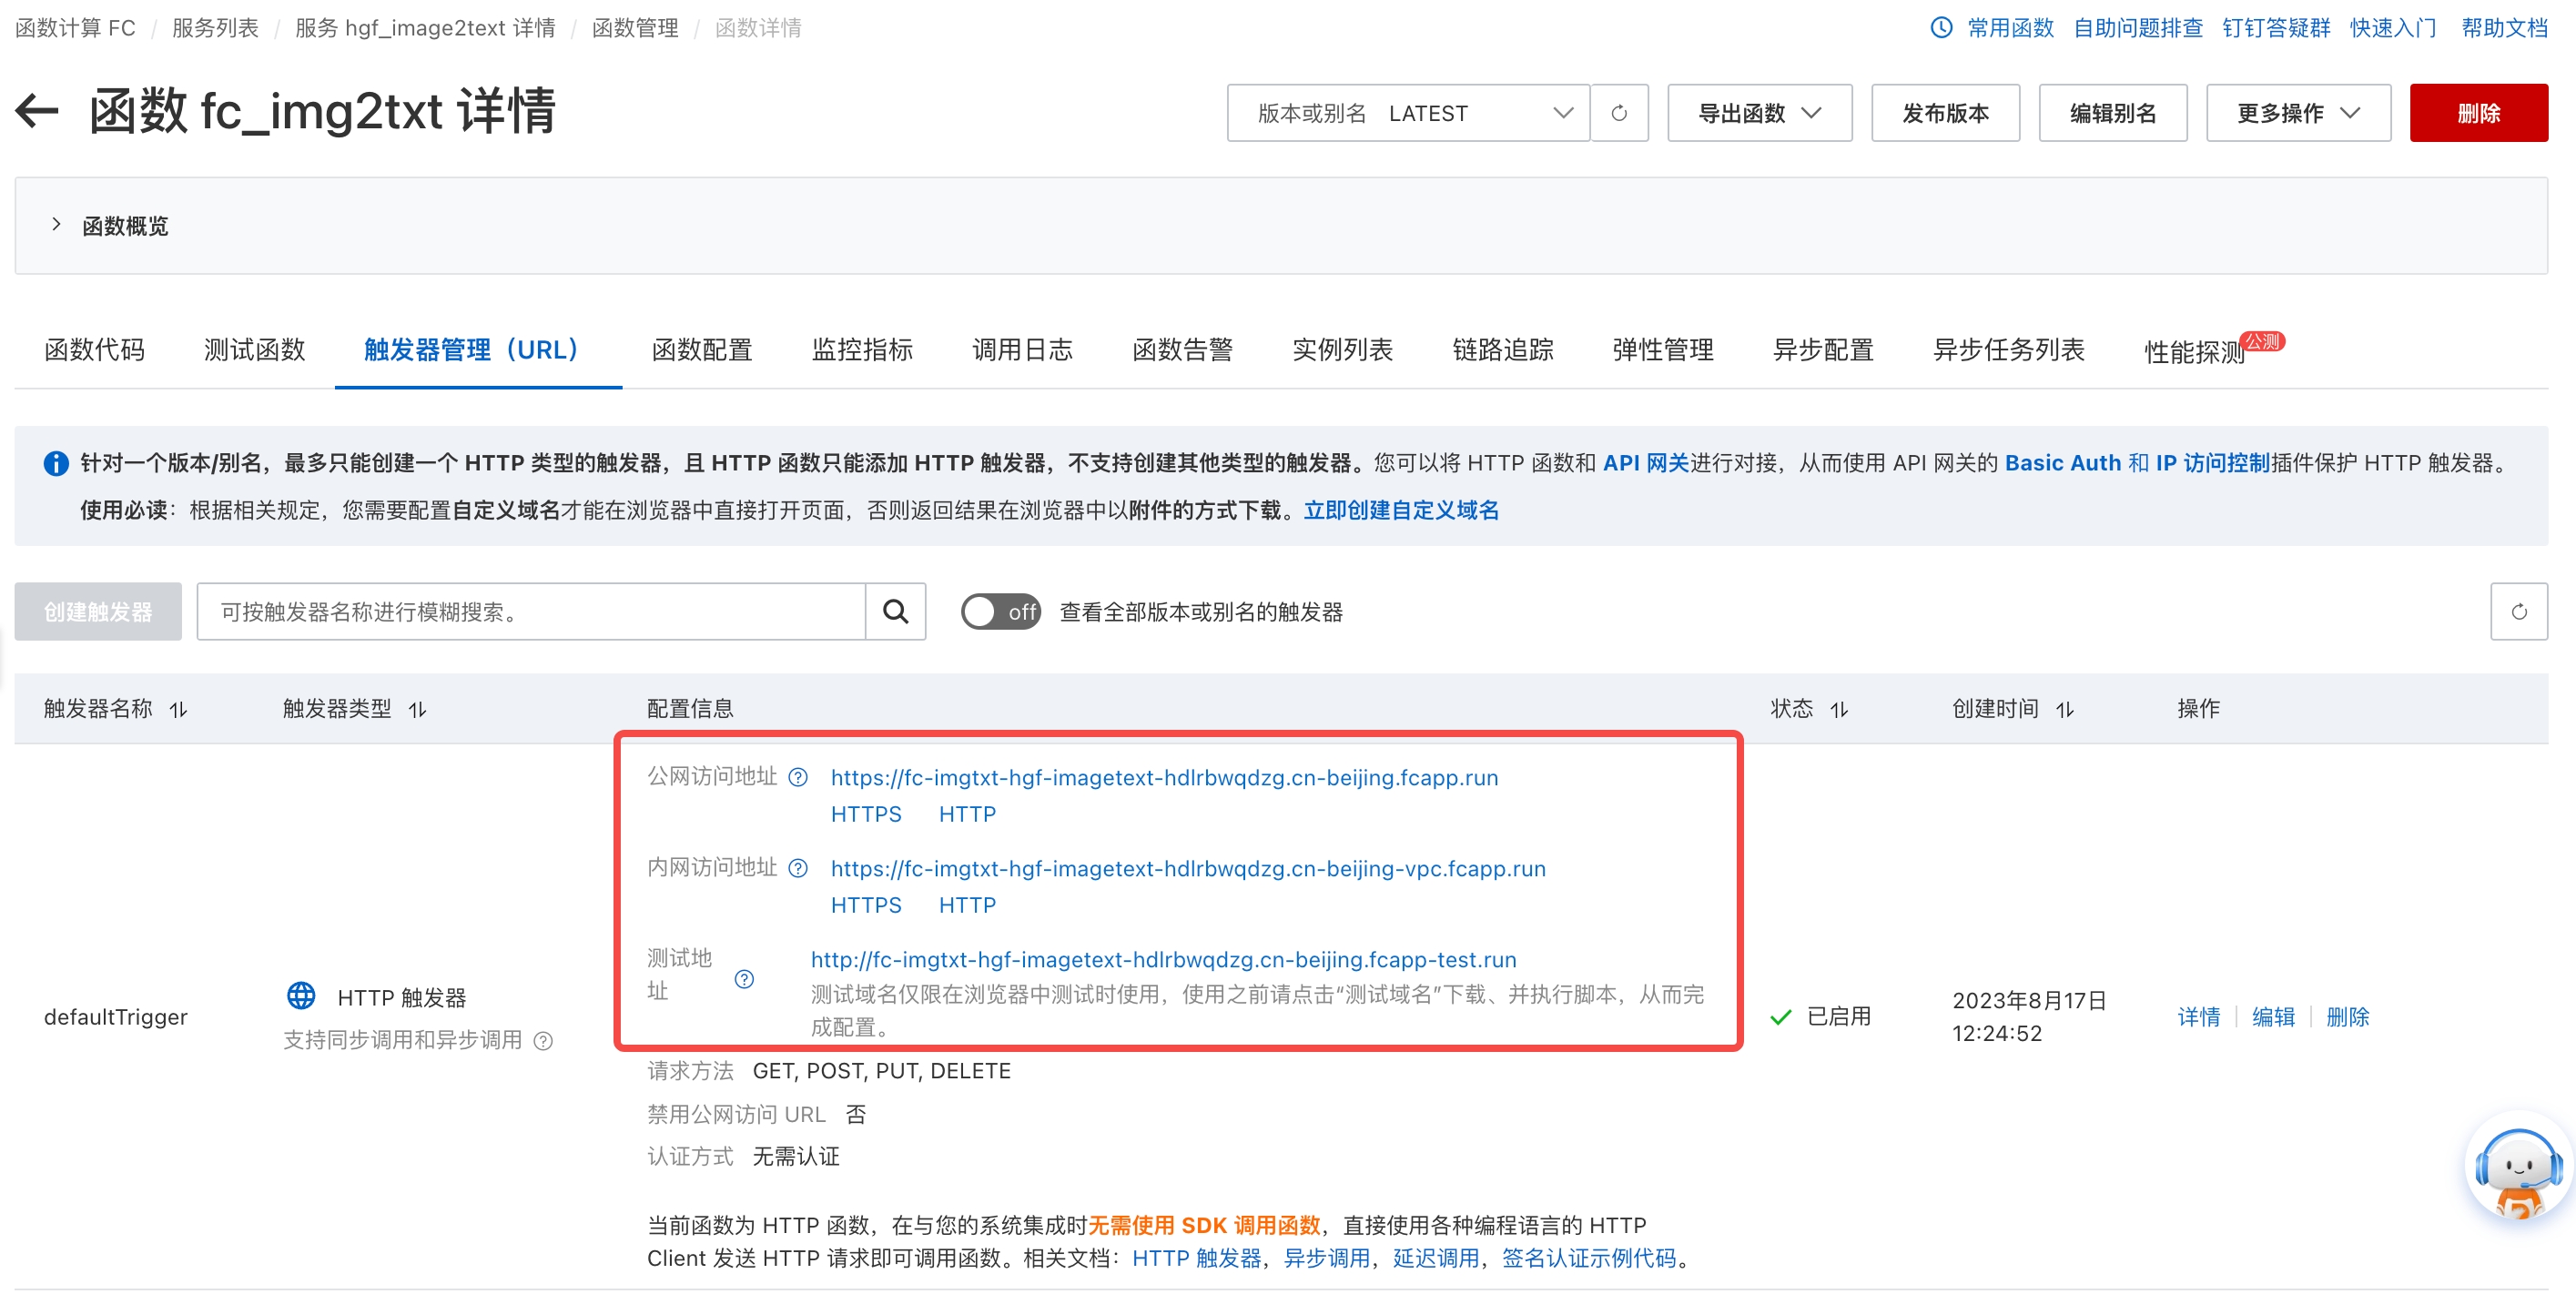
- Enter Trigger Management, obtain the public network access address HTTP link
2.7 Create Remote Function in Singdata Lakehouse (operations on the Singdata Lakehouse side):
Create the function:
Use the function (image URLs only support the https protocol):
3. Appendix
Code: