Building a Country-by-Country Regulatory Checklist in Notion

Creating a Country-by-Country Regulatory Checklist can feel overwhelming, but this guide simplifies the process using Notion. You can organize regulations, track compliance, and stay updated with ease. Notion’s flexibility allows you to customize your checklist to fit your needs. Its collaborative features enable teams to work together seamlessly, ensuring accurate data management. With everything centralized in one place, you save time and reduce errors. This guide empowers you to build a system that keeps your organization compliant across borders.
Key Takeaways
Use Notion to make a checklist that matches your needs.
Work together in Notion to share tasks and stay updated.
Keep all your regulatory info in one place to save time.
Update your checklist often for new rules and set reminders.
Use Notion's tools to make work easier and stay organized.
Why Use Notion for a Country-by-Country Regulatory Checklist?
Flexibility and Customization
Notion offers unmatched flexibility, allowing you to tailor your workspace to meet specific needs. Its modular, block-based platform enables you to create custom workflows, databases, and templates. Whether you're a student, a startup, or part of a global organization, you can design a system that works for you. For example, Notion's lifecycle marketing team successfully scaled personalized communication by implementing localized onboarding campaigns. This adaptability highlights how Notion can handle diverse requirements, including regulatory checklists.
Additionally, Notion's versatility extends beyond traditional productivity tools. You can build wikis, project management systems, and even collaborative study guides. Over half of recent Y Combinator startups use Notion, showcasing its popularity among innovative teams. By using Notion, you gain a tool that evolves with your needs, making it perfect for managing a Country-by-Country Regulatory Checklist.
Collaboration and Teamwork
Effective teamwork is essential when managing regulatory compliance across multiple countries. Notion's real-time collaboration features make it easy for your team to work together. You can leave comments, share documents, and assign tasks, ensuring everyone stays on the same page. A centralized workspace streamlines communication and reduces the risk of errors.
For example, teams can use Notion to manage tasks, notes, and projects in one place. This setup encourages transparency and accountability. Whether you're working with a small group or a large organization, Notion fosters collaboration, helping you maintain compliance efficiently.
Centralized Data Management
Keeping all your regulatory data in one place simplifies compliance management. Notion allows you to create a centralized database where you can store country-specific regulations, compliance statuses, and deadlines. Businesses that adopt Notion often report a 20-40% increase in productivity within six months.
Using Notion templates can also save time and reduce costs. By consolidating your data, you minimize the need for multiple software tools and decrease administrative overhead. As your organization grows, Notion's scalable templates ensure your system remains efficient. This centralized approach makes it easier to manage a Country-by-Country Regulatory Checklist and adapt to changing regulations.
Preparing to Build Your Country-by-Country Regulatory Checklist
Identify Regulatory Requirements
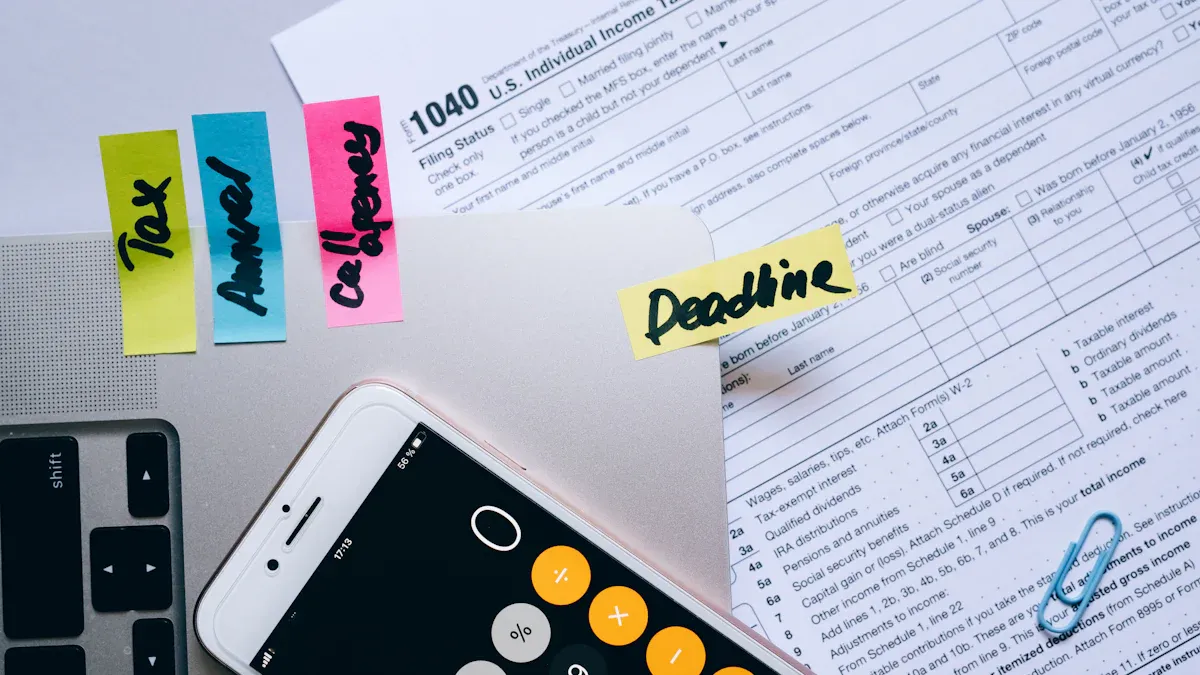
Before creating your checklist, you need to identify the regulatory requirements your organization must follow. This step ensures your checklist is comprehensive and tailored to your needs. A well-structured compliance audit checklist should include all necessary regulations, the documents or records that prove compliance, and the specific activities required to meet these standards. For example, you might need to track tax laws, labor regulations, or environmental policies depending on the countries where you operate.
Assign responsibilities for each compliance activity to team members. This approach ensures accountability and reduces the risk of oversight. By clearly defining these requirements, you create a strong foundation for your Country-by-Country Regulatory Checklist.
Gather Country-Specific Data
Once you know the regulatory requirements, gather data specific to each country. This data includes local laws, deadlines, and documentation standards. Studies show that planning and preparation significantly improve the effectiveness of checklists. For instance, research spanning 23 years and 11 countries highlights the importance of thorough preparation in checklist design.
Aspect | Details |
|---|---|
Number of Studies | 29 |
Countries Represented | 11 different countries or regions |
Study Duration | Approximately 23 years (2001 to 2023) |
Participants Range | Between 4 and 138 participants, mean of 29 participants |
Recruitment Methods | Voluntary recruitment, convenience sampling, snowball approaches, social media, email, phone |
Study Design Types | Majority were pre- and post-studies (59%) |
Focus of Studies | Design, development, or evaluation of checklists as part of quality improvement projects |
This data underscores the importance of gathering accurate and detailed information. Use reliable sources like government websites, legal advisors, or industry reports to ensure your checklist reflects current regulations.
Define the Checklist Structure
The structure of your checklist plays a crucial role in its usability. A clear and organized layout helps you navigate complex data efficiently. Use consistent design elements like color palettes, typography, and spacing to enhance readability. A user-centered approach ensures your checklist is easy to understand and navigate.
Include sections for each country, with subsections for specific regulations, deadlines, and compliance statuses. Add clear calls to action, such as reminders for upcoming deadlines or tasks requiring immediate attention. This structured approach minimizes confusion and helps you maintain compliance across multiple regions.
Step-by-Step Guide to Building a Country-by-Country Regulatory Checklist in Notion

Create a New Database in Notion
To start building your Country-by-Country Regulatory Checklist, you need to create a new database in Notion. A database acts as the foundation for organizing and managing your compliance data. Begin by opening Notion and selecting the option to create a new page. From there, choose the "Database" option. You can select from different database types, such as a table, board, or list. For most regulatory checklists, a table format works best because it allows you to view and edit data in a structured way.
Once your database is created, give it a clear and descriptive name. For example, you might call it "Global Compliance Tracker" or "Regulatory Checklist Database." This name helps you and your team quickly identify the purpose of the database. You can also add an icon or cover image to make the page visually appealing and easier to locate.
Tip: Use Notion's drag-and-drop feature to rearrange columns or rows in your database. This flexibility allows you to customize the layout as your needs evolve.
Add Key Properties (e.g., Country, Regulation Type, Compliance Status)
After creating your database, the next step is to define its key properties. Properties are the columns in your database that store specific types of information. For a Country-by-Country Regulatory Checklist, you might include properties like:
Country: The name of the country where the regulation applies.
Regulation Type: The category of the regulation, such as tax, labor, or environmental.
Compliance Status: A status indicator, such as "Compliant," "Pending," or "Non-Compliant."
Deadline: The date by which compliance must be achieved.
Assigned Team Member: The person responsible for ensuring compliance.
To add a property, click the "+" button at the top of your database table. Choose the property type that best fits your data. For example, use a "Select" property for compliance status or a "Date" property for deadlines. Customizing these properties ensures your database captures all the necessary details for effective compliance tracking.
Note: Use consistent naming conventions for your properties. For instance, always use "Country" instead of switching between "Nation" or "Region." This consistency improves clarity and reduces confusion.
Organize Data Using Views (e.g., Table, Board, Calendar)
Notion allows you to organize your data using different views, making it easier to analyze and manage your checklist. The default view for a new database is usually a table, but you can add other views like boards, calendars, or timelines to suit your workflow.
Table View: Use this view for a detailed, spreadsheet-like layout. It’s ideal for entering and editing large amounts of data.
Board View: This view organizes data into columns, similar to a Kanban board. You can group items by properties like compliance status or regulation type. For example, you might have columns for "Compliant," "Pending," and "Non-Compliant."
Calendar View: Use this view to track deadlines visually. Each compliance task appears on the calendar based on its due date, helping you prioritize time-sensitive activities.
To add a new view, click the "Add a View" button at the top of your database. Select the view type you want and customize its settings. You can switch between views at any time, giving you flexibility in how you interact with your data.
Pro Tip: Save time by creating filters and sorting rules for each view. For instance, in the calendar view, you can filter tasks to show only those with upcoming deadlines.
Add Templates for Consistency
Templates play a vital role in ensuring consistency across your Country-by-Country Regulatory Checklist. They provide a standardized framework that helps you and your team maintain uniformity while managing complex regulatory data. By using templates, you can save time, reduce errors, and create a more organized system for compliance tracking.
When you create templates in Notion, you set clear expectations for how information should be structured. This approach ensures that every entry in your checklist follows the same format. For example, you can design a template that includes predefined sections for country names, regulation types, deadlines, and compliance statuses. This structure eliminates guesswork and keeps your data consistent.
Here are some key benefits of using templates:
They establish clear expectations and responsibilities from the start.
They standardize processes, ensuring all necessary steps are followed.
They provide a customizable and interactive platform for tracking progress.
They allow you to incorporate feedback mechanisms to improve over time.
To create a template in Notion, open your database and click on the "New Template" button. Design the template to include all the essential fields and sections relevant to your checklist. For instance, you might add placeholders for country-specific regulations, compliance deadlines, and assigned team members. You can also include instructions or reminders within the template to guide users as they fill out the checklist.
Tip: Use Notion's "Duplicate" feature to quickly replicate templates for new entries. This feature saves time and ensures that every new entry adheres to the same structure.
Templates also make collaboration easier. When everyone on your team uses the same format, it becomes simpler to review and update information. You can even customize templates for specific regions or departments, tailoring them to meet unique requirements. This flexibility ensures that your checklist remains relevant and effective as your organization grows.
By integrating templates into your workflow, you create a system that is not only consistent but also scalable. This approach helps you manage your Country-by-Country Regulatory Checklist more efficiently, ensuring compliance across multiple regions.
Tips for Maintaining and Updating Your Country-by-Country Regulatory Checklist
Regular Updates
Keeping your checklist up to date is essential for staying compliant with ever-changing regulations. Laws and policies often change without much notice, so you need a system to track these updates. Schedule regular reviews of your checklist, such as monthly or quarterly, to ensure all information remains accurate.
Start by monitoring reliable sources like government websites, industry newsletters, or legal advisors for updates. When you find new regulations or changes, add them to your checklist immediately. For example, if a country introduces a new tax law, update the relevant section in your database and adjust deadlines or compliance statuses as needed.
You can also set reminders in Notion to alert you about upcoming deadlines or review dates. Use the "Date" property in your database to create notifications for tasks that need attention. This proactive approach helps you avoid last-minute scrambles and ensures your checklist remains a reliable tool for compliance management.
Tip: Create a "Change Log" in your Notion database to document updates. This log can help you track what was changed, when, and why, providing a clear history of your compliance efforts.
Collaborating with Team Members
Managing a Country-by-Country Regulatory Checklist often requires input from multiple team members. Collaboration ensures that everyone contributes their expertise and helps maintain the accuracy of your checklist. Notion’s collaborative features make it easy to work together, even if your team is spread across different locations.
Assign specific tasks to team members using the "Assigned Team Member" property in your database. For instance, you can designate one person to handle tax regulations and another to focus on labor laws. This division of responsibilities ensures that no area is overlooked.
Encourage team members to leave comments or suggestions directly in Notion. For example, if someone notices a discrepancy in the data, they can flag it for review. This open communication fosters accountability and helps resolve issues quickly.
Regular team meetings can also improve collaboration. Use Notion to create shared agendas or meeting notes, so everyone stays informed. By working together, your team can maintain a checklist that reflects the latest regulations and compliance statuses.
Pro Tip: Use Notion’s "Share" feature to give team members access to specific pages or databases. This feature ensures that everyone has the information they need without overwhelming them with unnecessary details.
Using Notion Integrations for Automation
Automation can save you time and reduce the risk of human error when managing your checklist. Notion offers integrations with tools like Zapier, Make, and Slack, allowing you to automate repetitive tasks and streamline your workflow.
For example, you can use Zapier to automatically update your Notion database when new regulations are published on government websites. This integration eliminates the need for manual data entry and ensures your checklist stays current. Similarly, you can set up Slack notifications to alert your team about upcoming deadlines or changes in compliance statuses.
Another useful integration is with Google Calendar. Sync your Notion database with your calendar to visualize deadlines and plan your tasks more effectively. This integration helps you prioritize your workload and ensures that no critical deadlines are missed.
Note: While automation can simplify many tasks, it’s important to review automated updates regularly. This step ensures that the information added to your checklist is accurate and relevant.
By leveraging Notion’s integrations, you can create a more efficient system for managing your Country-by-Country Regulatory Checklist. Automation not only saves time but also allows you to focus on more strategic aspects of compliance management.
Common Challenges and Solutions for a Country-by-Country Regulatory Checklist
Managing Large Datasets
Handling large datasets can feel overwhelming, especially when managing regulatory requirements across multiple countries. You may encounter challenges such as high dimensionality, which complicates data organization. Aggregating data from various sources often requires normalization to ensure consistency. Missing data or reporting gaps can further hinder your ability to assemble and analyze information effectively.
To address these issues, focus on creating a structured database in Notion. Use properties like "Country" and "Regulation Type" to categorize data systematically. Filters and sorting rules can help you isolate specific information, making it easier to manage. Additionally, consider using Notion integrations to automate data updates and reduce manual errors. By implementing these strategies, you can simplify the complexities of large datasets and maintain a reliable checklist.
Ensuring Data Accuracy
Data accuracy is critical in regulatory environments. Inaccurate information can lead to compliance failures and legal risks. With 44 zettabytes of digital data circulating globally, ensuring accuracy becomes even more challenging. Every day, humans generate 2.5 quintillion bytes of new data, making it essential to verify and validate the information you include in your checklist.
You can improve accuracy by cross-referencing data with trusted sources like government websites or legal advisors. Regular audits of your checklist can also help identify discrepancies. Notion’s collaborative features allow team members to flag errors and suggest corrections, ensuring your data remains up-to-date and reliable. A well-maintained checklist reduces the risk of compliance issues and builds confidence in your regulatory processes.
Training Team Members on Notion
Introducing a new tool like Notion requires proper training to ensure your team uses it effectively. Without adequate guidance, team members may struggle to navigate the platform or update the checklist correctly. This can lead to inconsistencies and missed deadlines.
Start by providing hands-on training sessions that cover the basics of Notion, such as creating entries, using templates, and applying filters. Encourage team members to explore the platform and ask questions. You can also create a Notion page with step-by-step guides and video tutorials for ongoing support. By investing in training, you empower your team to manage the checklist confidently and collaboratively.
Building a Country-by-Country Regulatory Checklist in Notion simplifies compliance management. You’ve learned how to create a database, add key properties, and organize data using views. Start by applying these steps to your own checklist and explore Notion’s features to customize it further. Regular updates and teamwork ensure your checklist stays accurate and effective. By maintaining this system, you’ll stay ahead of regulatory changes and foster a culture of compliance within your organization.
Tip: Begin today and experience how Notion transforms your compliance workflow.
FAQ
What makes Notion better than spreadsheets for compliance tracking?
Notion offers more flexibility than spreadsheets. You can create custom views, add templates, and collaborate in real time. Unlike static spreadsheets, Notion allows you to organize data visually, automate tasks, and centralize updates, making it a dynamic tool for managing compliance.
Can I use Notion offline to access my checklist?
Notion supports offline access through its desktop and mobile apps. You can view and edit your checklist without an internet connection. Once you reconnect, all changes automatically sync to ensure your data stays updated across devices.
How do I ensure my checklist stays accurate over time?
Regularly review and update your checklist. Use reliable sources like government websites for regulatory changes. Assign team members to monitor updates and set reminders in Notion for periodic reviews. A "Change Log" can also help track modifications for better accuracy.
Is Notion secure for storing sensitive compliance data?
Notion uses encryption to protect your data. It encrypts data both in transit and at rest. For added security, you can control access permissions, ensuring only authorized team members can view or edit sensitive information.
Can I integrate Notion with other tools for automation?
Yes, Notion integrates with tools like Zapier, Make, and Slack. These integrations let you automate tasks such as updating your checklist, sending deadline reminders, or syncing with Google Calendar. Automation saves time and reduces manual errors.
Tip: Explore Notion’s API for custom integrations tailored to your workflow.
See Also
Understanding Cross-Border Compliance: VAT, Customs, And Data Rules
Creating A Data-Centric Stage-Gate Process For Retail Launches
Developing A SKU Detection Model: Tips On Tools And Data