Connecting Tableau to Lakehouse
Tableau is a Business Intelligence (BI) product. Lakehouse supports connecting data to Tableau for visual analysis. You can leverage Tableau's simple drag-and-drop interface to customize views, layouts, shapes, colors, and more to present your own data perspective. This article explains how to connect Tableau using the Lakehouse JDBC driver and perform visual data analysis.
Background Information
Tableau Desktop is a software application developed by Tableau based on breakthrough technology from Stanford University. It helps you vividly analyze virtually any structured data and generate beautiful charts, graphs, dashboards, and reports within minutes. For more information about Tableau Desktop, see Tableau Desktop.
Prerequisites
Before starting, ensure you meet the following conditions:
- Lakehouse service is activated.
- Lakehouse JDBC Driver has been downloaded.
- Tableau has been downloaded and installed. This article uses Professional Edition 2024.3.1 as an example.
- The Lakehouse-provided Tableau Plugin
Connecting to Lakehouse
Step 1: Place the Lakehouse JDBC Driver
Place the downloaded Lakehouse JDBC Driver JAR file in the corresponding directory for Tableau Desktop based on your operating system:
- Windows: C:\Program Files\Tableau\Drivers
- macOS: ~/Library/Tableau/Drivers
- Linux: /opt/tableau/tableau_driver/jdbc
Step 2: Place the Lakehouse Tableau Plugin
Download the Lakehouse-provided Tableau Plugin. This plugin is developed based on the Tableau official plugin documentation.
Place the downloaded plugin in the corresponding directory for Tableau Desktop:
- Windows: C:\Users\[Windows User]\Documents\My Tableau Repository\Connectors
- macOS: /Users/[user]/Documents/My Tableau Repository/Connectors
- Linux: /opt/tableau/connectors The example in this article uses macOS, with the location: /Users/xxx/Documents/My Tableau Repository/Connectors
Step 3: Launch Tableau
- Launch Tableau Desktop. Since the plugin above has not been digitally signed, signature verification must be disabled on startup.
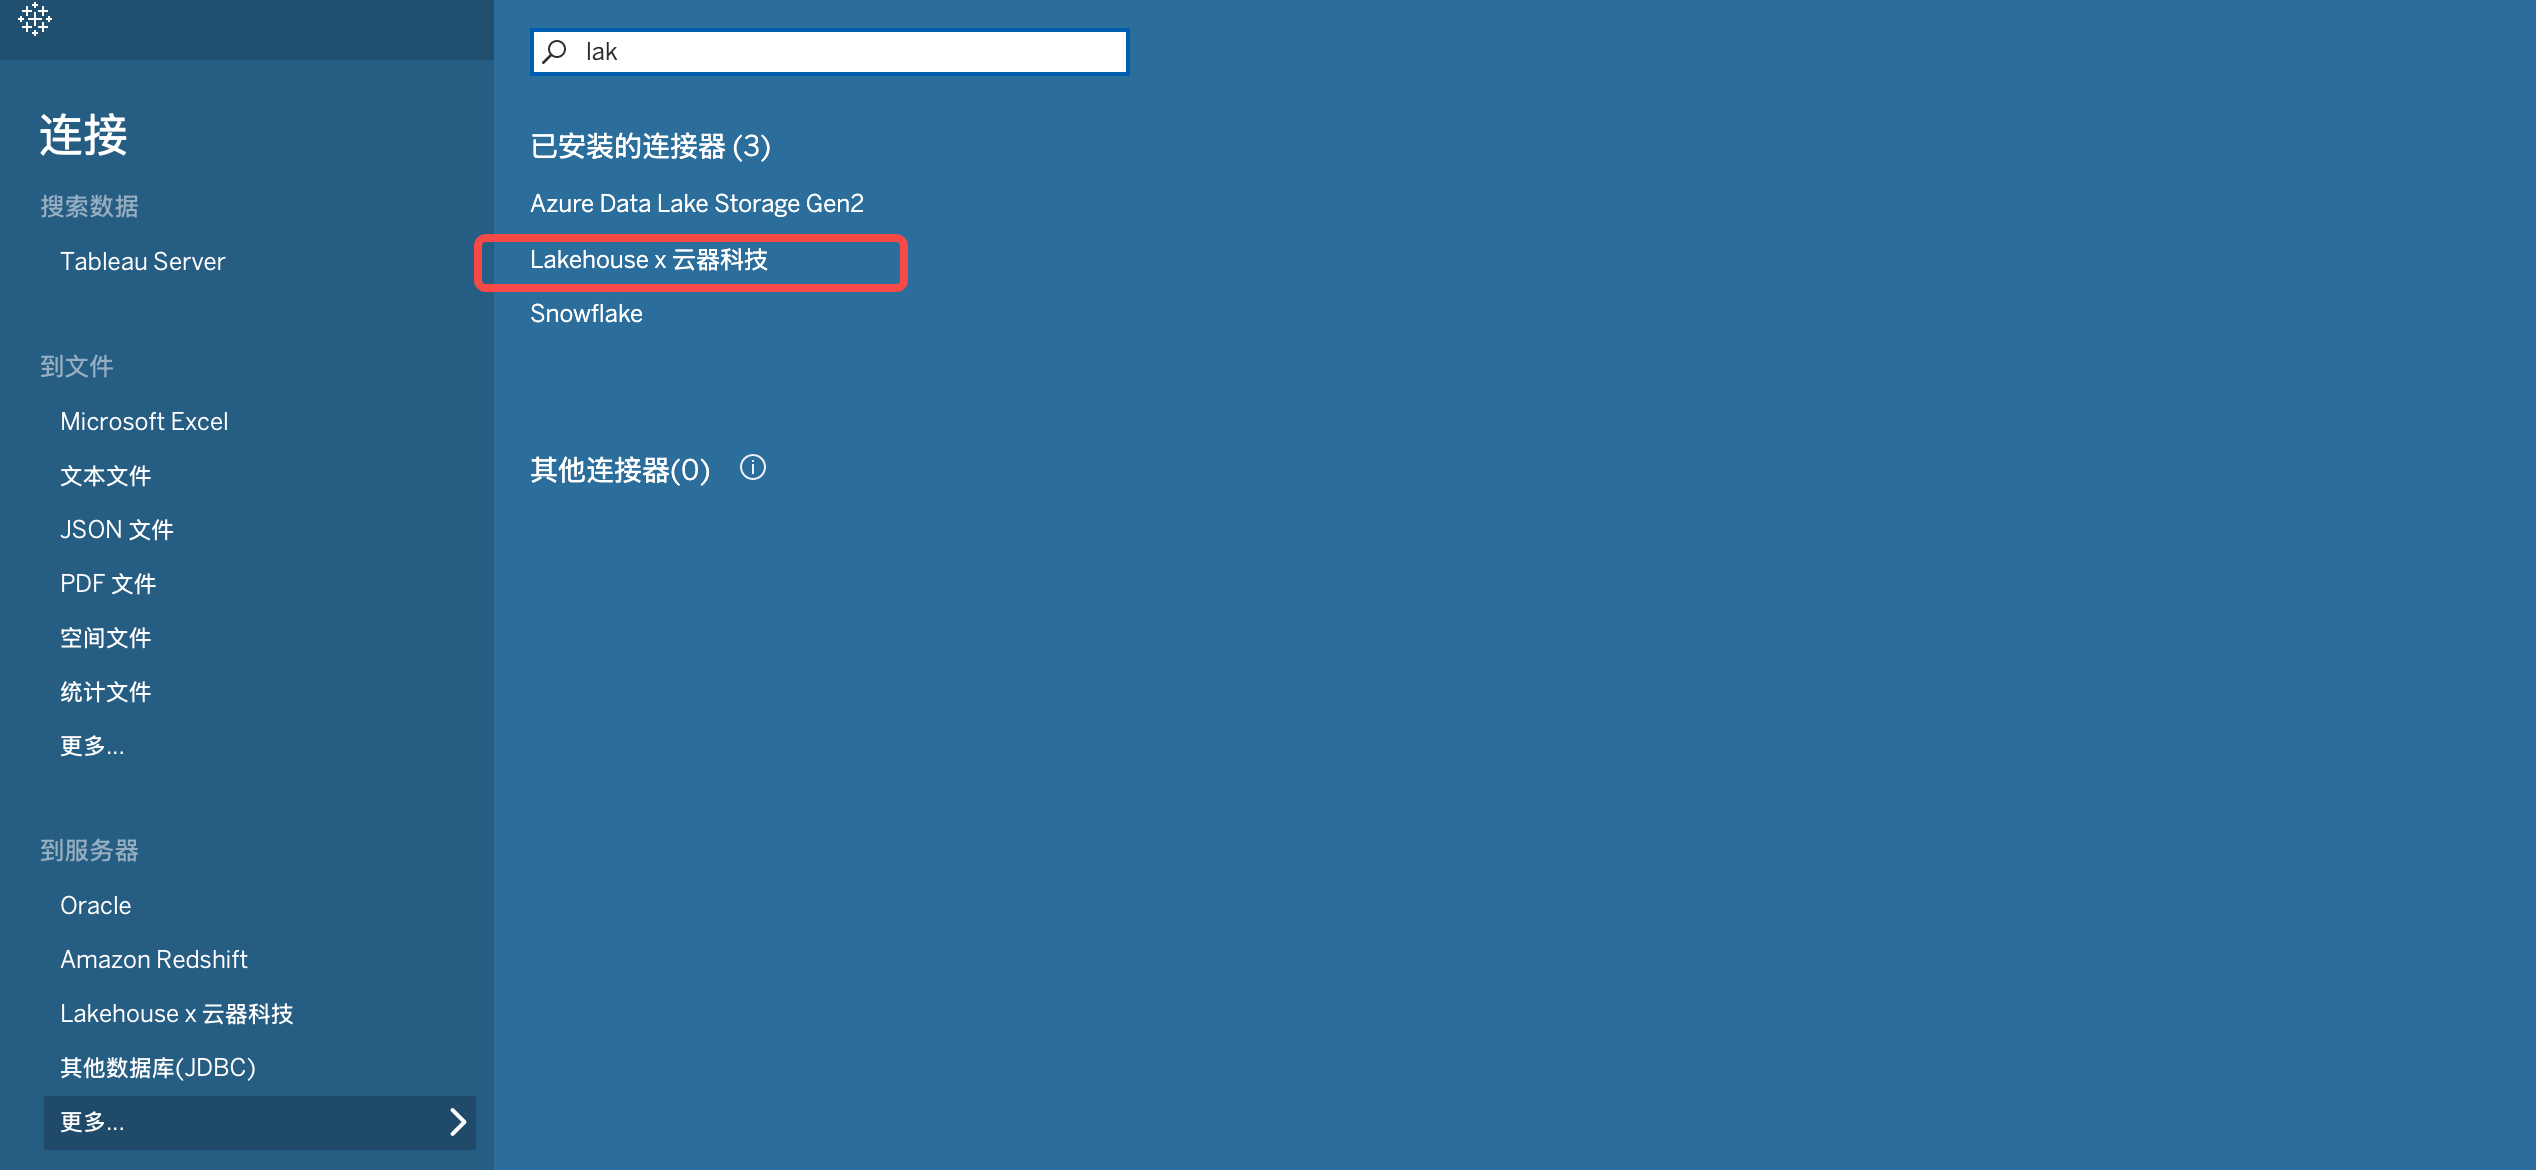
- In the left navigation bar under To Server, select More... > Lakehouse by Singdata.
- In Lakehouse by Singdata, configure the parameter information:
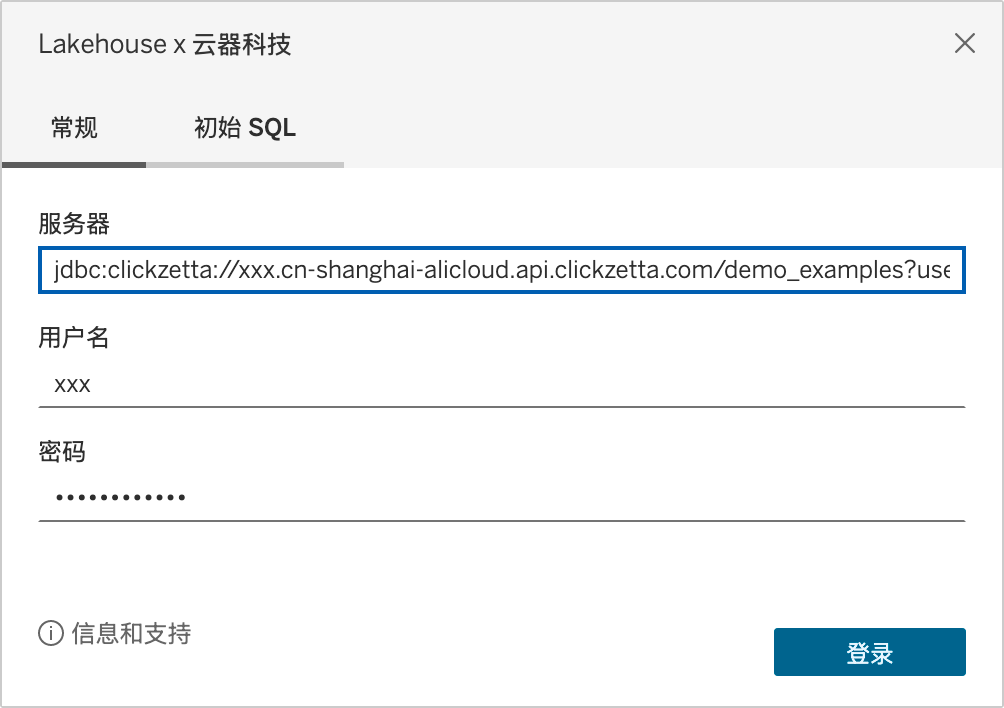
| Parameter | Required | Description |
|---|---|---|
| Server | Y | You can find the JDBC connection string in Lakehouse Studio Administration -> Workspaces |
| Username | Y | Username |
| Password | Y | Password |
- Click Sign In to enter the Tableau Desktop workspace.
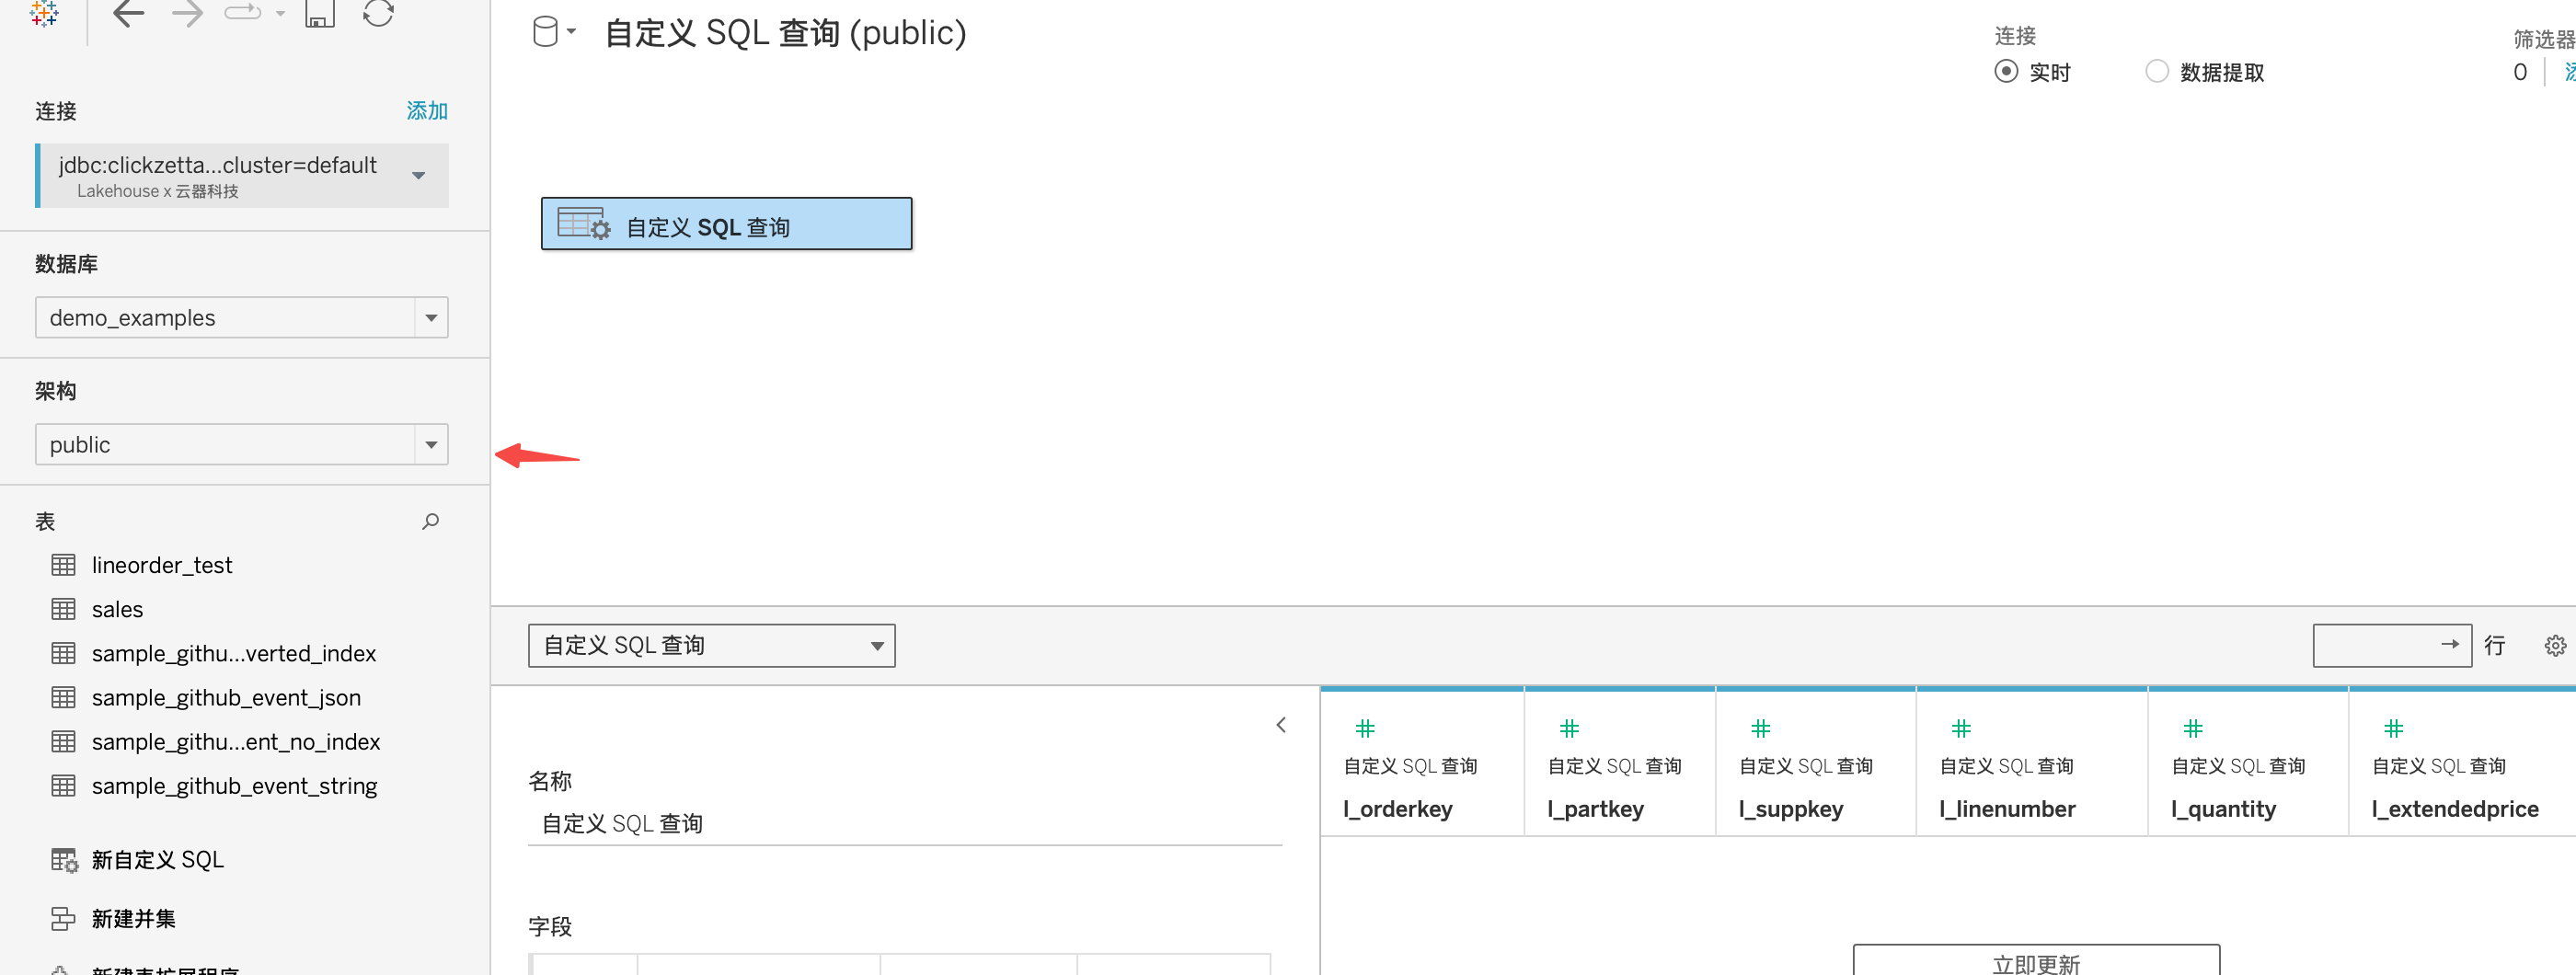
- In the Schema dropdown list on the left, select the target Lakehouse Schema.
Step 4: Query and Analyze Data Using Tableau
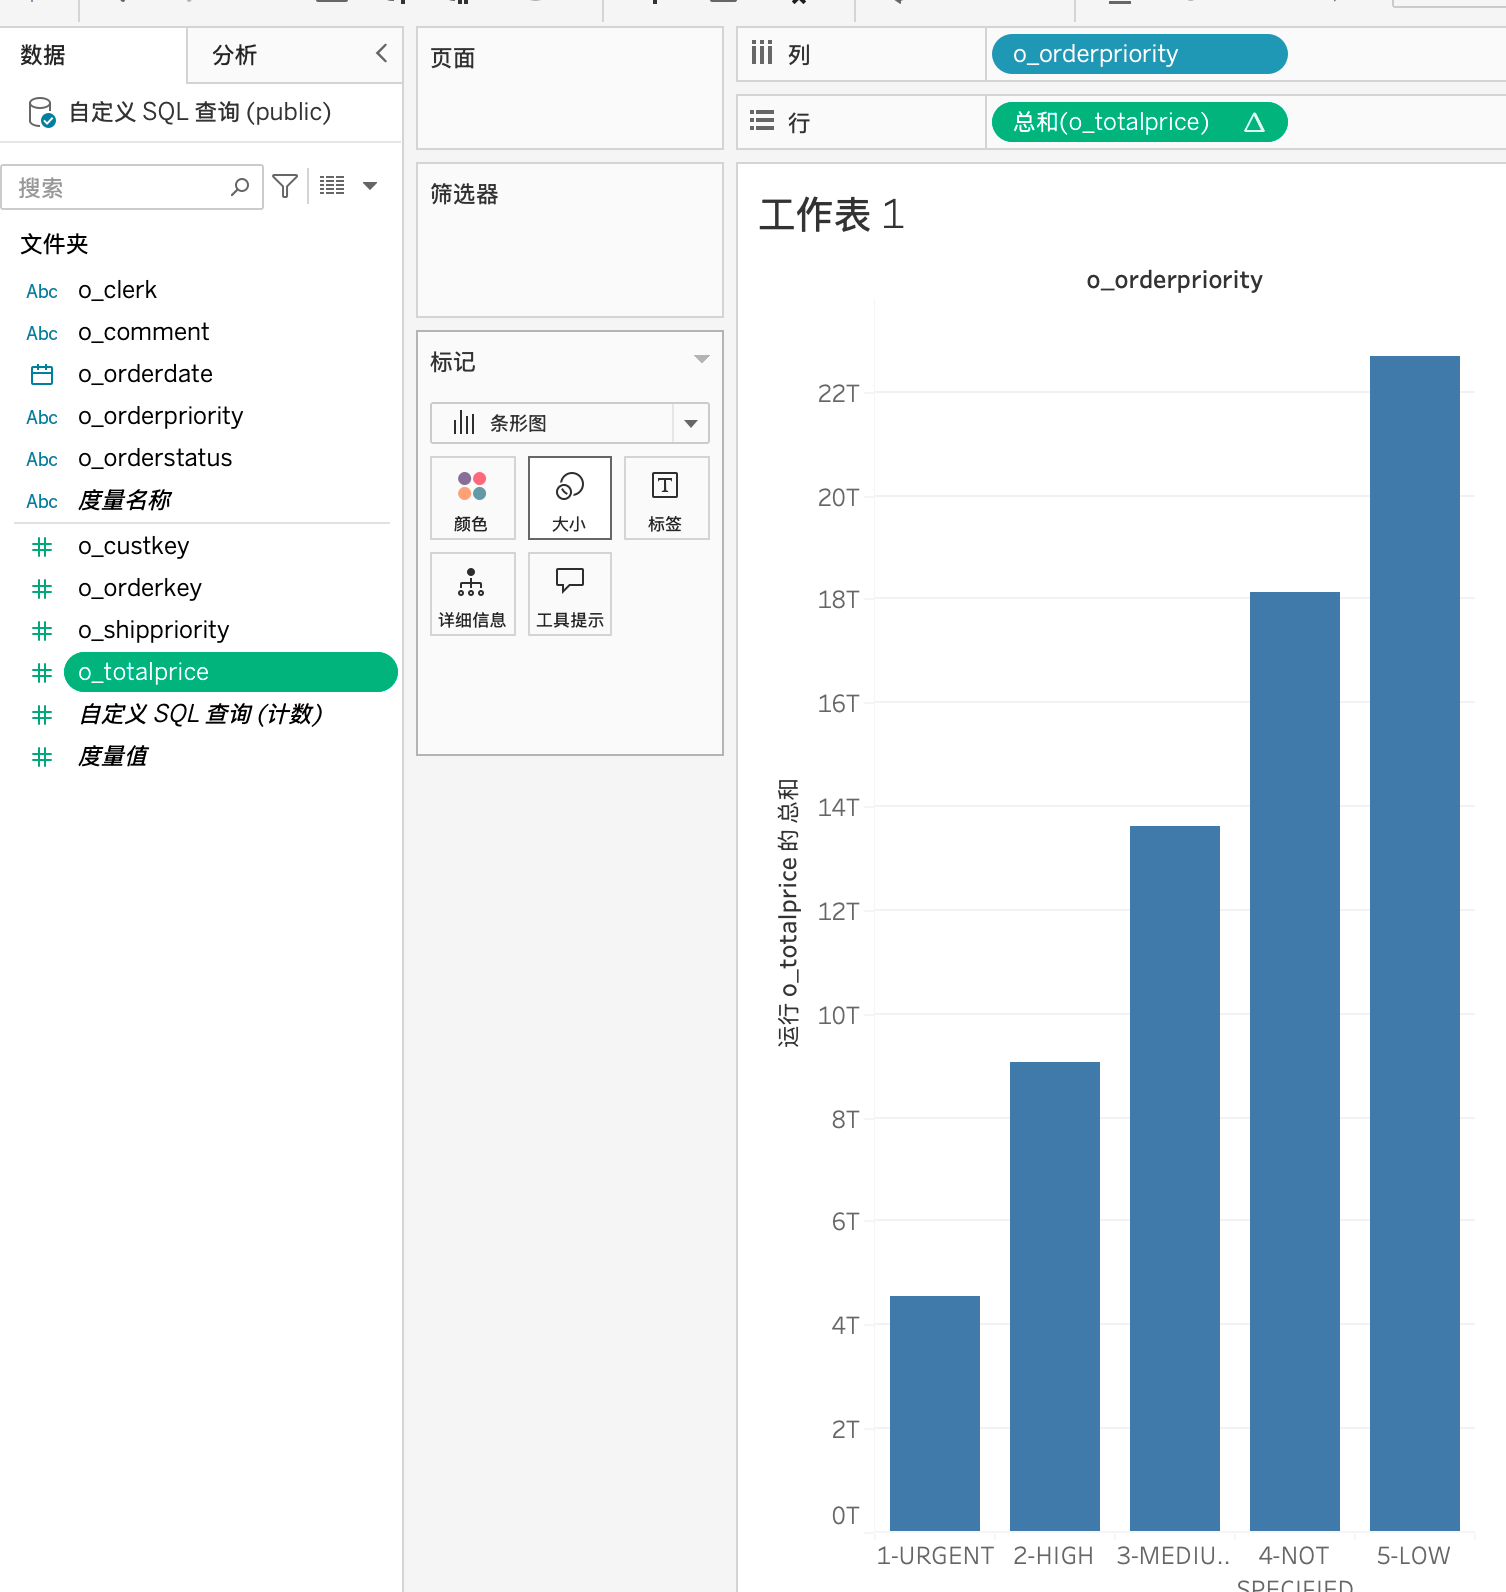
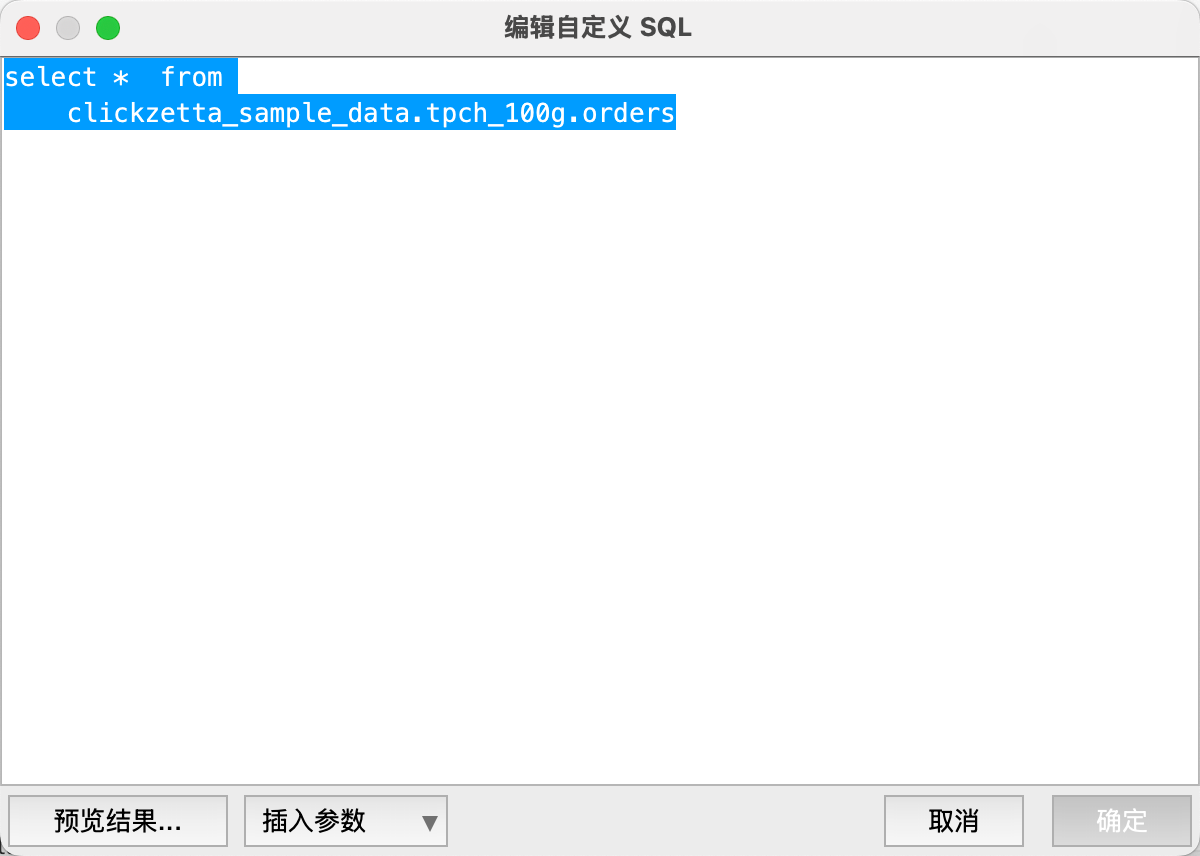
This example uses the clickzetta_sample_data.tpch_100g.orders table from the public dataset to analyze data.
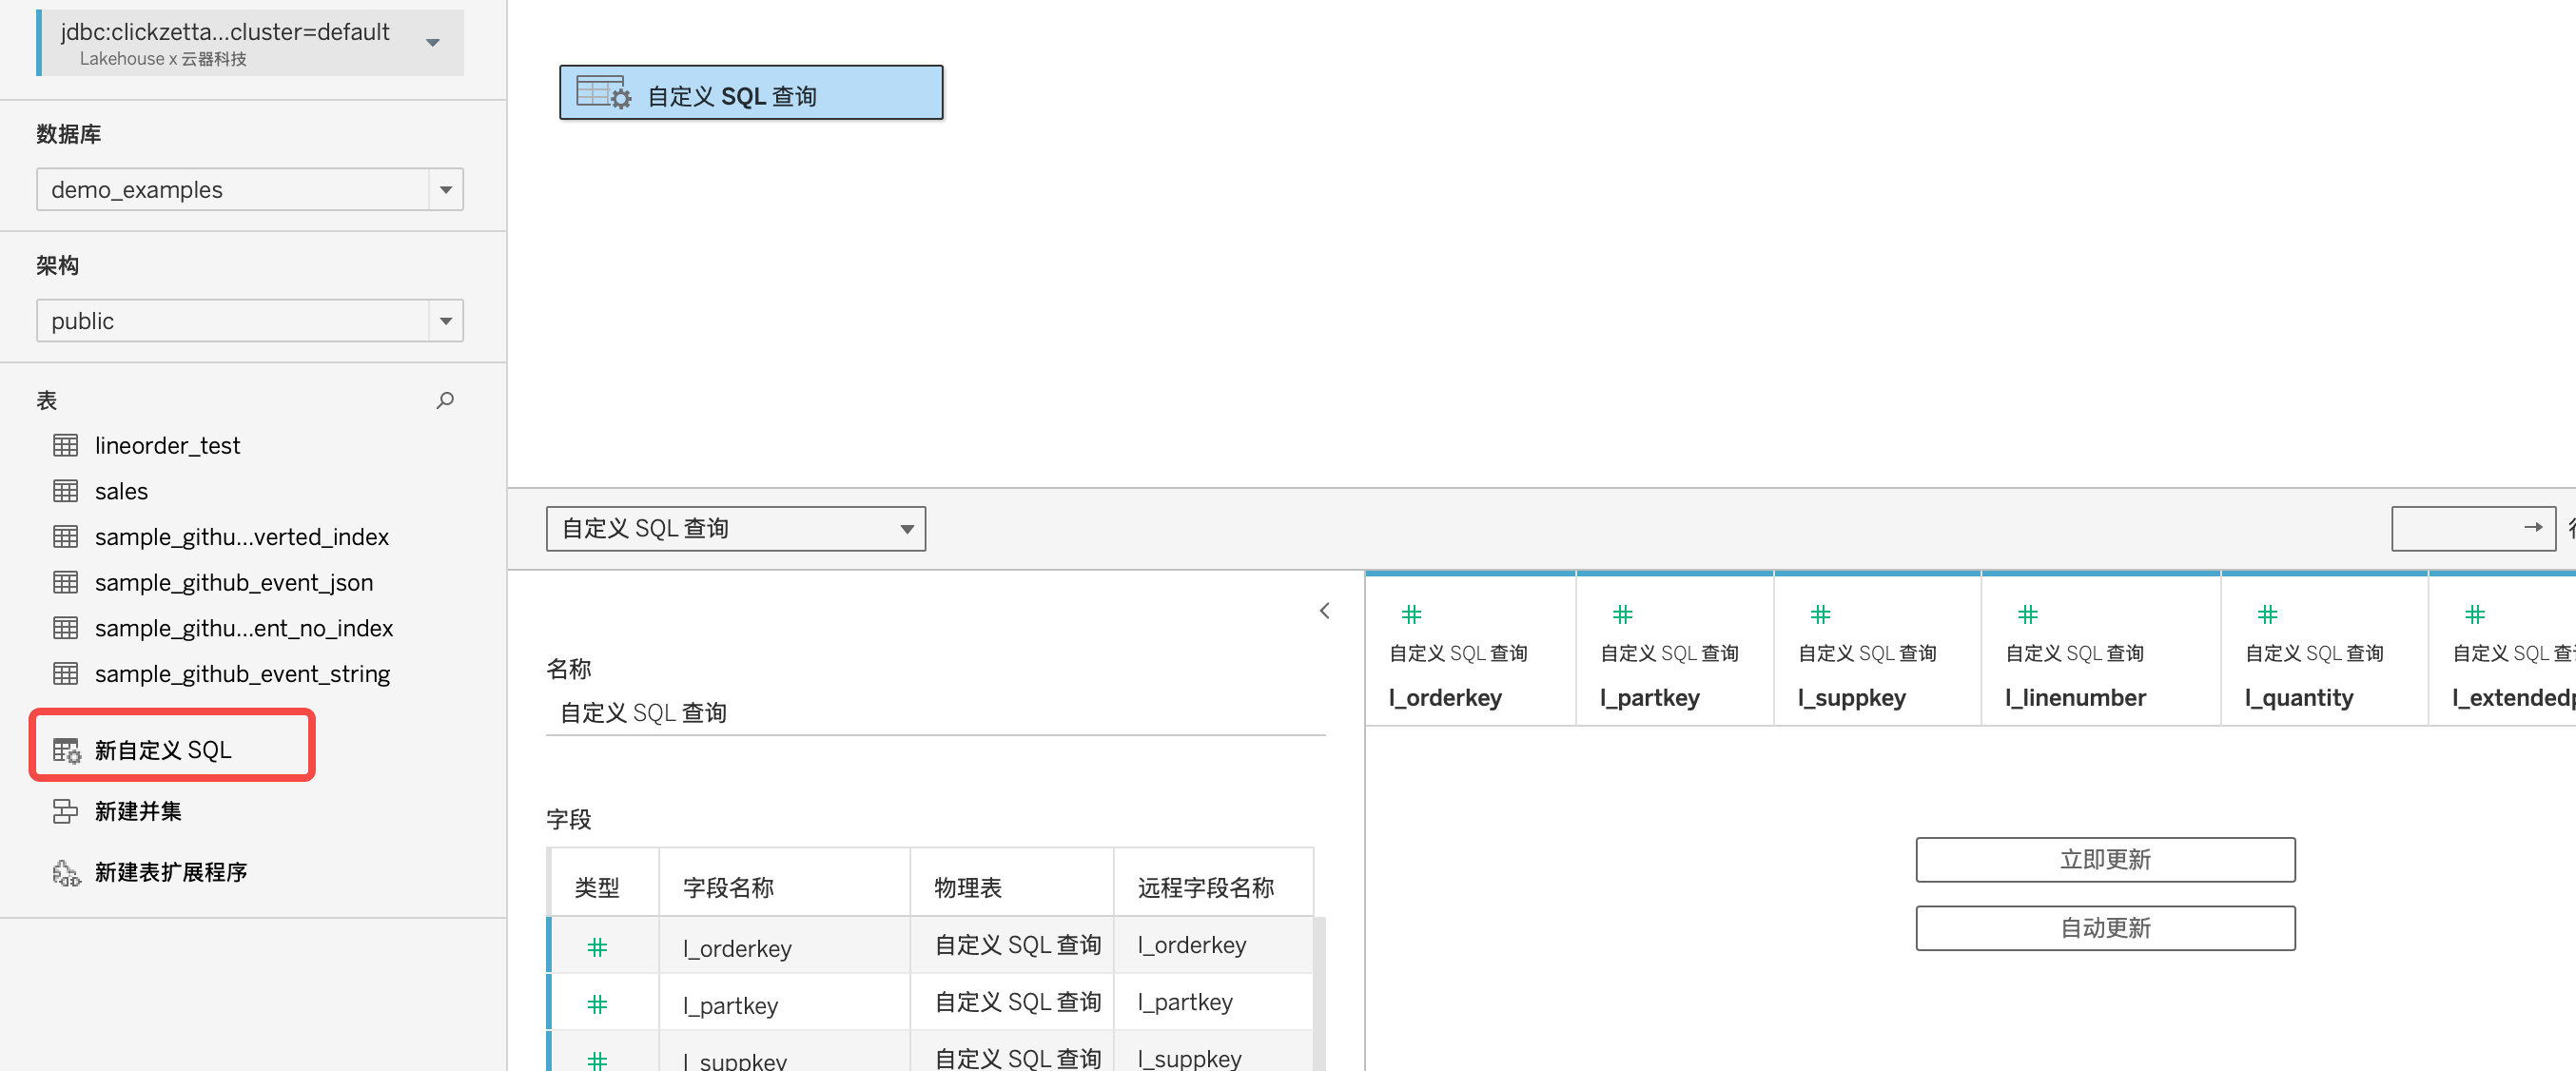
Double-click New Custom SQL:
Enter the following and click OK:
Click Sheet to analyze the dataset from the clickzetta_sample_data.tpch_100g.lineitem table: