Connecting MindsDB to Singdata Lakehouse
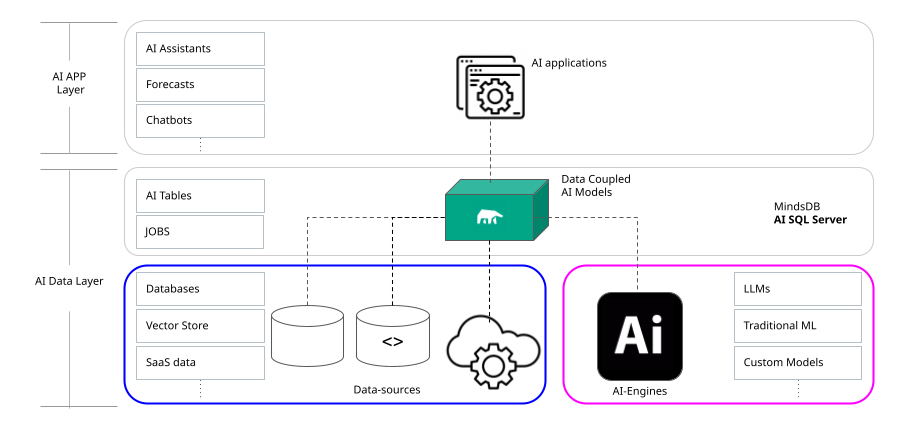
MindsDB enhances SQL with AI building blocks, allowing developers to create AI applications that need to be coupled with real-time data. One of MindsDB's innovations is the ability to treat AI (models, agents, knowledge bases) as virtual tables, enabling you to SELECT FROM, JOIN, and FINE-TUNE from Singdata Lakehouse data sources using any AI engine.
Method 1: Running and Configuring MindsDB on Docker
Install Docker
If you haven't installed Docker yet, please follow the instructions to install Docker on your computer. To ensure Docker has been successfully installed on your computer, test if Docker is running properly as follows:
You should see the Hello from Docker! message. Otherwise, please refer to the Docker's getting started documentation.
Docker for Mac Users - RAM Allocation Issue
By default, Docker for Mac allocates 2 GB of RAM, which is not sufficient to deploy MindsDB using Docker. We recommend increasing the default RAM limit to 8 GB. For more information on how to increase the allocated memory, please refer to the Docker Desktop for Mac user manual.
Install and Start MindsDB
Please note that this MindsDB installation method requires at least 8 GB of RAM and 20 GB of available storage space.
Download the docker compose file locally:
https://github.com/clickzetta/mindsdb-clickzetta/blob/staging/docker-compose-up-only.yml
Run the following command to start MindsDB in Docker.
Now, you can access the following:
MindsDB Studio:
Using MySQL with MindsDB
Next Steps
Now that you have installed and started MindsDB locally in a Docker container, next, learn how to create and train models using the CREATE MODEL statement. In the MindsDB SQL section, you will find a comprehensive overview of the SQL syntax provided by MindsDB. We also provide the Mongo-QL syntax documented in the MindsDB Mongo-QL section.
You can connect MindsDB to different clients, including the MySQL CLI.
Check out the Use Cases section for tutorials covering large language models, natural language processing, time series, classification, and regression models.
Method 2: Setting up MindsDB via pip and GitHub Source Code
This section describes how to deploy MindsDB from the source code. If you want to contribute to our code or debug MindsDB, this is the preferred way to use MindsDB.
To successfully install MindsDB, use the 64-bit version of Python. Also, ensure Python >= 3.8 and pip >= 20.3.
Installation
Please note that this MindsDB installation method requires at least 6 GB of available storage space.
-
Clone the MindsDB repository:
-
Create a new virtual environment:
-
Activate the virtual environment:
-
Install dependencies:
-
Start MindsDB:
By default, MindsDB will always start the http and mysql APIs.
If you want to use the Mongo API, you need to provide it as a parameter to --api. You can do it as follows:
- Now, you can access the following:
MindsDB Studio:
Using MySQL with MindsDB
Dependencies
By default, many data or ML integration dependencies are not installed.
If you want to use data or ML integration dependencies that are not available by default, install them by running the following command:
You can find all available handlers here.
Troubleshooting
Pip and Python Versions
Currently, MindsDB supports Python versions 3.8.x, 3.9.x, 3.10.x, and 3.11.x.
To successfully install MindsDB, use the 64-bit version of Python. Additionally, ensure Python >= 3.8 and pip >= 20.3. You can check the pip and python versions by running the commands pip --version and python --version.
Please note that depending on your environment and the installed pip and python packages, you may have to use pip3 instead of pip or python3.x instead of py. For example, pip3 install mindsdb instead of pip install mindsdb.
How to Avoid Dependency Issues
Use pip to install MindsDB in a virtual environment to avoid dependency issues.
How to Avoid Common Errors
MindsDB requires approximately 3 GB of available disk space to install all its dependencies. Ensure a minimum of 3 GB of disk space is allocated to avoid the IOError: [Errno 28] No space left on device while installing MindsDB error.
First, activate the virtual environment where MindsDB is installed to avoid the No module named mindsdb error.
If you encounter the This site can't be reached. 127.0.0.1 refused to connect. error, check the MindsDB server console to see if the server is still in the starting phase. However, if the server has started but you still receive this error, report it on our GitHub repository.
How to Resolve ImportError: failed to find libmagic Issue
If you encounter the ImportError: failed to find libmagic error, you should manually install libmagic by running one of the following commands:
Check Singdata Lakehouse Handler Status
Visit MindsDB Studio Check Singdata Lakehouse Handler status
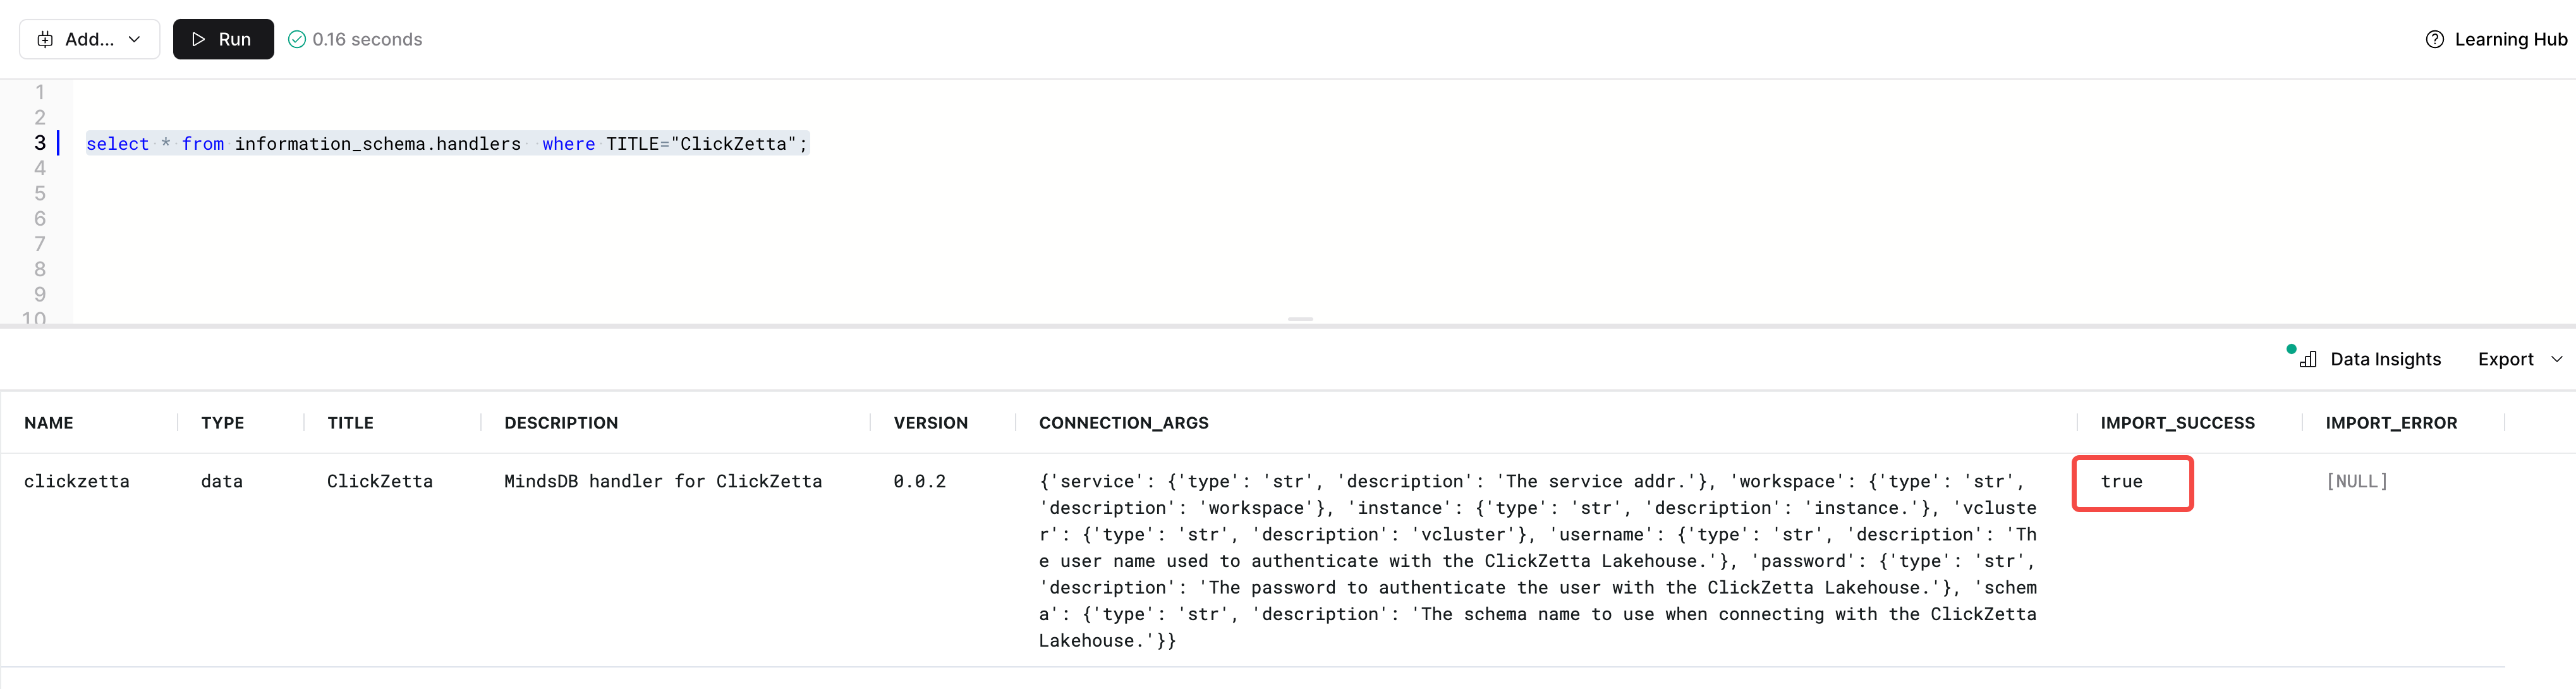 IMPORT_SUCCESS is true, indicating that the Singdata Lakehouse Handler is working properly.
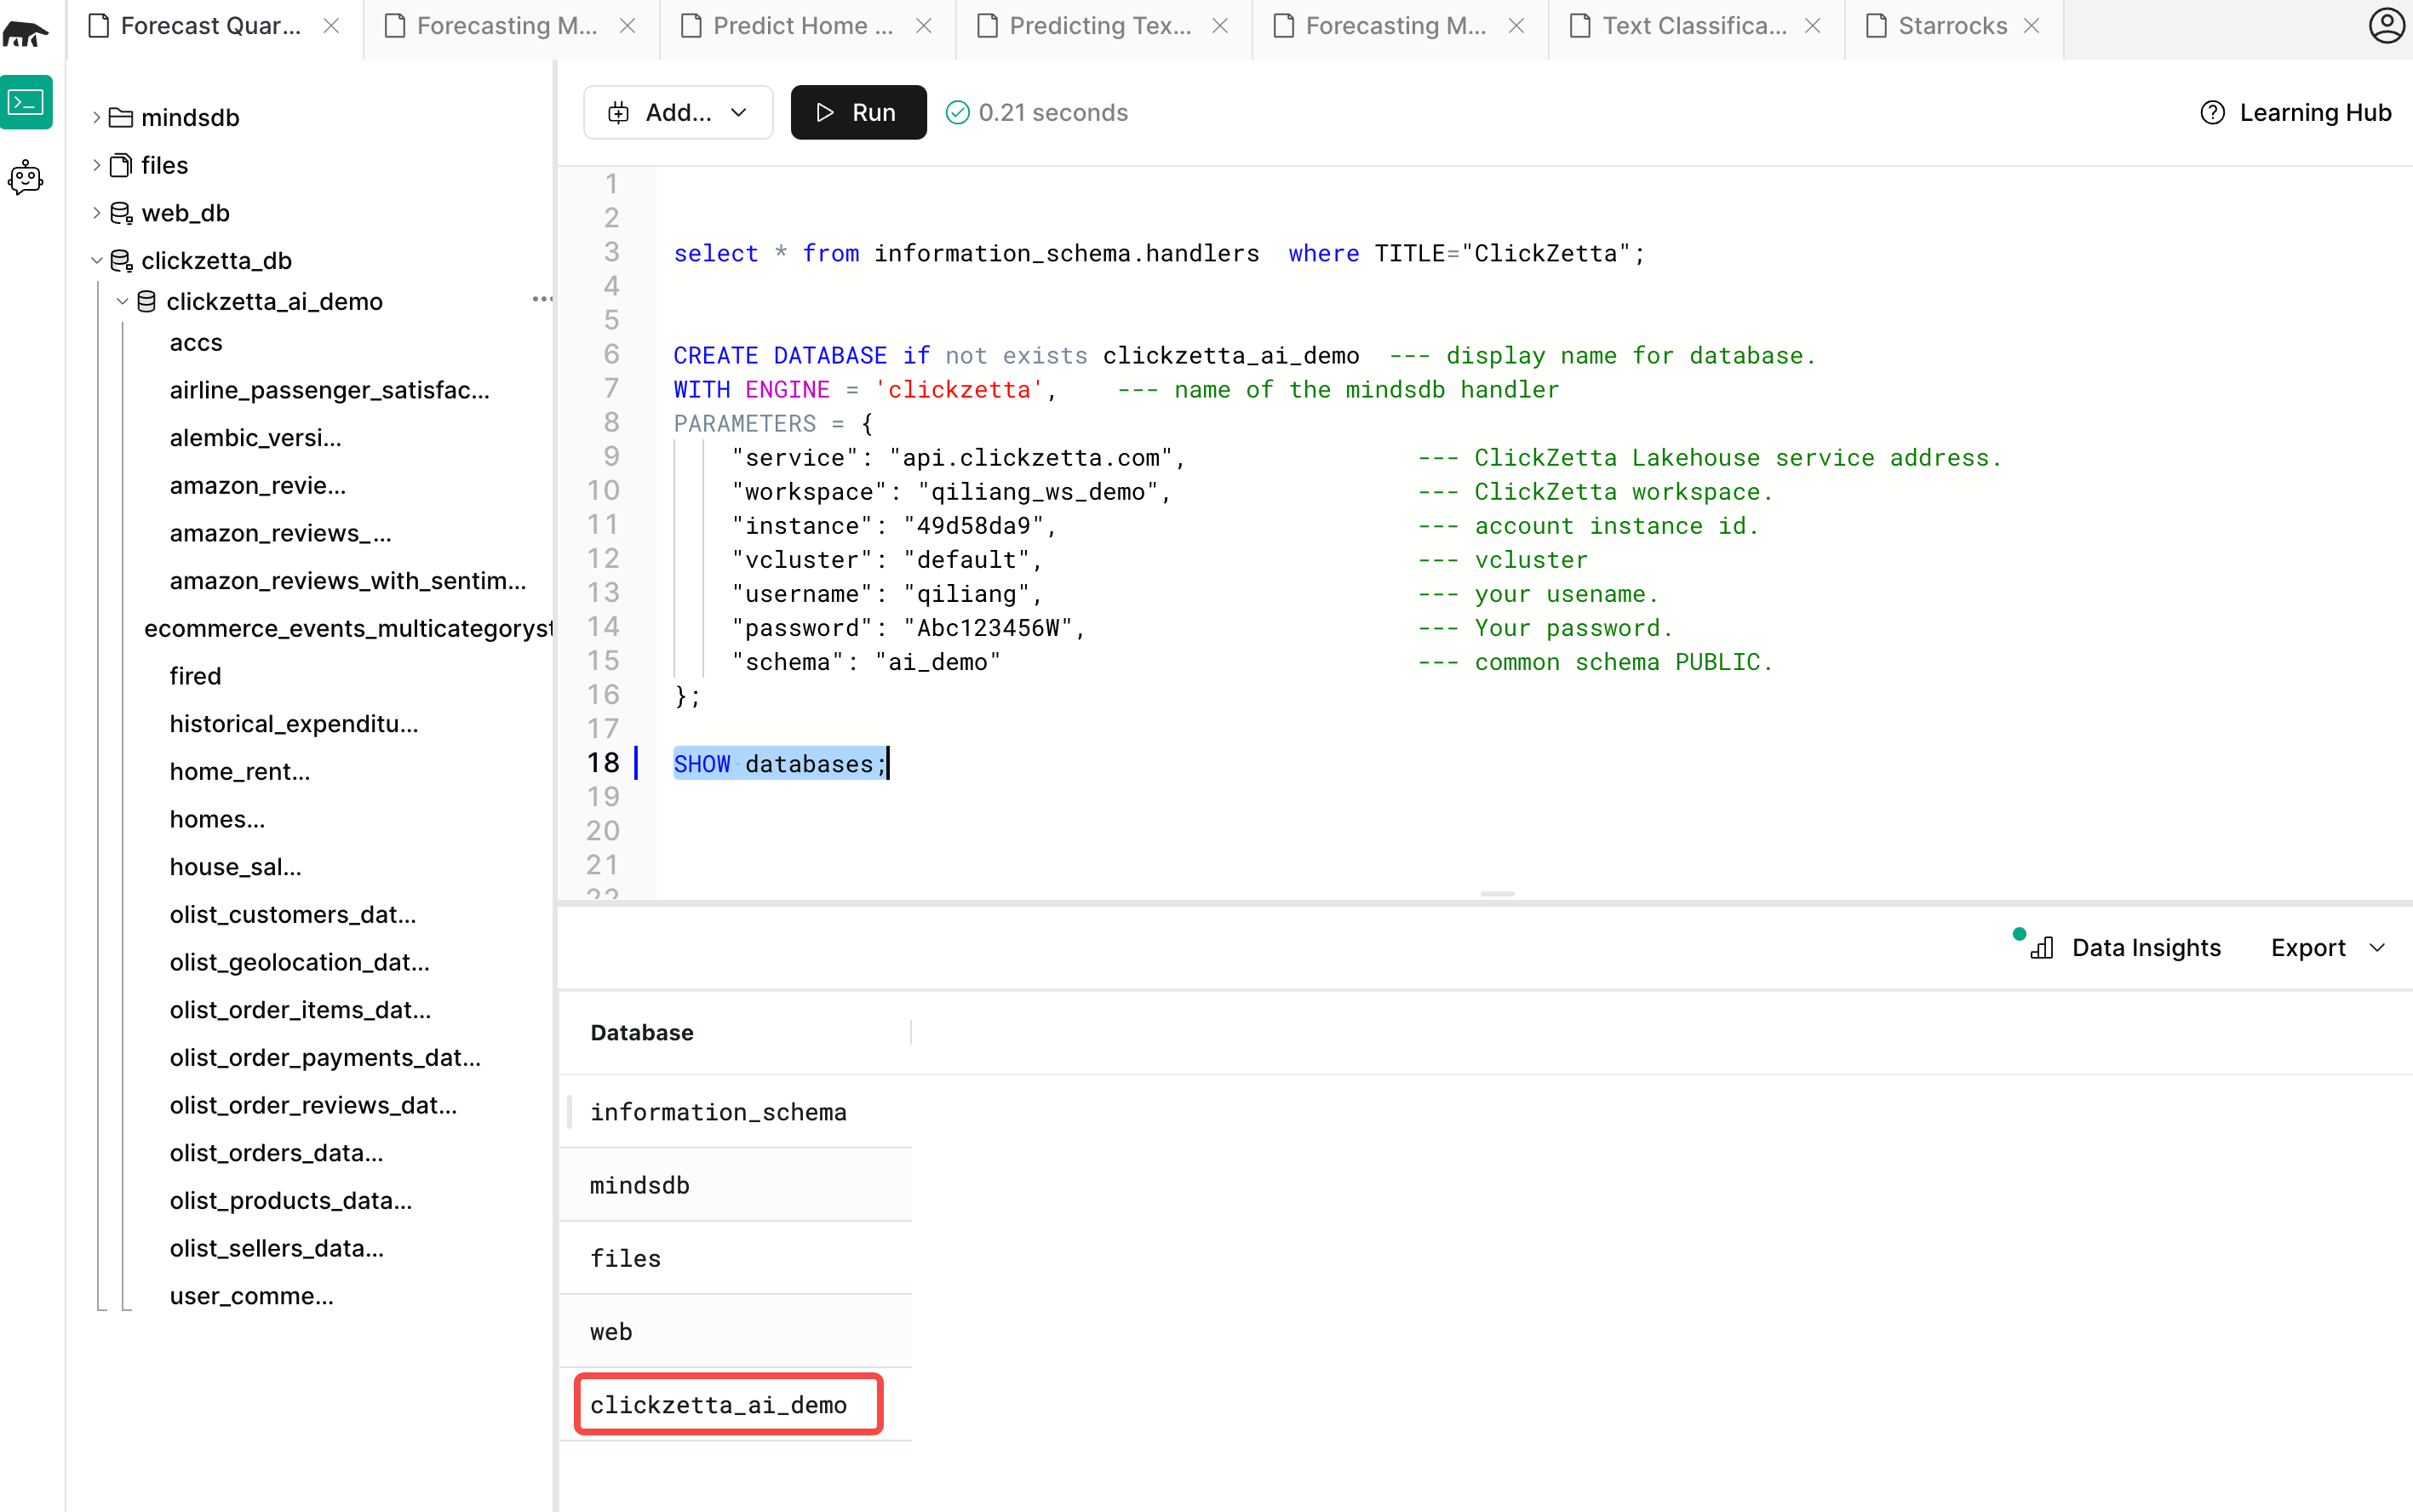
Create a project and Singdata Lakehouse database
Check the creation result, showing that it has been created:
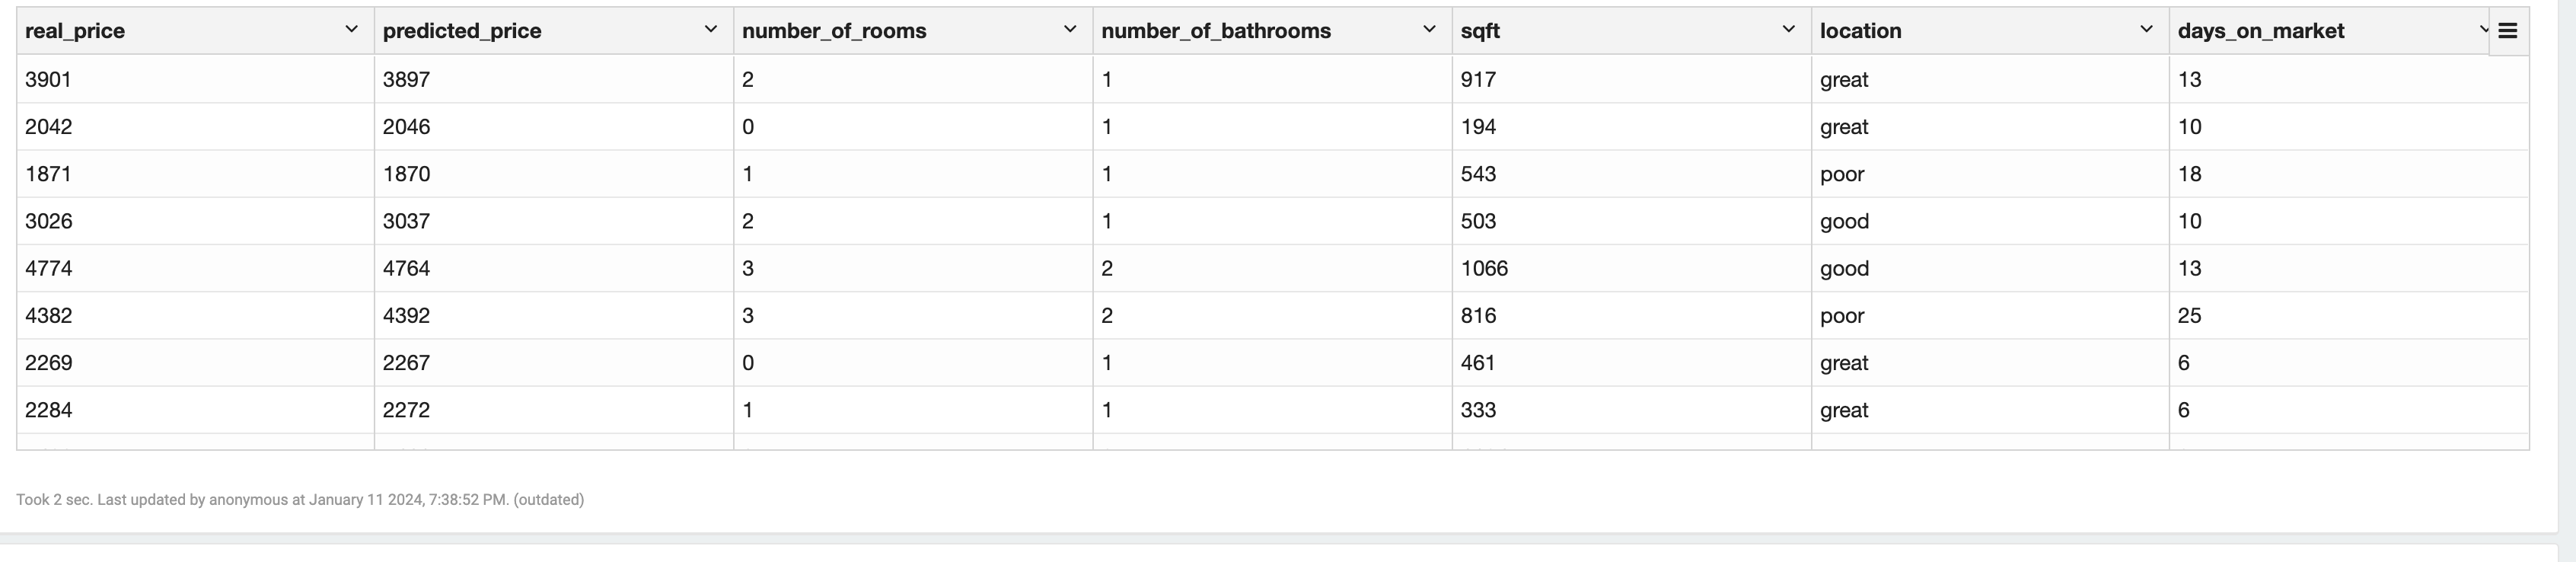
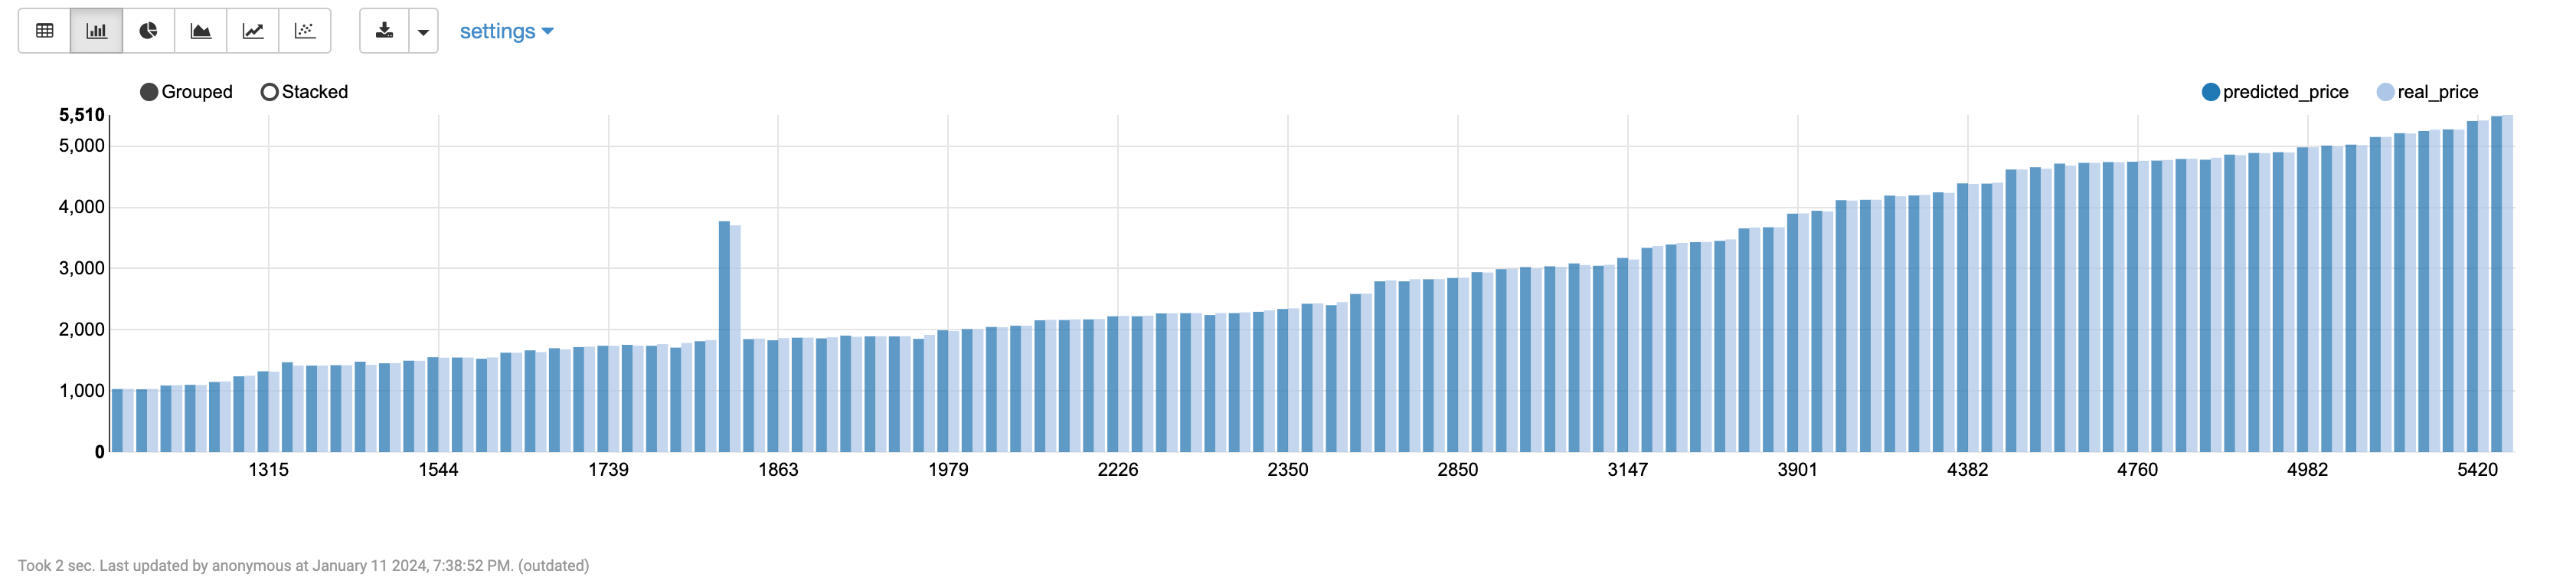
Application Example
Predicting House Rental Prices