Develop and Deploy Dynamic Tables
【Preview Release】This feature is currently in an invitation-only preview phase. If access is required, please contact our technical support team for assistance.
Web-IDE provides a wizard-based dynamic table task template that supports collaborative development, improving the efficiency of dynamic table tasks. It also integrates with task operations and monitoring alarm functions, enhancing production-oriented operation and monitoring capabilities.
The development process of dynamic tables in Web-IDE is assisted by a visual wizard to help users write the necessary content for creating dynamic tables. For example: the schema where the dynamic table is located, the name of the dynamic table, the refresh cycle, the query logic of the dynamic table, etc. After the dynamic table script is completed, when the task is "submitted," the system will create the dynamic table at the target location based on the script content, and the refresh strategy configuration of the dynamic table will be automatically scheduled, thereby achieving the deployment and launch of the dynamic table task.
Step 1: Create a new dynamic table task
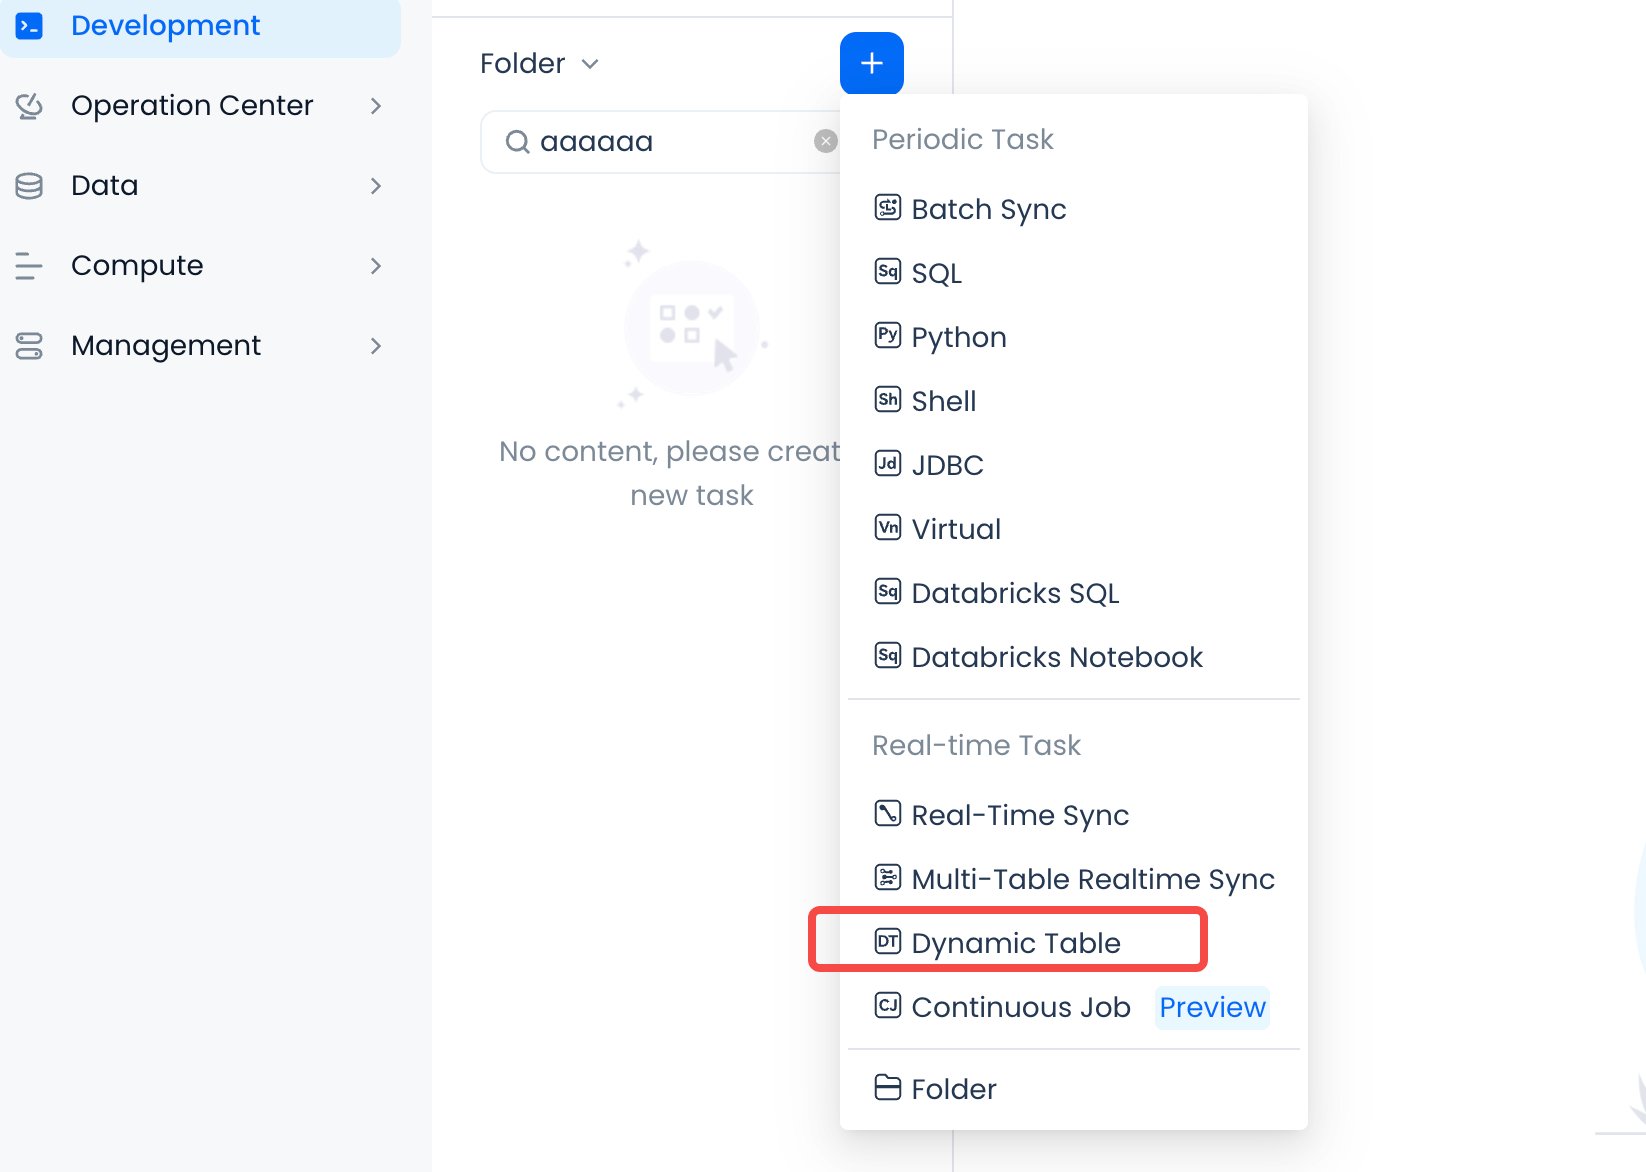
You can add a "dynamic table" type task by creating a new task in the Studio IDE development environment.
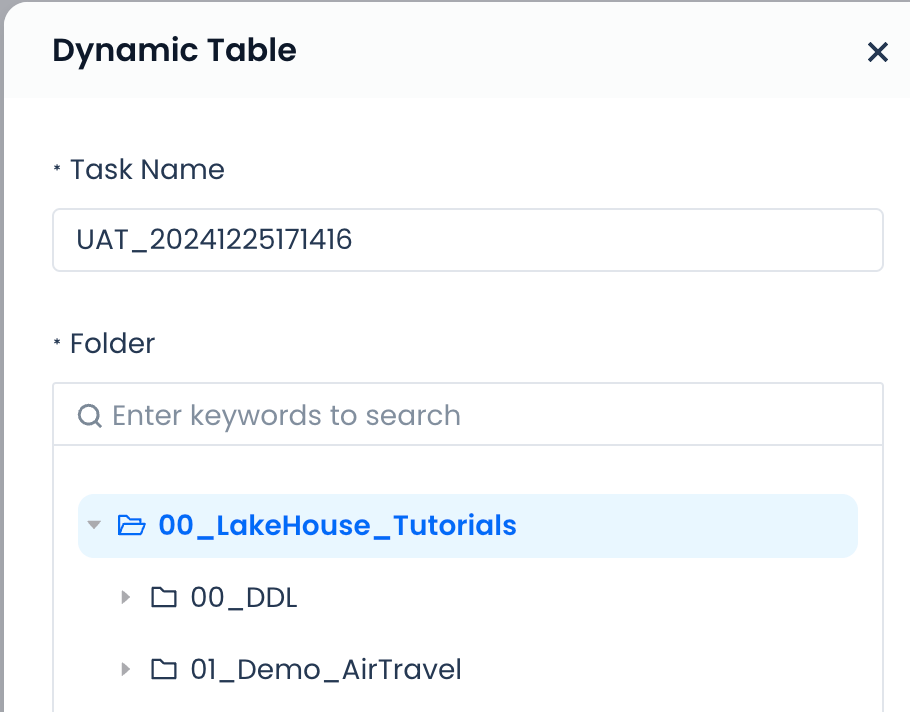
Specify the task name and save location for the task code when creating a new task.
Step 2: Name the dynamic table and write the SELECT query statement for the dynamic table
First, fill in the schema location where the dynamic table will be saved after submission and the name of the dynamic table.
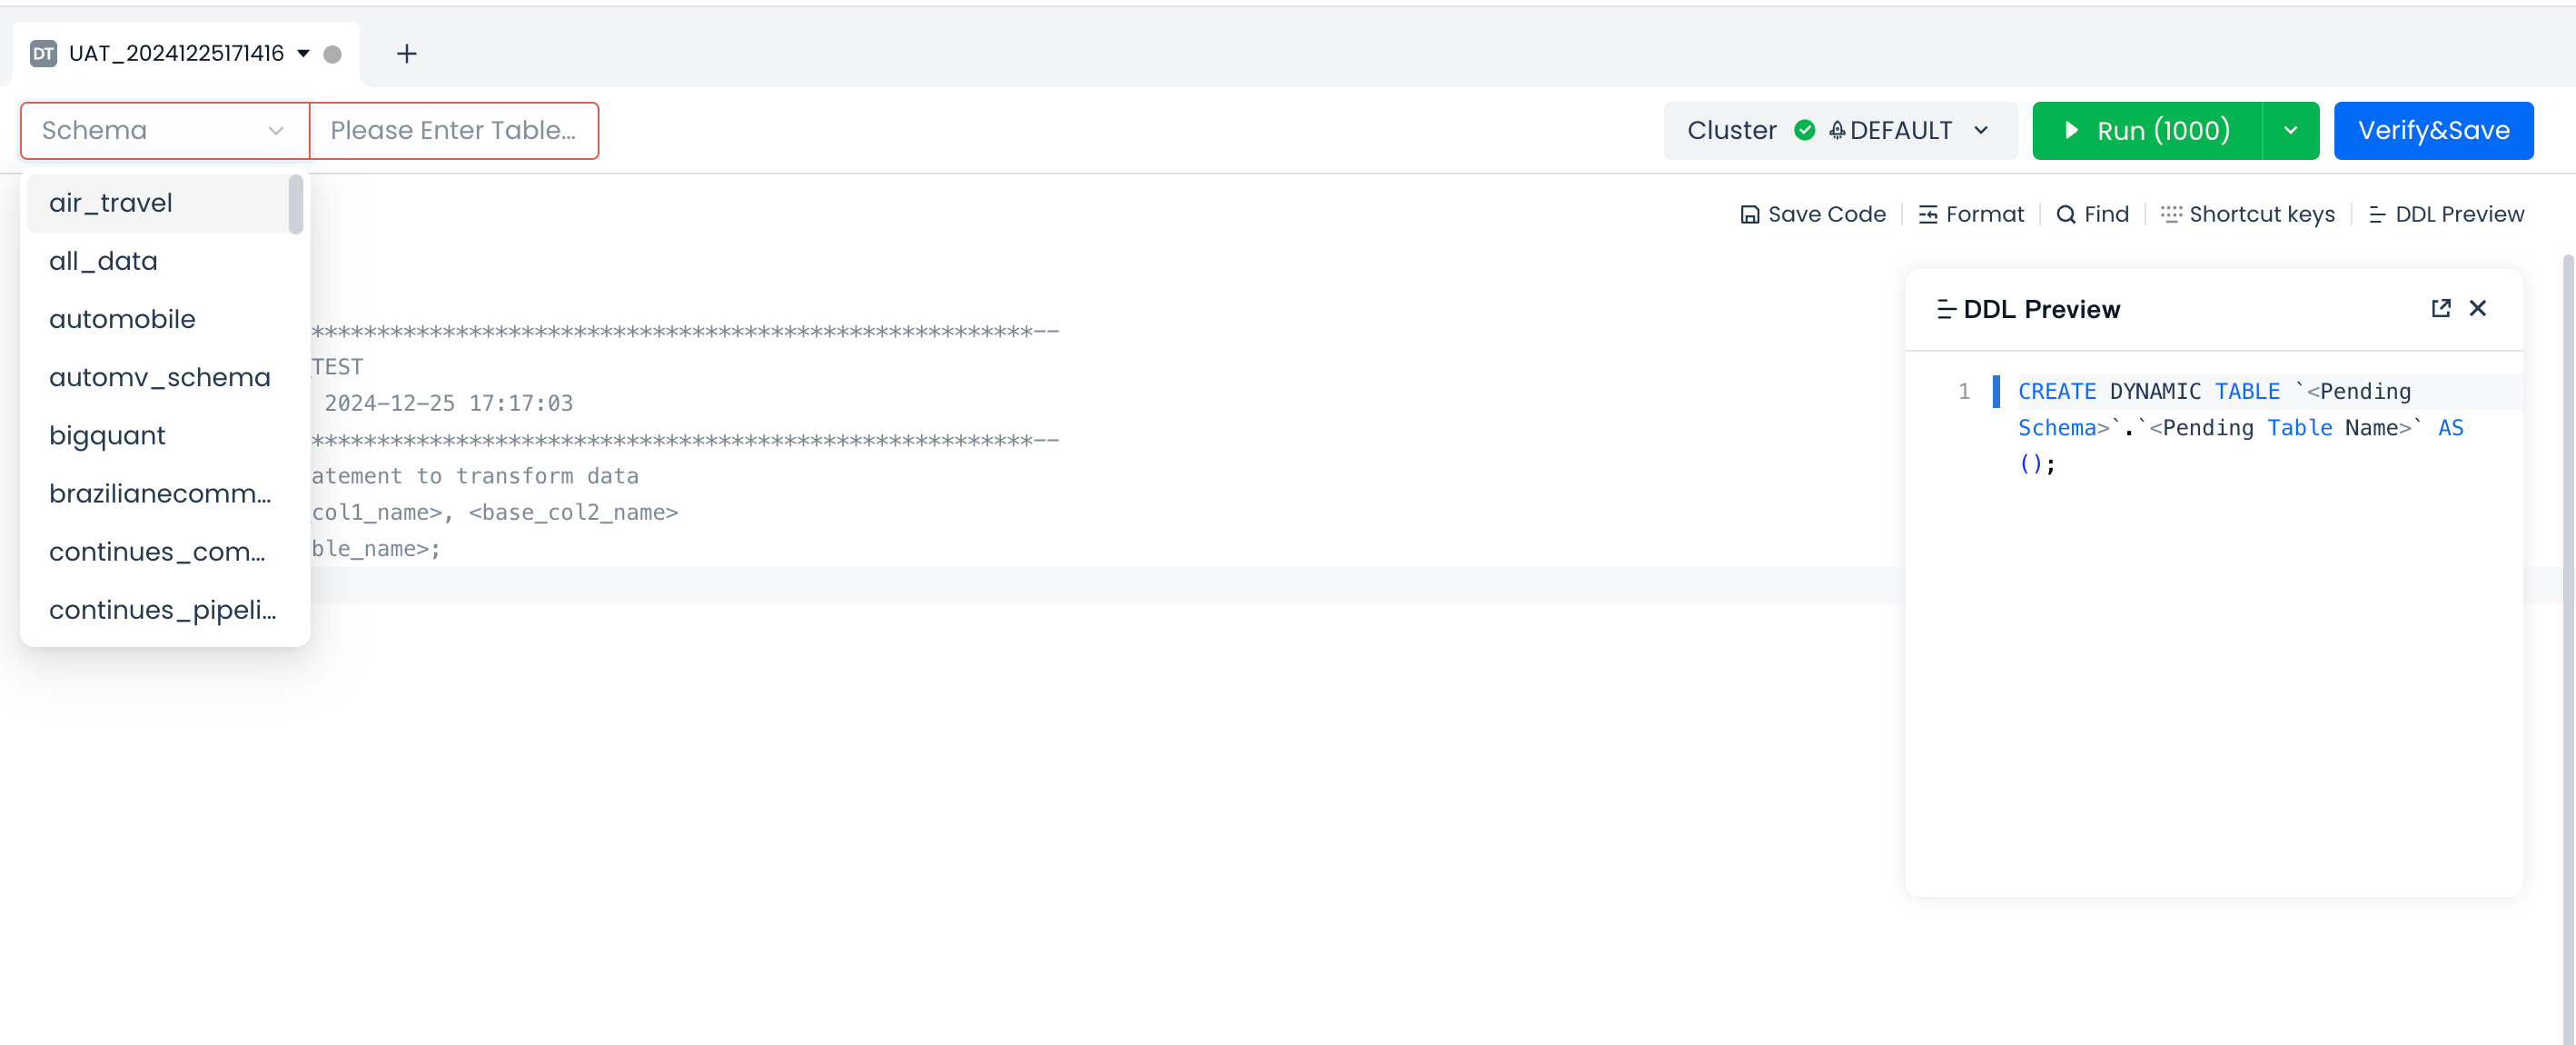
Next, write and test the query statement for the dynamic table in the SQL code area.
Write the SELECT statement for processing and transformation in the SQL code area, set the cluster name for running the SQL (when the dynamic table is deployed and running, this cluster will be used by default to run the refresh task), and you can also test the SELECT statement by running it to ensure the correctness of the processing logic.
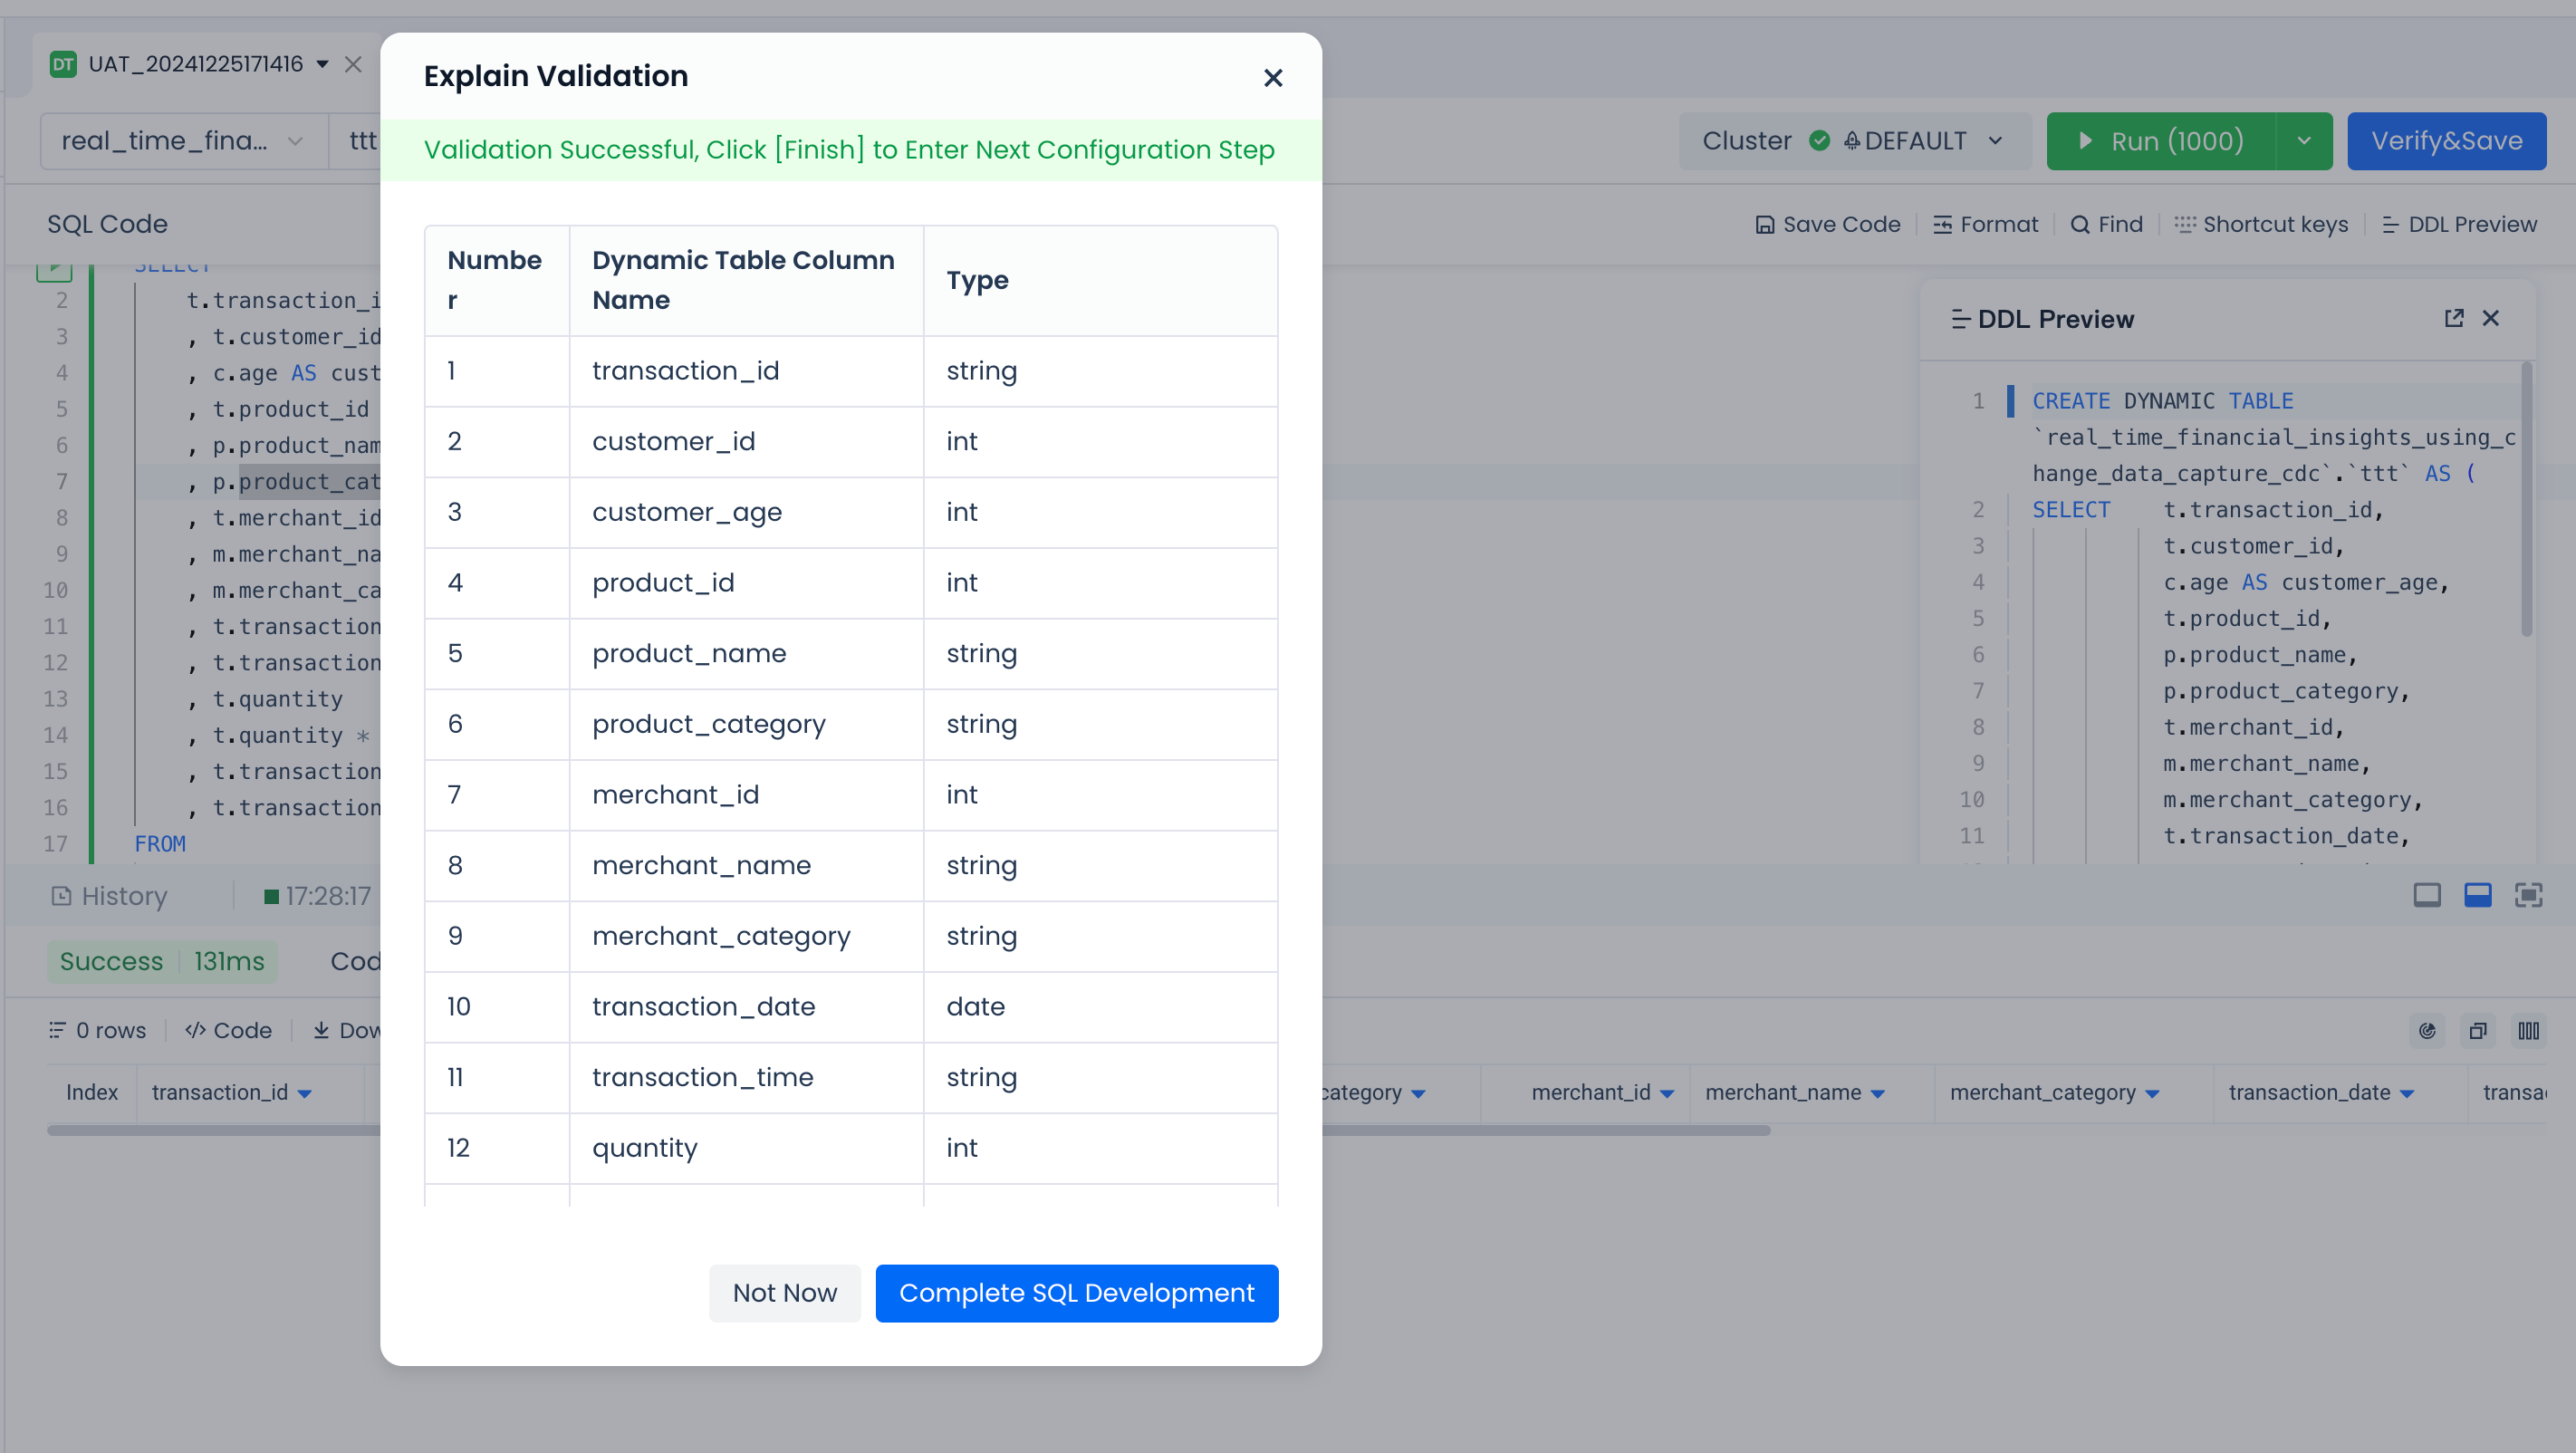
Finally, verify the syntax correctness of the query statement through the Explain button and save the model definition of the dynamic table.
Click the button to check the syntax correctness of the SELECT query, check whether the field names and data types meet expectations. After confirming correctness, click the "Confirm and Continue" button in the pop-up window. The system will save the definition of the dynamic table and exit the SQL code editing state.
Step 3: Modify and adjust the dynamic table configuration and submit for deployment
After completing the development of the dynamic table SQL code and exiting the SQL editing mode, you will see the default configuration including basic information of the dynamic table, running parameters, SQL code, dynamic table fields, dynamic table partitions, and buckets.
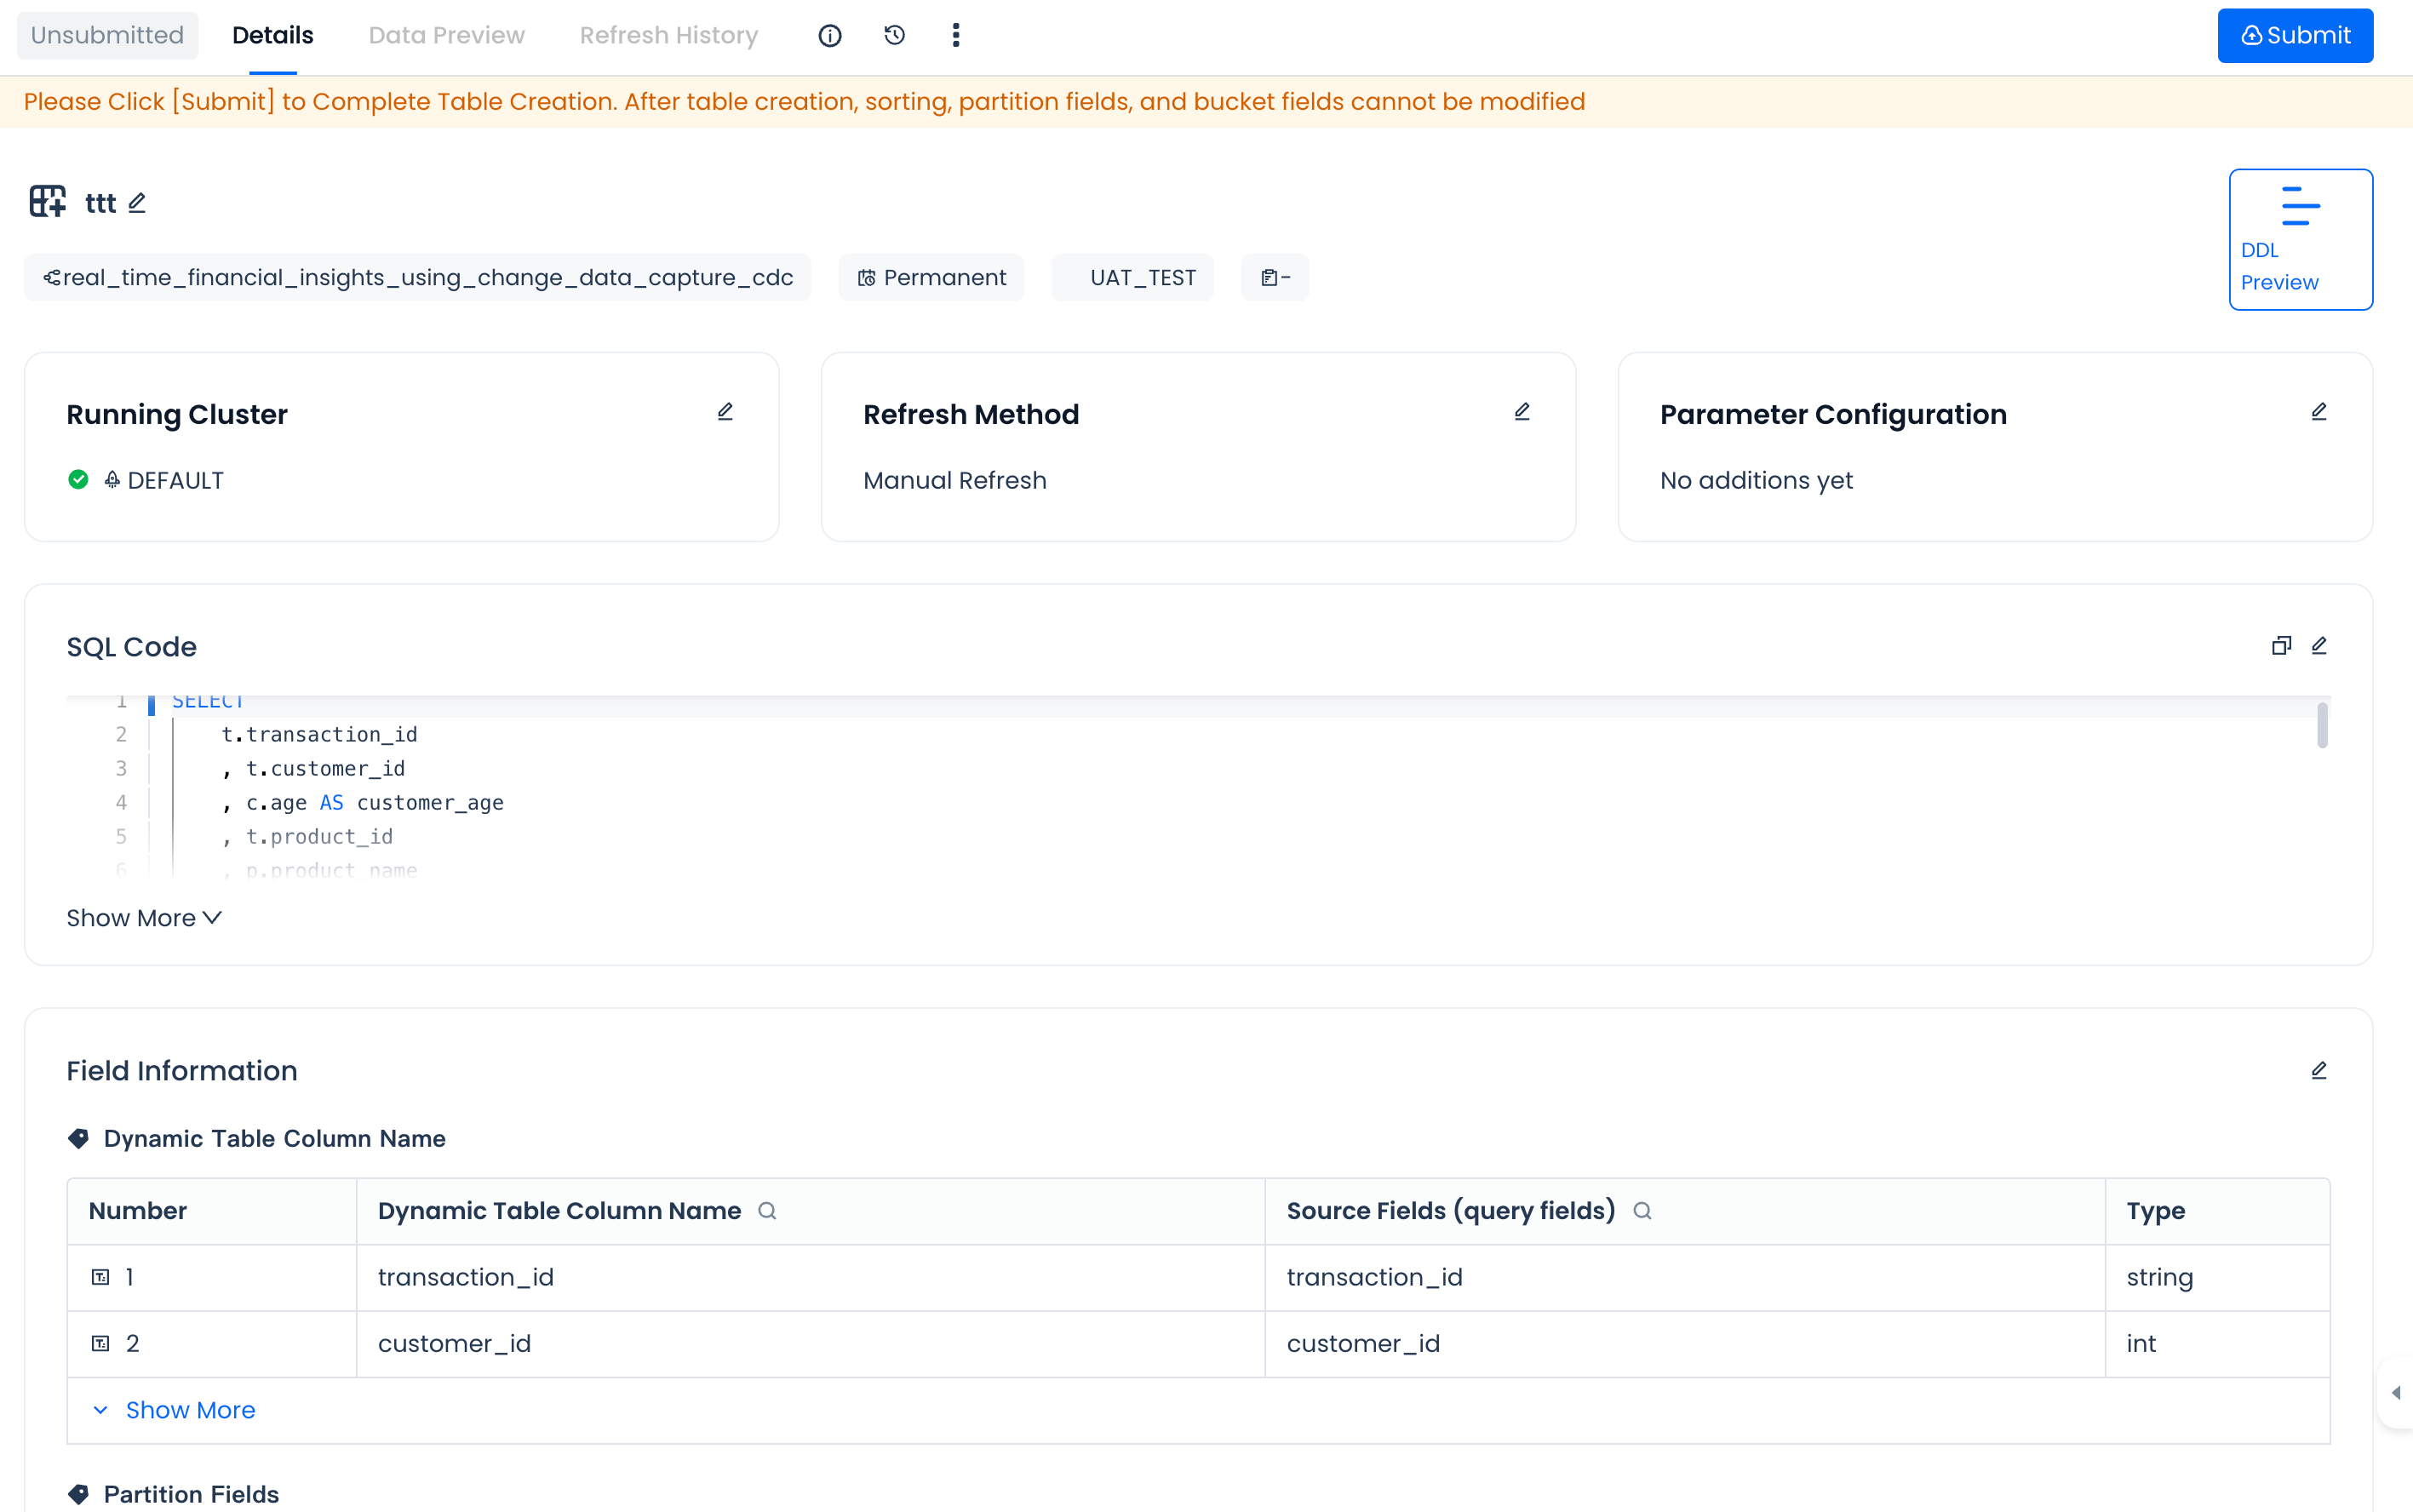
Before submitting the dynamic table model definition for deployment to the Lakehouse data environment, you need to check and modify the following configuration information according to business needs to meet production operation requirements. The following are the configuration items that support adjustment and modification for dynamic tables. Please configure them as needed.
| Configuration Item | Default Value | Configuration Description | Example |
|---|---|---|---|
| Dynamic Table Lifecycle | Permanent | Optional. You can choose to specify the data lifecycle of the dynamic table. | 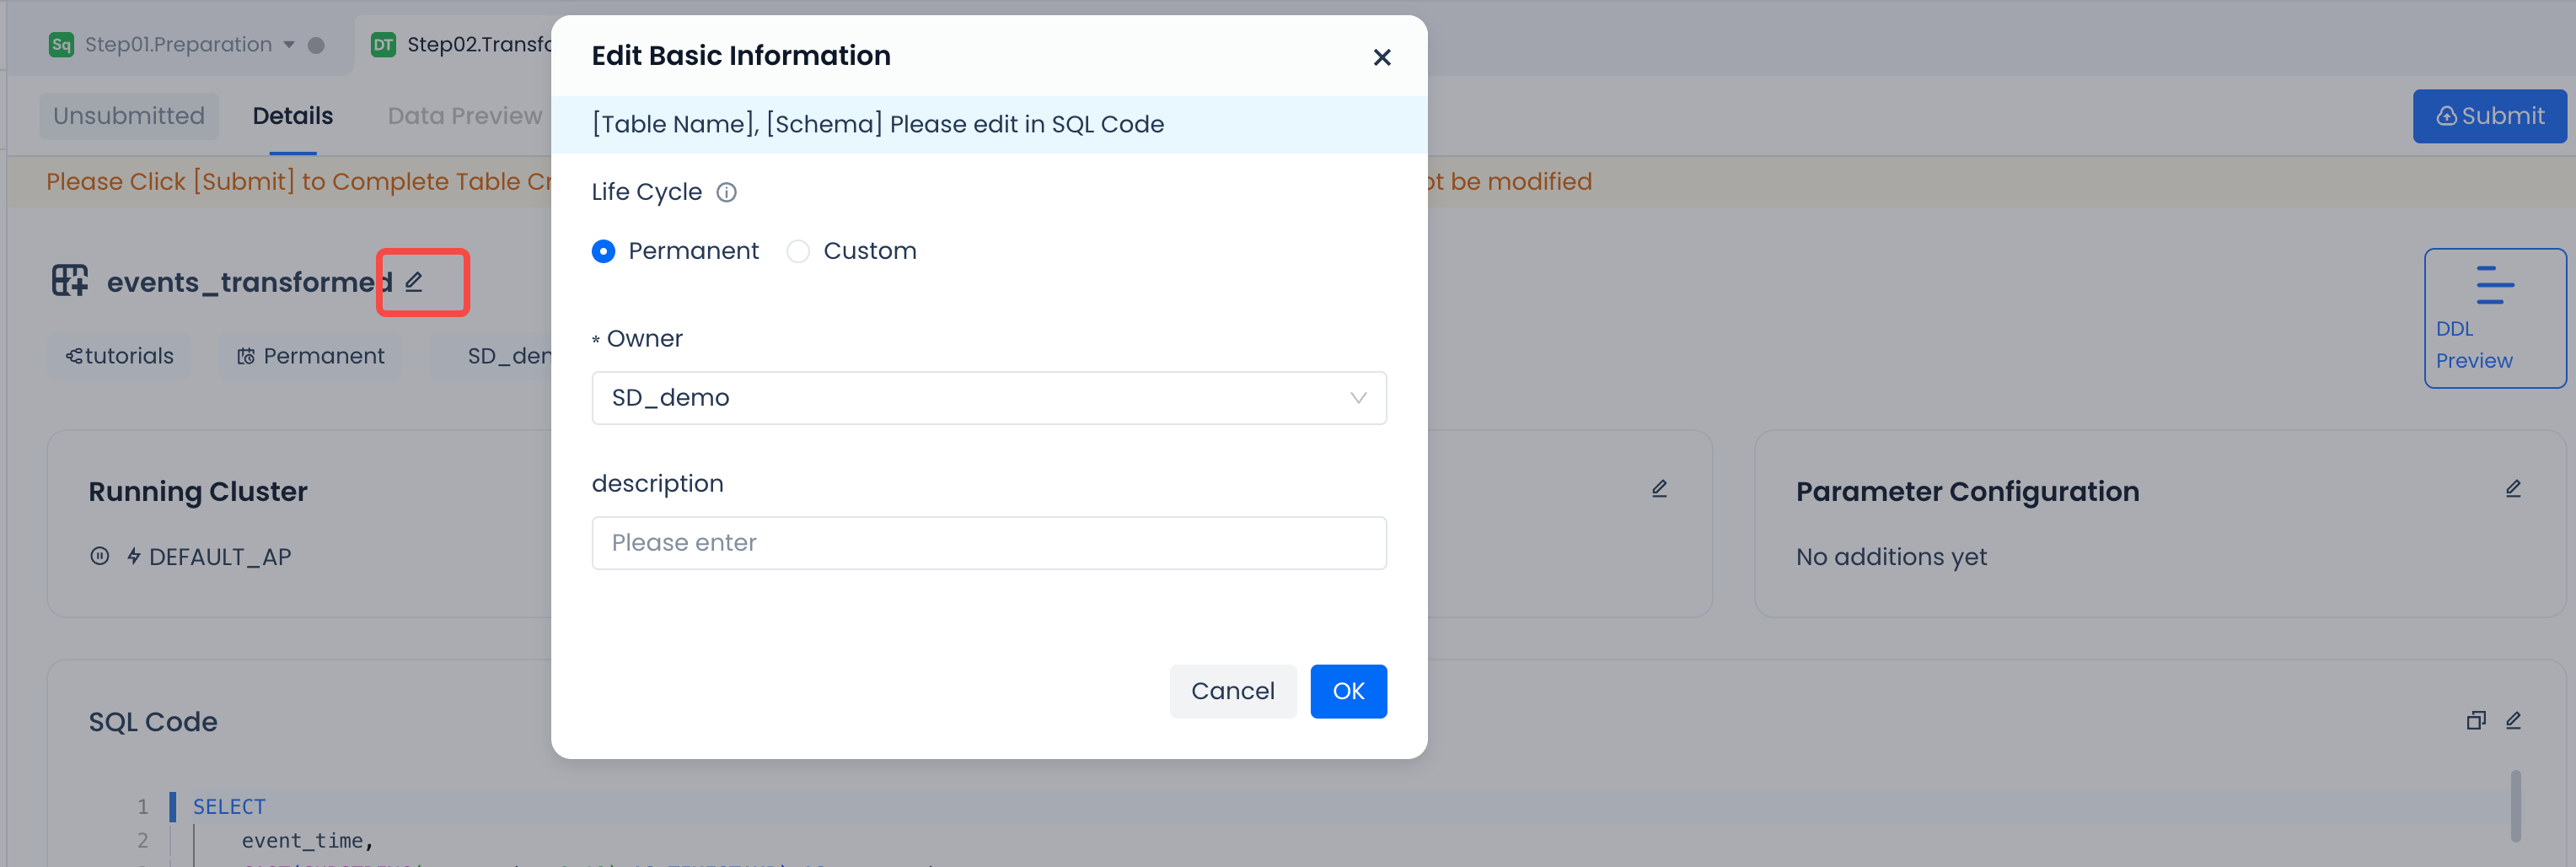 |
| Responsible Person | Task script creator | Optional. You can adjust the overall responsible person for the task. | |
| Dynamic Table Description | None | Optional. Add comments for the dynamic table. | |
| Running Cluster | Cluster name specified during IDE development | Optional. You can choose other computing clusters to run the dynamic table refresh task according to the cluster planning of the deployment environment. | 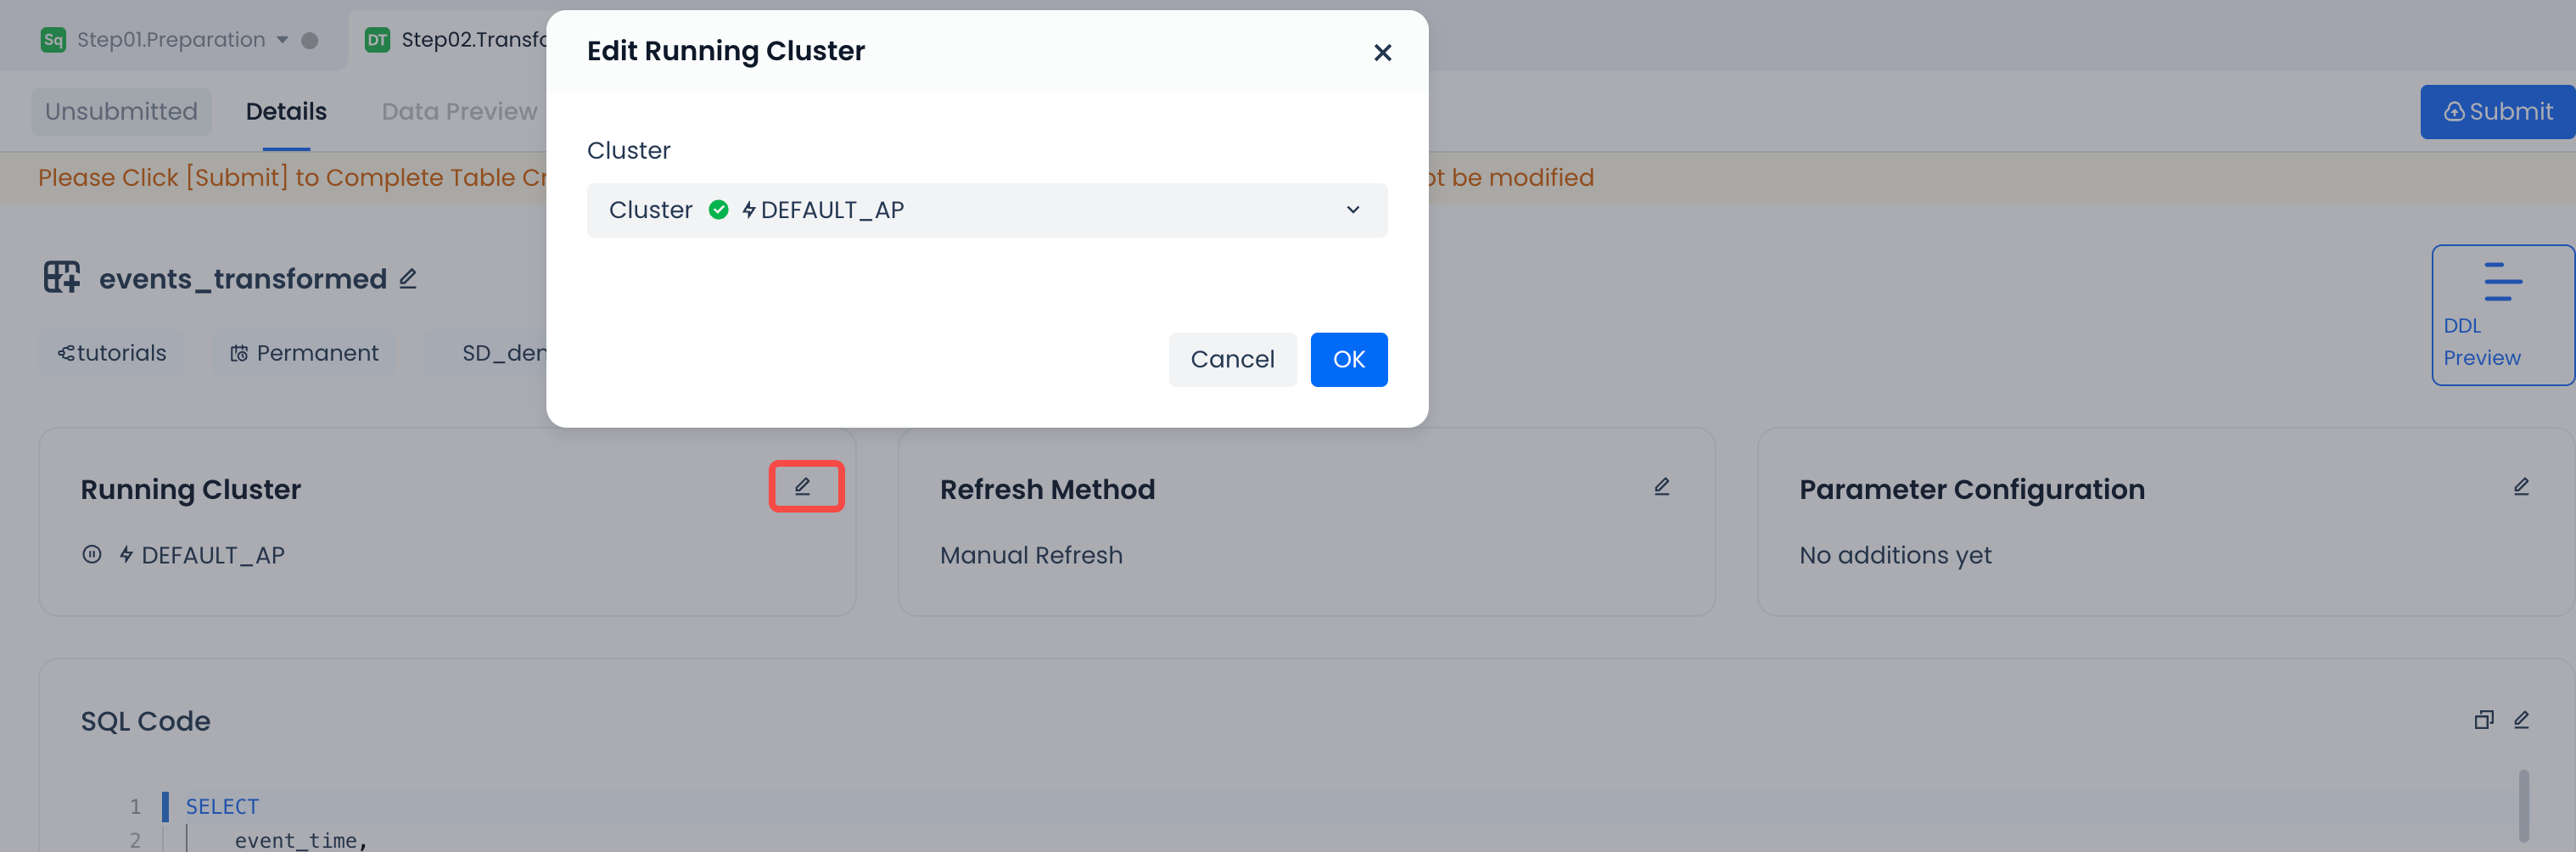 |
| Refresh Method | Manual Refresh | Optional. It is recommended to choose the automatic refresh method for production use. Currently supports scheduling policies set at minute, hour, and day intervals, with a minimum scheduling interval of 1 minute. | 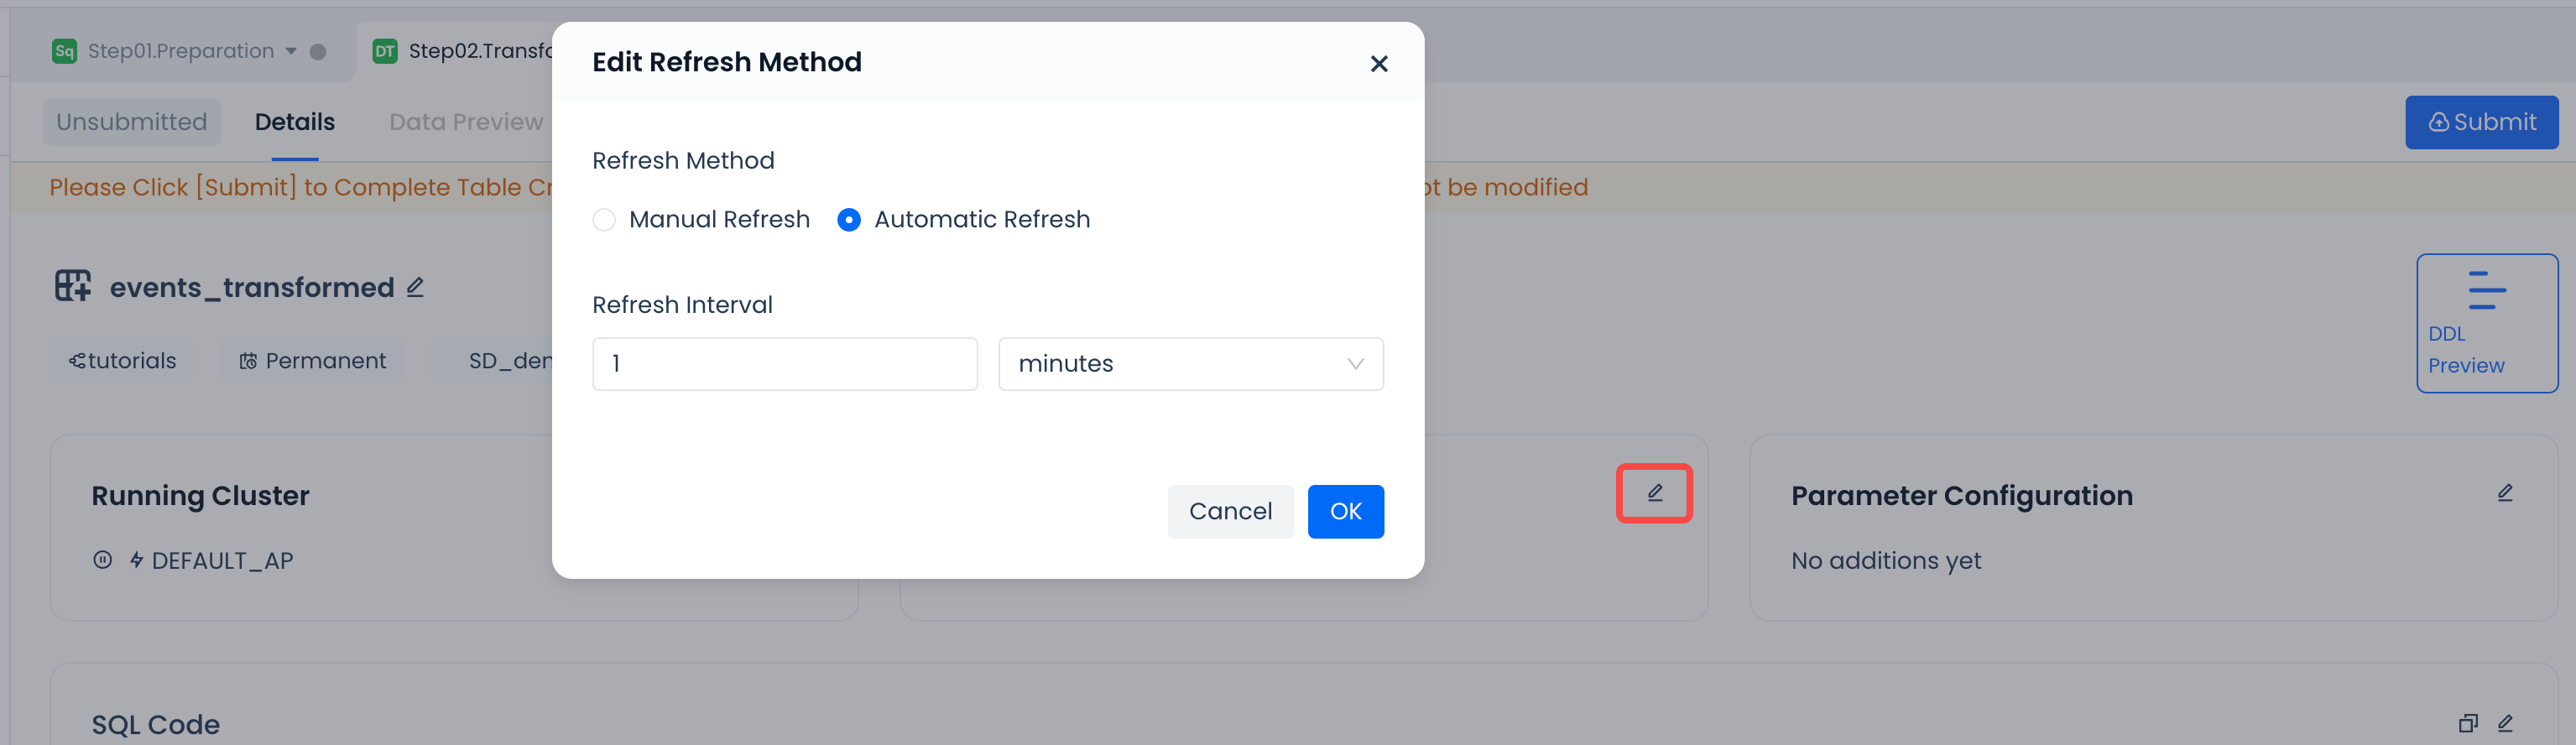 |
| Parameter Configuration | None | Optional. Advanced parameter settings for dynamic table operation, only needed in specific optimization scenarios (usually provided by the platform for specific scenarios), no need to set by default. | 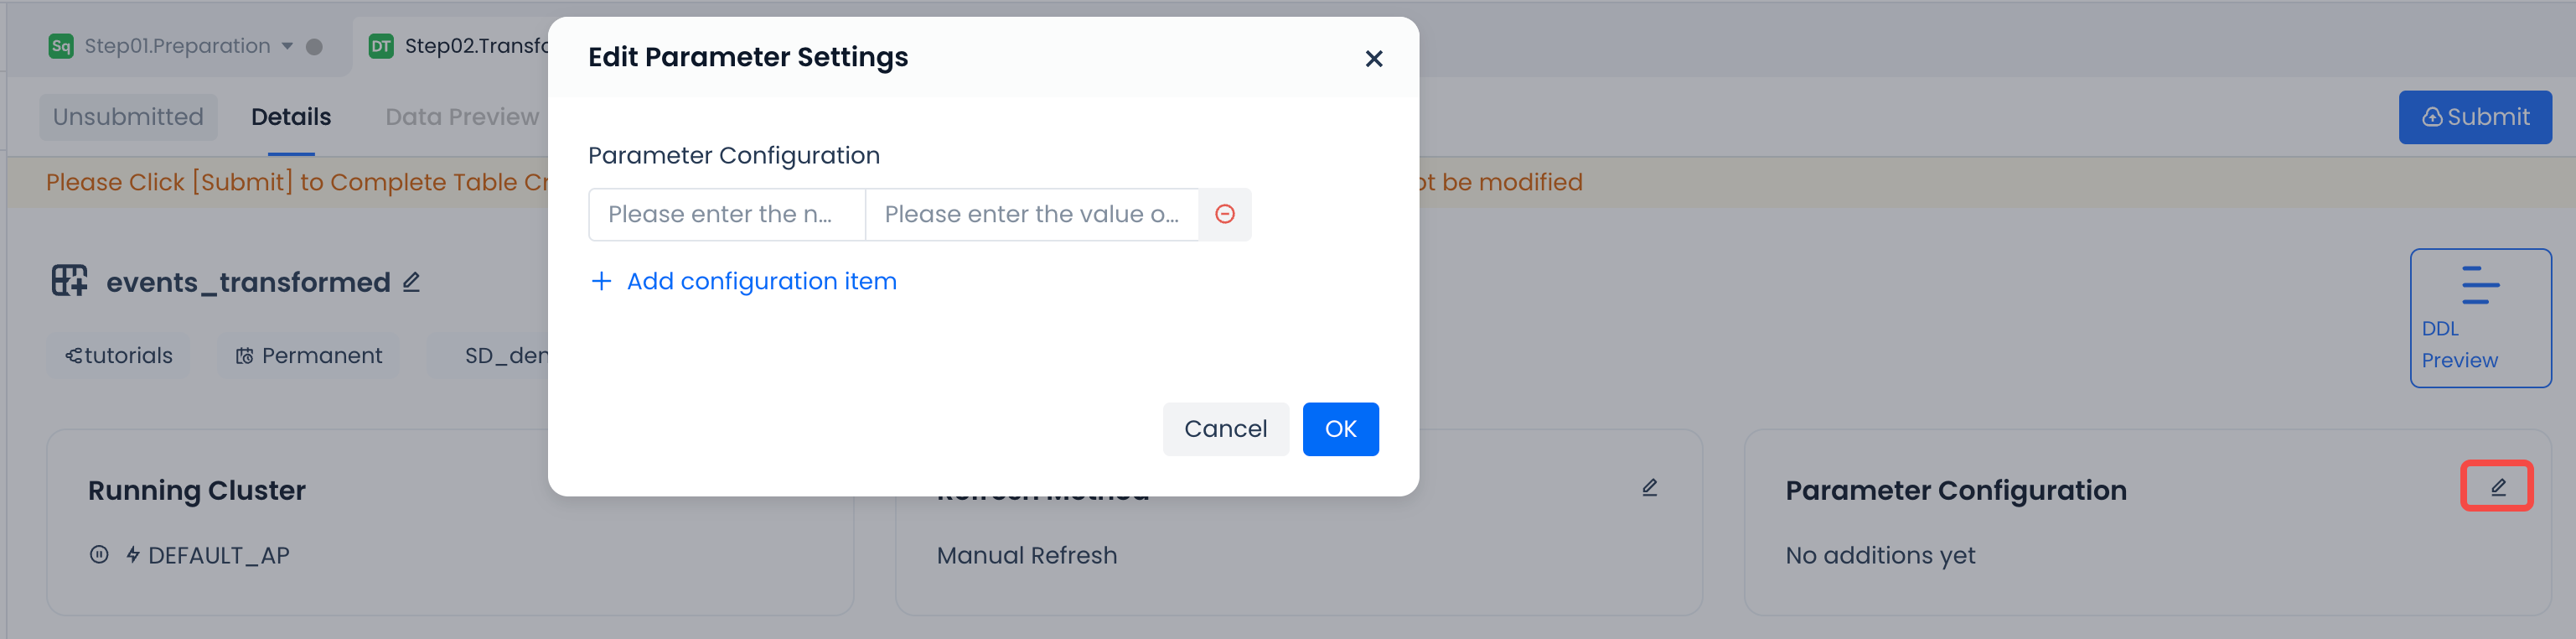 |
| SQL Code | Last saved code content | Optional. When you want to adjust the SQL code after saving, you can modify and save it through the edit mode. |  |
| Edit Fields | None | When editing fields, you can set: * Field comments. Add comment information to the field: Set partition fields. Add specific fields as partition fields, supporting regular partition fields and Transform partitions. Set dynamic table bucket fields and quantity. Add specific fields as bucket fields and set the number of buckets. After enabling bucket settings, the default number of buckets is 256. Set sorting fields. You can specify one or more fields as sorting fields and specify the sorting method. | 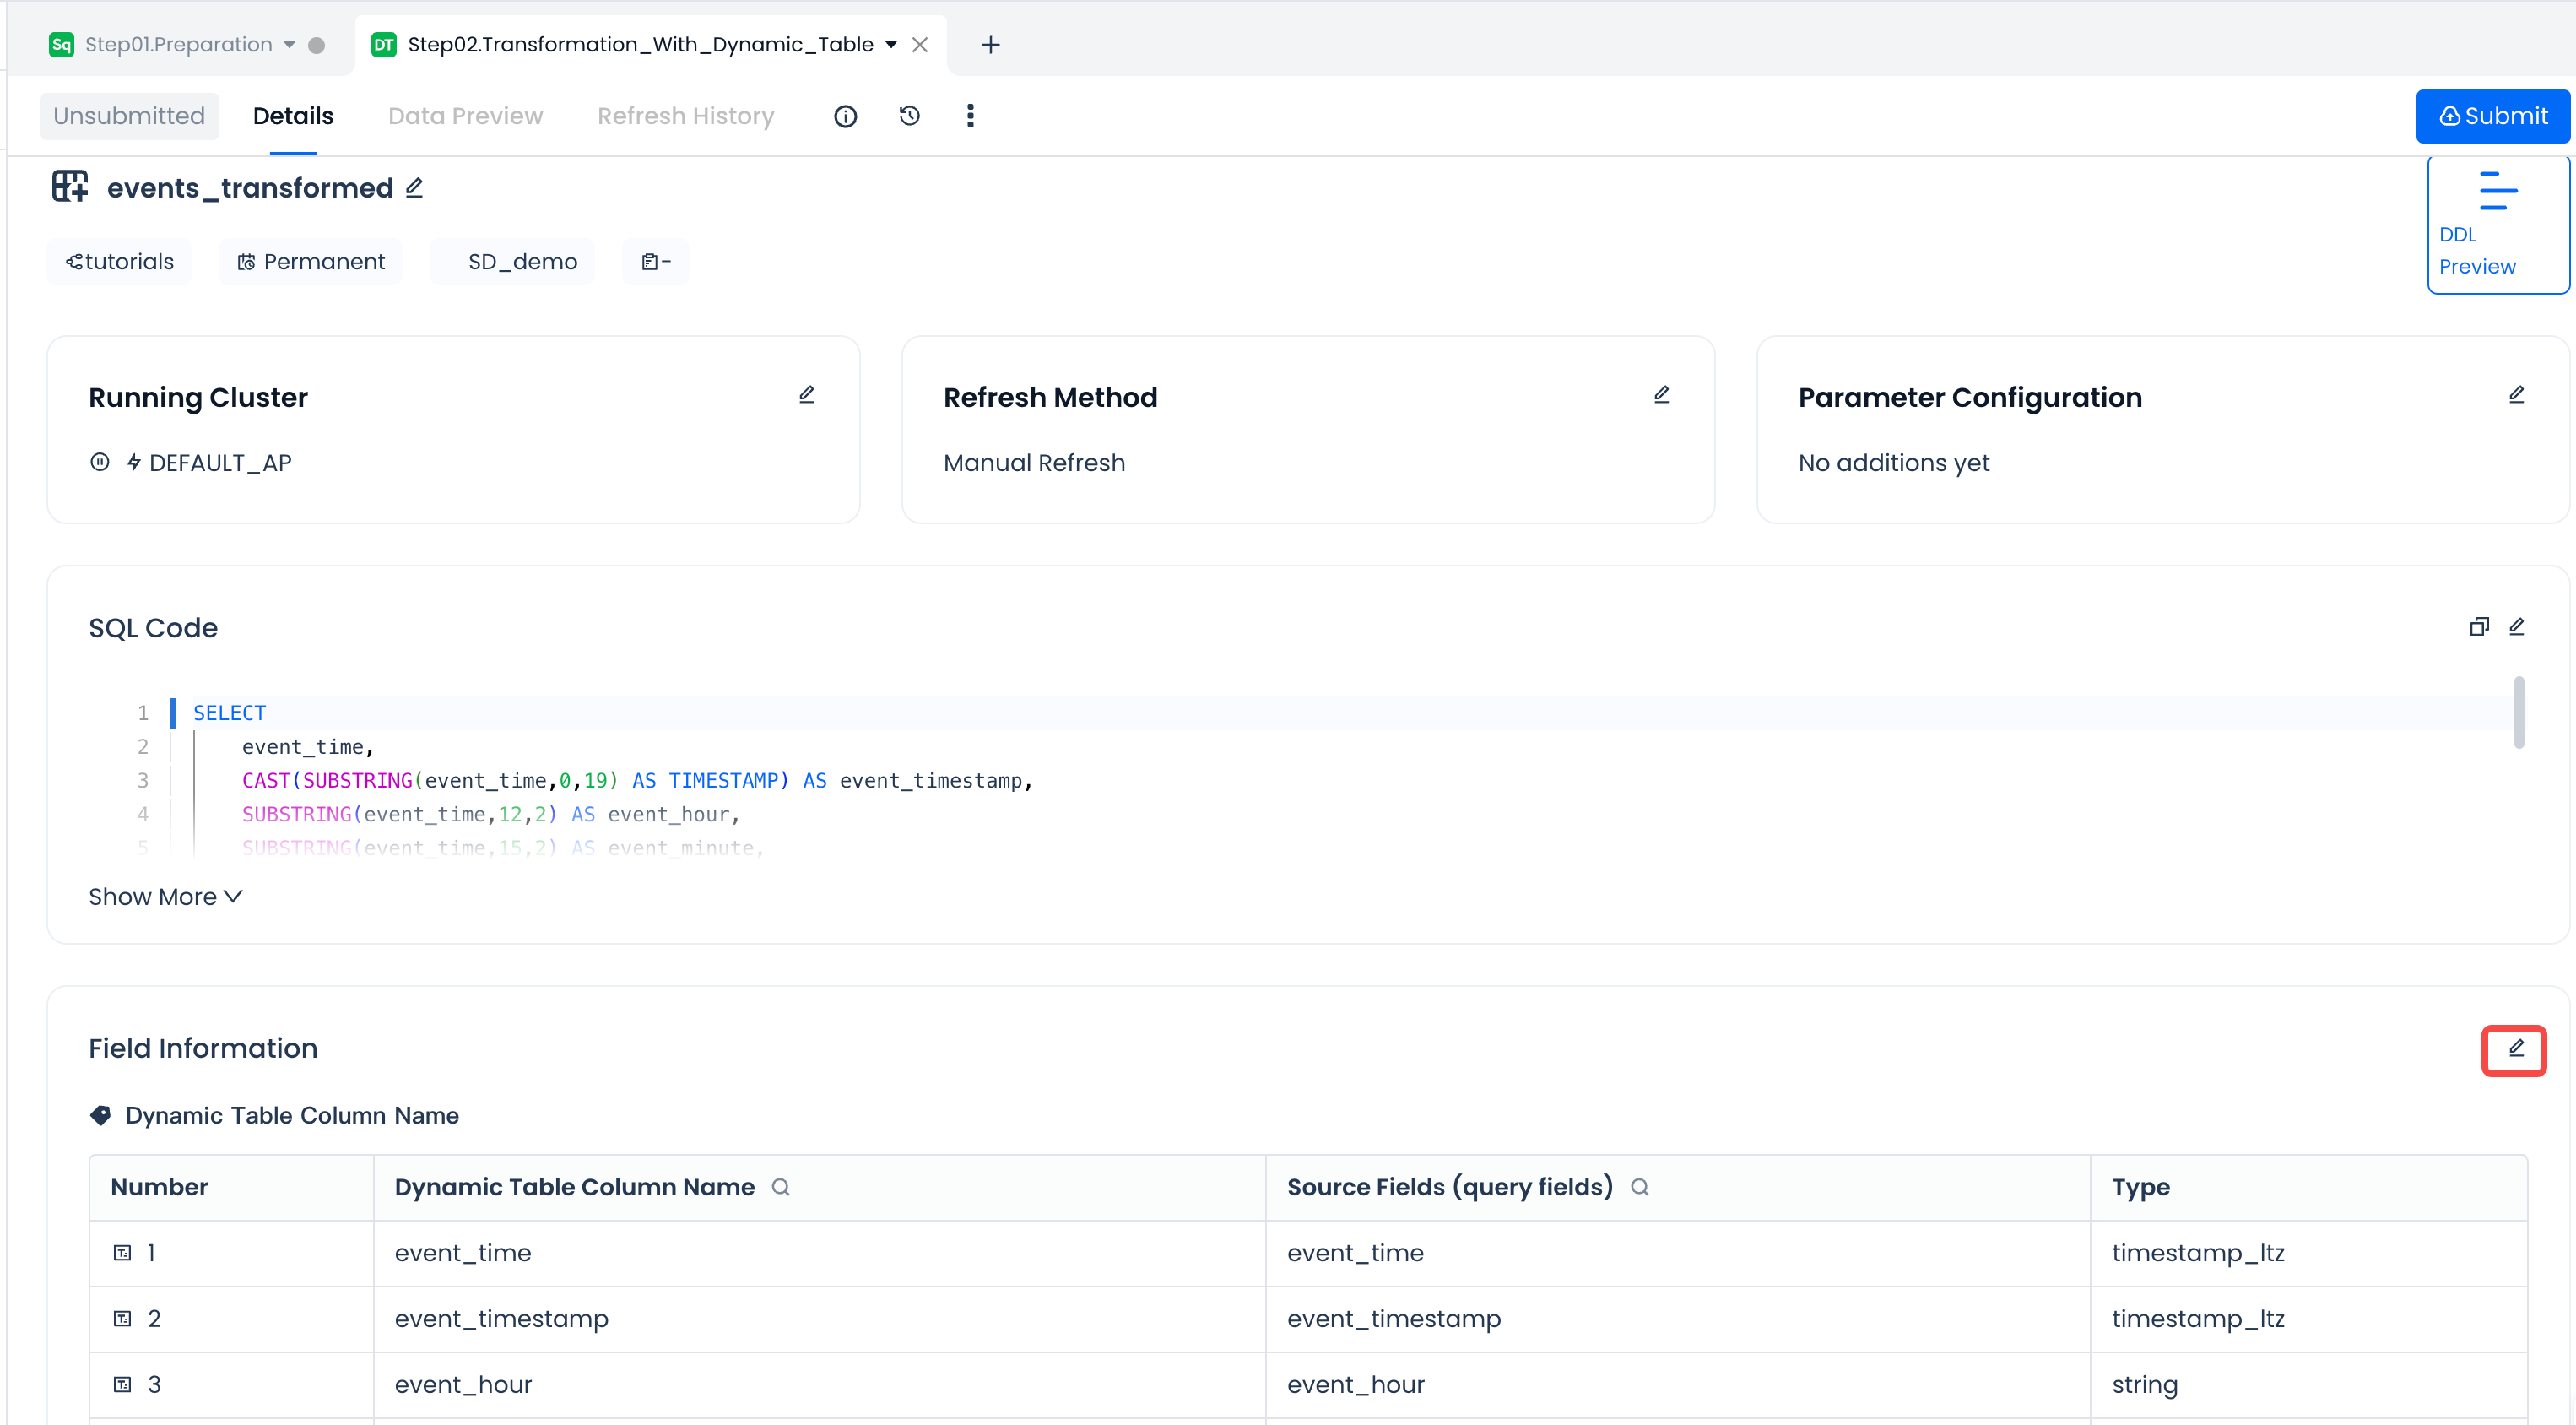 |
Step 4: Submit and deploy the dynamic table model to the target environment
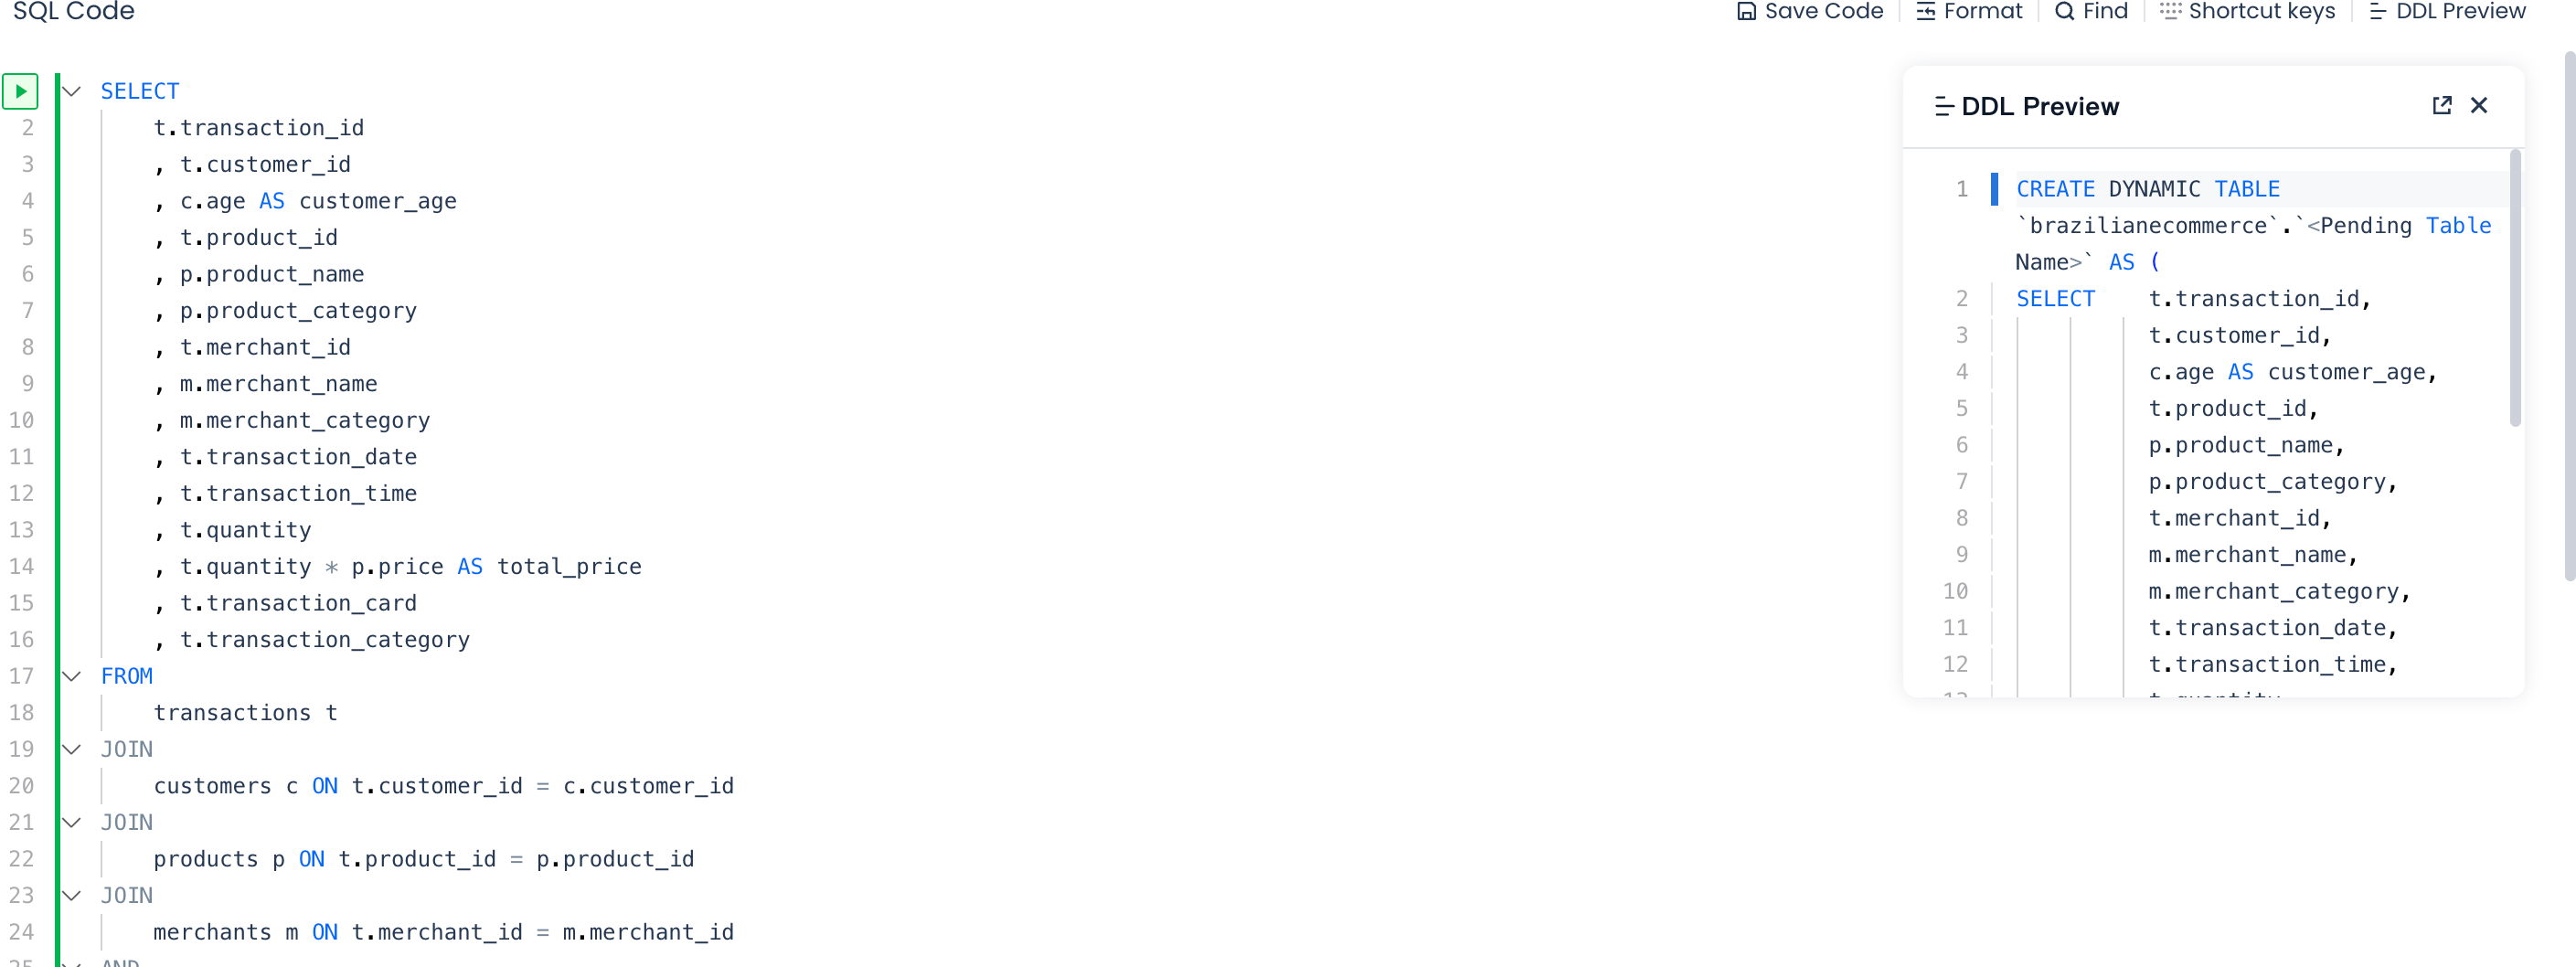
After completing SQL development and dynamic table configuration, you can view the complete DDL definition of the dynamic table model through "DDL Preview".
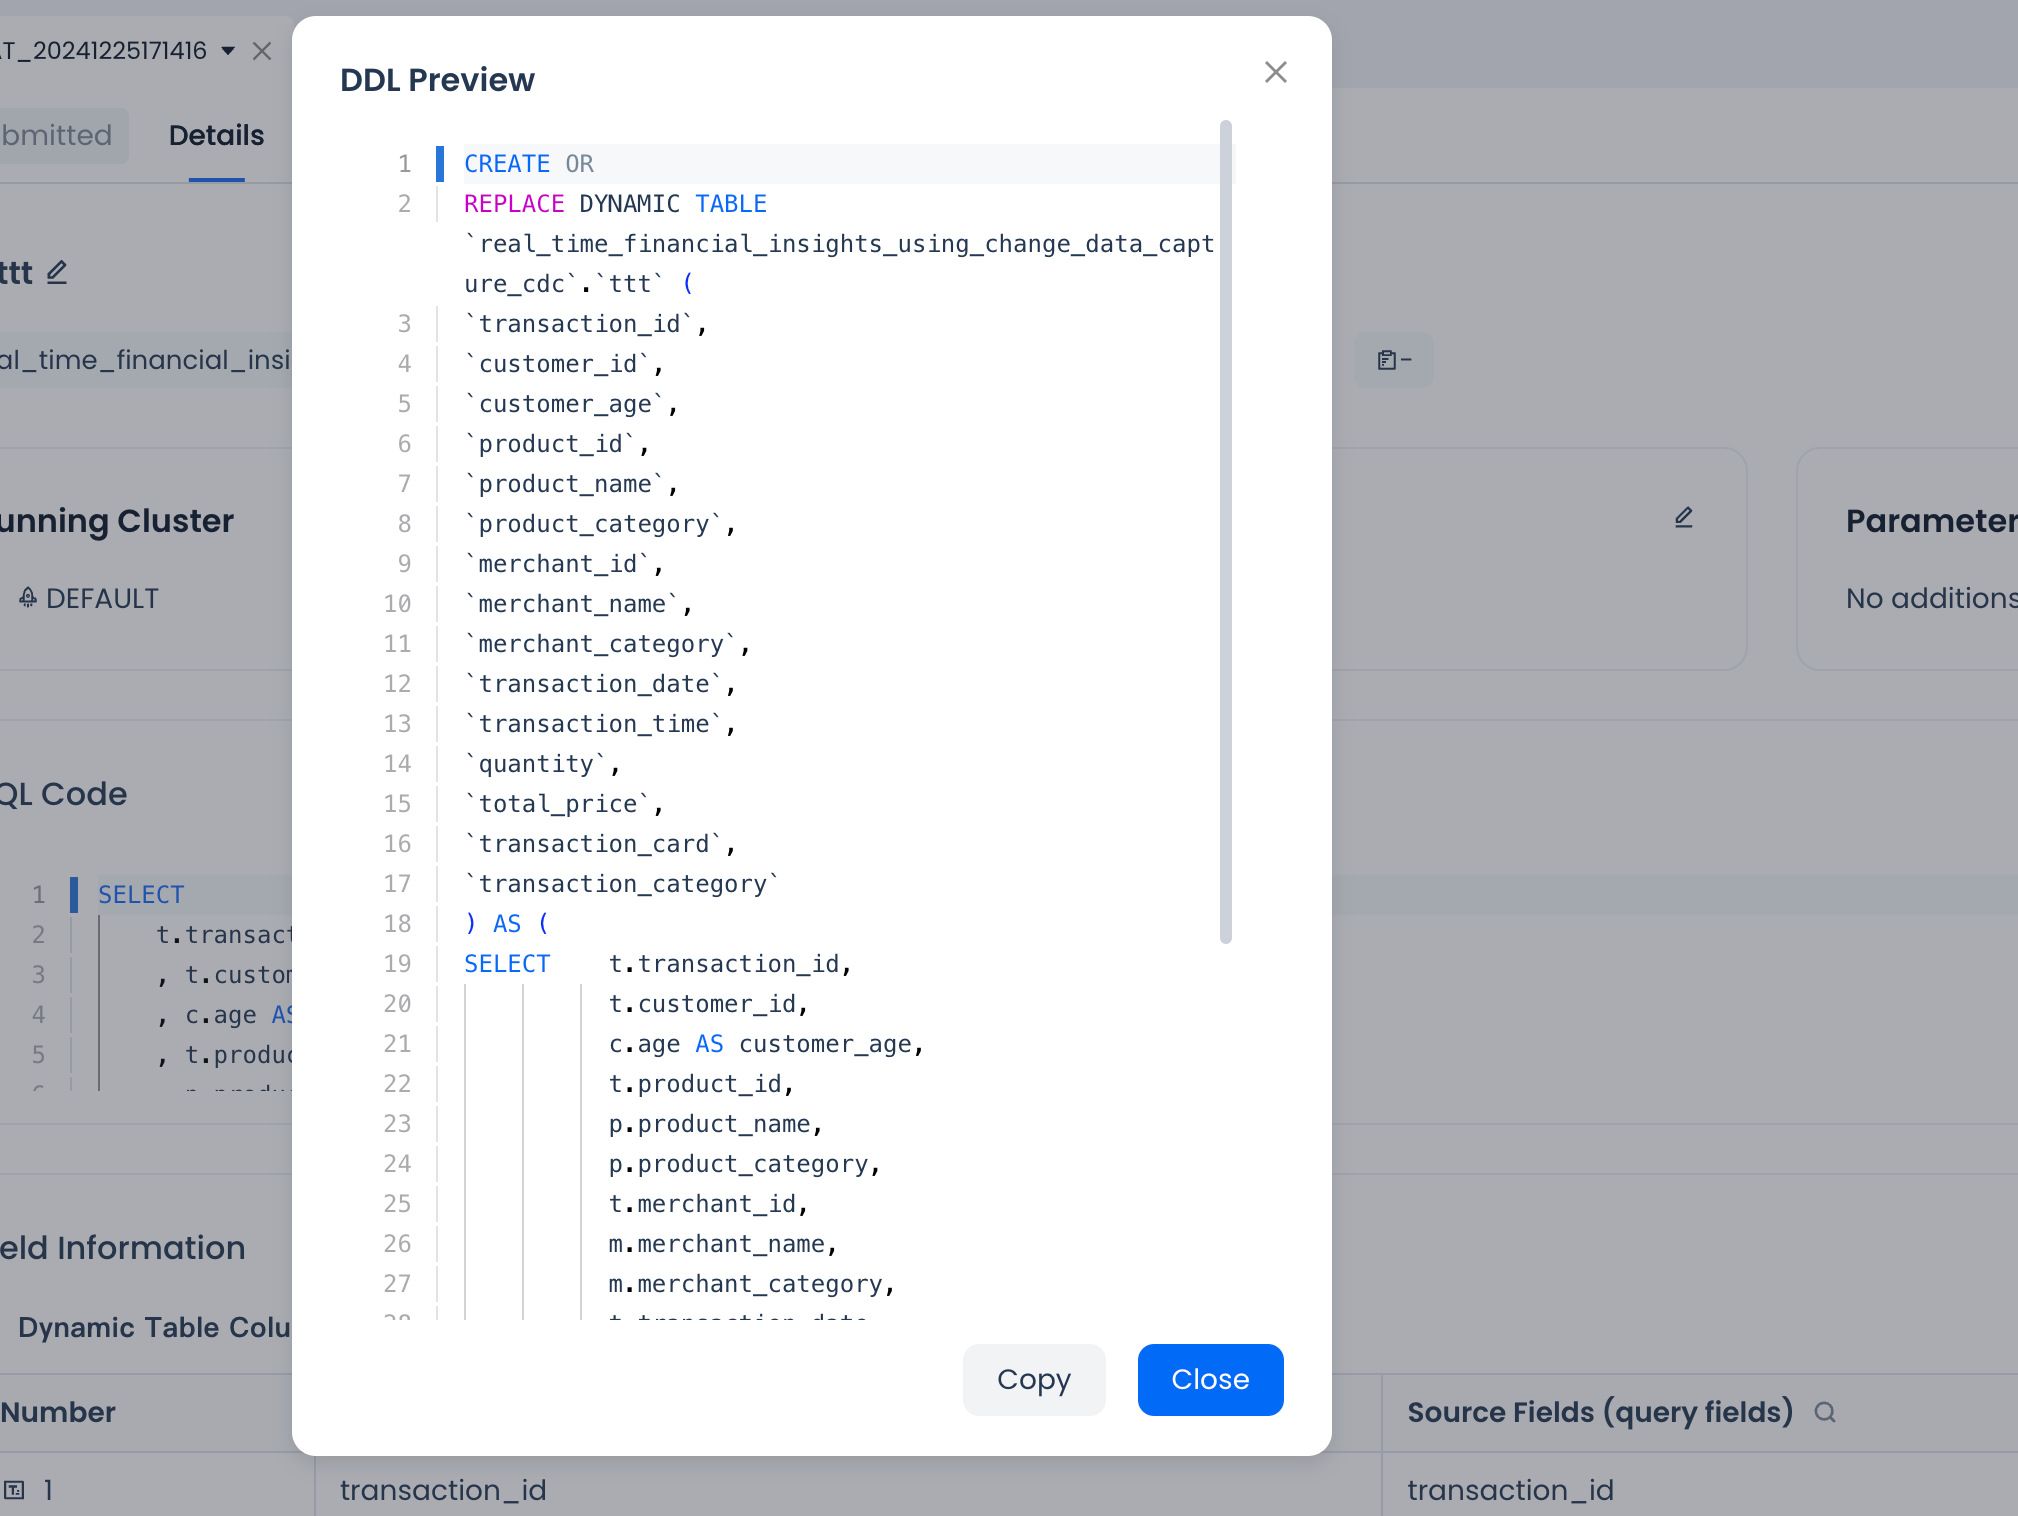
After confirming that it meets expectations, you can click the "Submit" button on the right side of the dynamic table task. The system will pop up a comparison with the last saved code version:
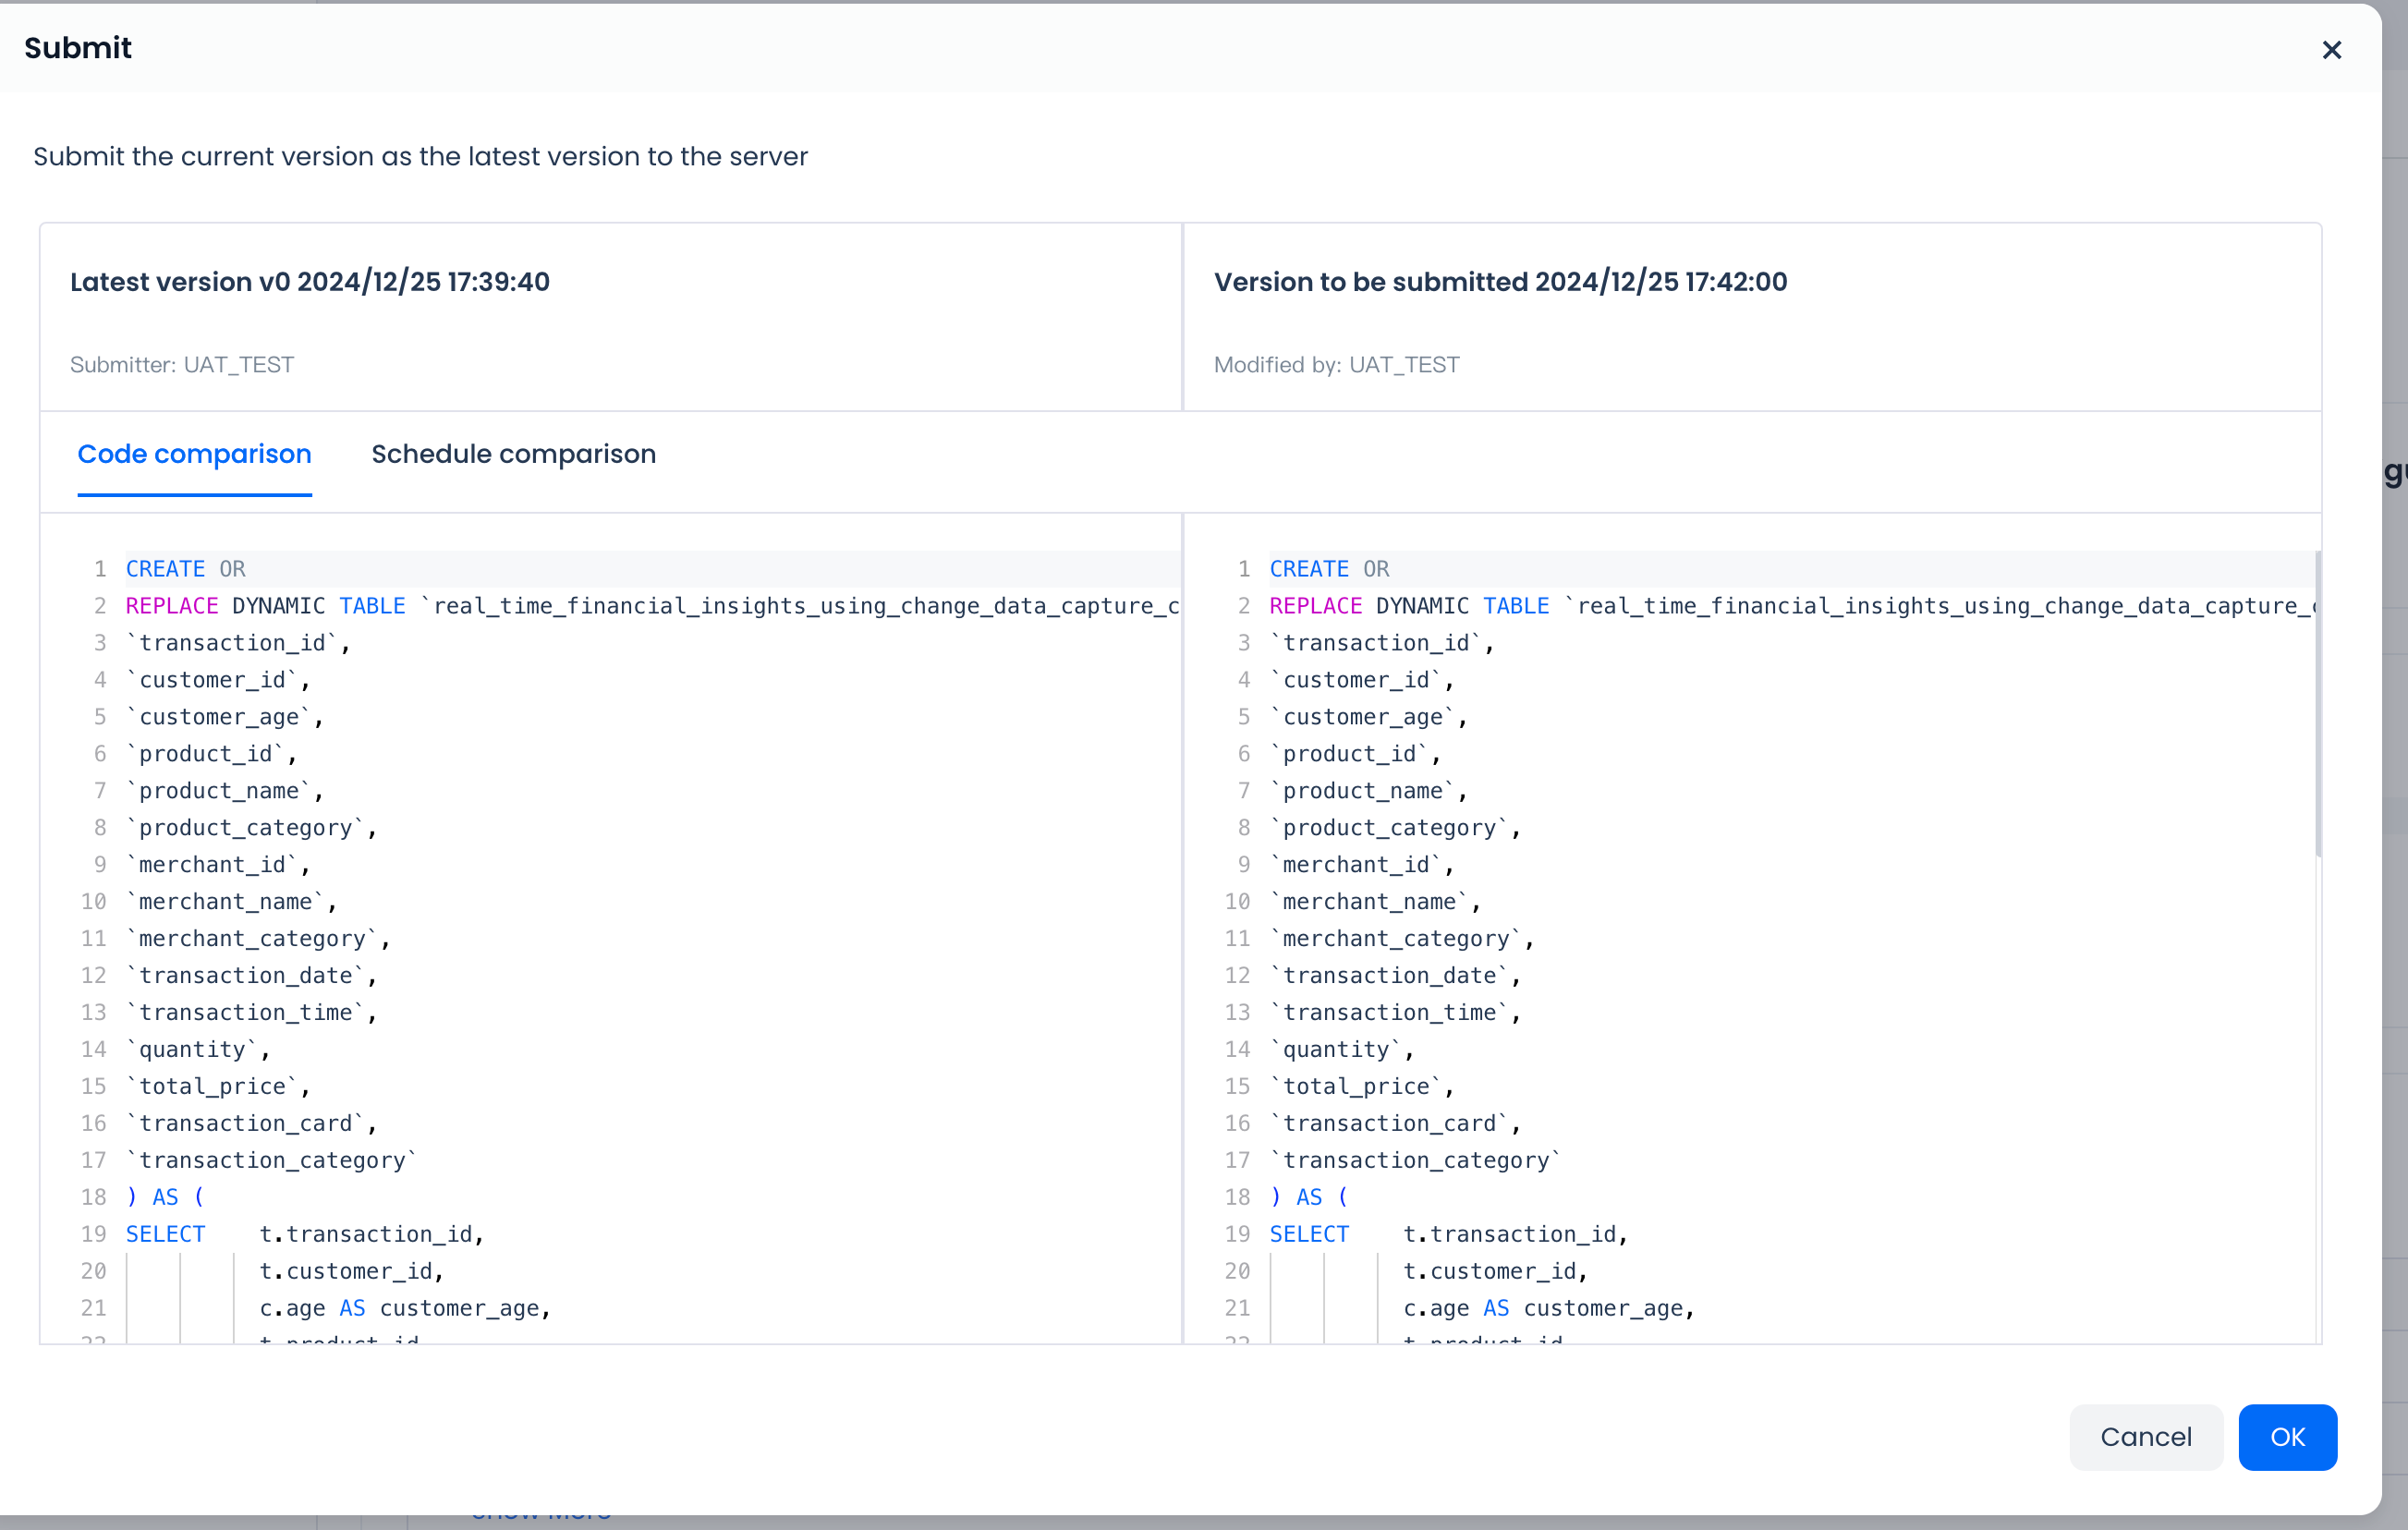
After confirming the submission, your model development content will ultimately be executed and create dynamic table data objects in the Lakehouse target data environment through DDL commands. The Lakehouse system will automatically schedule execution according to the refresh strategy of the dynamic table.